Honoring Heritage Through Craft

Divine Uwimana ‘27 sands the circular wood slices to prepare them for their laser engravings.

Divine Uwimana ‘27 sands the circular wood slices to prepare them for their laser engravings.

In spring 2025, the Williams College Makerspace partnered with the Stockbridge-Munsee Community to create truly meaningful engraved wooden appreciation gifts for museums that supported the repatriation of ancestors and sacred items. The gifts were presented at the Community’s reburial ceremony on April 24, 2025.

Each circular wood slice, roughly nine inches wide, is engraved with the Stockbridge-Munsee Tribal Seal and the words “Anushiik / Oneewe 2025”  meaning “thank you” in Munsee and Mohican. These tokens were designed to express gratitude, respect, and remembrance.

From Idea to Creation

Divine Uwimana ‘27 puts non-toxic wood oil on the appreciation to protect and enhance the grain.

Divine Uwimana ‘27 puts non-toxic wood oil on the appreciation to protect and enhance the grain.

Makerspace Program Manager, David Keiser-Clark, and Makerspace partner Divine Uwimana ’27 worked closely to bring the Community’s vision to life. Using existing wood slices from David’s collection, they carefully sanded and treated each one with natural oil to highlight the grain.

The engraving process balanced tradition and precision. The Tribal Seal, provided by the Community, was transferred into engraving software and etched using a laser or CNC machine. A small eyelet hook and twine were added to each piece so they could be easily displayed.

Challenges and Creative Solutions

Because each wood slice had natural variations in size and shape, the team adjusted engraving placements to keep the designs centered. Tight deadlines also meant careful scheduling from design approval in March to production and finishing in April.

The Final Pieces

The finished plaques feel both grounded and symbolic. The wood’s natural texture connects to the earth, while the engraved seal ties the pieces to heritage and identity. Together, they represent gratitude and shared stewardship between the Stockbridge-Munsee Community and museum partners.

Sustainability and Learning

This project emphasized sustainability, reusing wood, choosing natural oils, and minimizing waste. It also provided hands-on learning in digital design, engraving, and collaborative creation across cultural contexts.

A Gesture of Gratitude

The engraved wood appreciations are more than gifts; they are acts of respect. They honor the return of ancestors to their homeland and recognize the partnerships that made it possible, a reminder that craftsmanship can help carry forward stories of reconciliation, heritage, and care.

Special thanks to the Stockbridge-Munsee Community for their guidance and cultural leadership, and to the Williams College Makerspace and Science Shop for their support.

Finished engraved wood appreciations ready to be presented at the Community’s reburial ceremony.

Finished engraved wood appreciations ready to be presented at the Community’s reburial ceremony.

Darkroom Meets MakerSpace: How 3D Printing Transformed a Photography Class

What happens when a darkroom tool goes extinct, but twenty students still need it? The class had everything: a large-format camera, a darkroom, and eager students. It lacked only one thing: a negative holder that no longer existed. A negative holder is a device that keeps a piece of photo flat and steady during printing or scanning, and it is crucial because it ensures the image stays sharp, properly aligned, and free from distortion or damage.

The solution? Make One.

The original, nearly impossible to find, negative holders

The original, nearly impossible to find, negative holders

Last Winter Study, Daniel Goudrouffe, the Photo Technician for the Spencer Art Building, taught a winter study class called “Creative Portrait in the Darkroom,”  where students experimented with black-and-white film and created photomontages. The class utilizes a large-format view camera that produces 4×5-inch negatives, perfect for cutting, collaging, and combining with digital negatives to create layered portraits. However, there was one obstacle: the darkroom’s negative holders, which were essential for fitting these large negatives into the enlarger, were impossible to find online. The school’s enlarger was a rare, older, and slightly larger 5×7-inch model.

How We Solved the Problem

Using the Epilog to laser cut the negative holders.

Using the Epilog to laser cut the negative holders.

Daniel collaborated with Harris Longfield ‘27, a fellow makerspace worker, and Jason Mativi, Senior Science Center Shop Engineer, to design new holders from scratch. First, using Fusion 360, Harris and I carefully traced the original holder’s dimensions, while Mativi laser-cut and 3D-printed prototypes. After testing the first model and correcting a few asymmetries, the final versions worked flawlessly. The extra holders made a huge difference: instead of waiting in line for a single holder, ten students could now pair up and share five holders.

With the new equipment, students took their projects to the next level, pushing them further than ever. Instead of cutting paper prints, a traditional photomontage method, they cut and layered actual negatives, both film and digitally produced, to craft a one-of-a-kind composition. The larger 5×7 enlarger provided extra space around the 4×5 negatives, allowing them to add new visual elements and more information. This combination of old-school technique and modern tools opened a world of possibilities for image-making.

The five laser cut negative holders

The five laser cut negative holders

Perhaps the most striking result was how effortlessly the 3D-printed holders fit into the darkroom workflow, showing no loss of quality compared to the originals. By blending engineering with art, the project not only solved a practical challenge but also expanded the creative possibilities of analog photography, which shows how new technology can enhance and support classic film practices.

Surprises!

What surprised me most about this project was how naturally problem-solving morphed into a creative discovery. Initially, I viewed the missing negative holder as a straightforward hardware issue that required a technical solution, but I ultimately learned more: how to sketch and model a design, how to test and refine it, and the importance of teamwork in an environment where ideas are constantly evolving.

More importantly, I realized technology and art aren’t two separate worlds–they can actually amplify each other. By designing the new 3D-printed negative holders, we didn’t just replace a piece of equipment; we opened up new possibilities for creative image-making and expanded the possibilities of what a darkroom class could be. For me, that was a powerful reminder that creativity doesn’t exist in isolation: it grows when collaboration, technical skill, and art intersect. I’ll carry that forward into future projects, whether it’s prototyping or approaching any problem with both imagination and practical thinking.

Next Steps

Looking ahead, I can imagine this project leading to a shared toolkit for photographers everywhere. With tools like 3D printers and open-source design platforms, we can expand the idea by posting our files and guides online, making it possible for other darkrooms to thrive despite having vintage tools. I’d love to see this small innovation grow into a network that preserves classic practices and continually improves them through modern engineering. 


Wood, Memory, and Heritage: The Making of Engraved Gifts for Repatriation

Before: red maple wood discs, sliced from a fallen tree in Hopkins Forest

Before: red maple wood discs, sliced from a fallen tree in Hopkins Forest

Last spring, I worked on a project in the Makerspace that involved creating engraved wood slices as gifts for a reburial ceremony. This event was the reburial of the ancestors of the Stockbridge-Munsee Community. The Makerspace collaborated with Bonney Hartley, the Historic Preservation Manager at the Stockbridge-Munsee Historic Preservation office, to work on these slices. They were intended as a token of appreciation to the museums that assisted during the repatriation process. The reburial held deep significance; it was not only about returning the ancestors to the earth, but also about restoring wholeness and dignity to a community that had long been separated from its history.

The event aimed to reunite the ancestors’ remains with the funerary objects originally intended to accompany them. Over time, many of these items had been separated, often displayed in museums as artworks or stored away in boxes and plastic bags. The process of carefully unpacking, organizing, and preparing the materials for reburial required significant effort. Under the Native American Graves Protection and Repatriation Act (NAGPRA), the team undertook considerable legal and logistical work to ensure the ancestors and their belongings could be returned. Before the repatriation, they were in 10 different museums or federal collections agencies across various collections.  After years of collaboration, the team successfully reunited and reburied them, working in partnership with organizations such as the National Park Service and the U.S. Fish and Wildlife Service.

Connection to Place and Heritage

This process was deeply grounding for Bonney and the community, reaffirming their connection to place and heritage. This process restored and further grounded a sense of identity and place in the world. To them, it was truly meaningful to rebury ancestors, reunite them with the objects they were intended to be buried with, and return them to the earth.  It was, to some extent, a way to repair the past, the harm of being separated from their final resting place. It was a profound act of healing and restoration.

The wood slices were not only to appreciate the museum, but also all the people who supported them during this process. It was also an opportunity to express gratitude to the numerous staff members and individuals who work at these museums and federal institutions that hold the collection, and to appreciate those who dedicate significant time and energy to collaborating with them. Even though the focus was on the ancestors, there were people in the scenes who made it happen through goodwill and hard work. To Bonney, this gift is akin to a traditional practice and a form of reciprocity, acknowledging the mutual relationship that exists between them.

Bonney said, “It was hugely meaningful to have a piece of our homelands…” emphasizing how sharing these wood slices extended the Tribe’s tradition of gift-giving and reciprocity. Through the wood slice, in collaboration with the Makerspace and Williams College, they helped offer this gift at the reburial ceremony, and to give one piece of our homeland here in this other location for the reburial. It helps to continue the tradition of gift-giving during such an emotional and spiritual moment, restoring some aspect of the Tribe’s history.

The process of creating these gifts involved a lot of reflected care and intention:

Sanding

We began by carefully making the surfaces even to prepare the wood for engraving.

Sanding: We began by carefully making the surfaces even to prepare the wood for engraving.

Sanding: We began by carefully making the surfaces even to prepare the wood for engraving.

Laser Engraving

The Tribal Seal was then laser-engraved into each slice, and all the details were captured.

Using the Epilog Laser Engravier

Using the Epilog Laser Engravier

Finishing with Natural Oil

A few coats of natural oil protected the wood in order to enhance its texture and grain.

Applying non-toxic Walrus wood oil finish

Applying non-toxic Walrus wood oil finish

Adding Hardware

Finally, hardware was attached so each slice could be hung on a wall.

Back: hardware was attached so each slice could be hung on a wall

Back: hardware was attached so each slice could be hung on a wall

Project completed!

Project completed!

Reflection

For me, making the wood slices was more than a creative task; it was an act of participation in collective healing. It reminded me that craftsmanship can carry history and serve as a bridge between institutions and Indigenous communities.. Through this experience, I gained a deeper understanding of the history of the Stockridge-Munsee Community and the cultural significance behind the reburial event. It was truly moving to witness the respect, collaboration, and care that went into every step of the repatriation process. It’s also remarkable how the Makerspace’s efforts can be part of such a significant event, bringing together creativity, heritage, and community in a powerful way. 

LIFT Program at the Makerspace

Casen working with the Prusa XL 3D printer

Casen working with the Prusa XL 3D printer

The Learning Interventions for Teens (LIFT) program is a mentorship-based program held at Williams every winter study. This program pairs Williams College students with teenagers involved with the Berkshire County juvenile justice system. It offers teenagers an opportunity for personal growth, skill-building, and creative exploration. Over the course of three weeks, students engage in hands-on projects centered around art, photography, 3D printing, and other disciplines.

During our 2025 winter study, the Makerspace partnered with one of the mentor-mentee pairs, Sarah Sousa ’28 and Casen, respectively. Casen was interested in 3D printing and was eager to learn more about how he could use it for his project. Casen was interested in printing two cars that he envisioned using a black filament. David Keiser-Clark, the Makerspace Program Manager, and I gave Sarah and Casen a tour of the Makerspace and shared an overview of all the resources and tools that were available to them. I then worked with Casen and showed him the entire procedure involved in 3D printing, starting from slicing the 3D models to loading the filament and eventually initiating the print. After our demonstration, Casen was ready to implement the entire 3D printing process by himself.

One of Casen's 3D printed model cars

One of Casen’s 3D printed model cars

Altogether, the printing process for both cars took two days to complete. Once the prints were finished, the task of removing the supports—structures that help to stabilize the print during the process—was still a challenge. Removing the supports is usually straightforward, but it was a tricky process for these cars, yet Casen carefully removed them without damaging the prints. He was very patient with it and developed his own innovative techniques to remove them. 

During this time, Casen and Sarah also worked together on their final presentation—which I had the chance to attend on the last day of Winter Study. It was exciting to see all of the interesting projects that students in the program had been working on. The projects covered a range of topics, including nail art, attorney mentorship, and music. It was also lovely to see mentors and mentees receive their certificates of completion. I felt genuinely inspired to see how Williams’ resources helped Casen and other students explore and build upon their interests.

Learn Autodesk Fusion 360

Autodesk Fusion 360 computer aided design (CAD) software

Autodesk Fusion 360 computer aided design (CAD) software

Fusion 360 is a powerful cloud-based 3D modeling platform that blends computer-aided design (CAD), computer-aided manufacturing (CAM), and computer-aided engineering (CAE) in a single environment. It equips users with an all-in-one toolkit to design, simulate, and refine everything from quick prototypes to intricate, functional creations. Fusion 360 has been a cornerstone of the Makerspace’s creative and technical toolkit. We use it to design objects from scratch, develop prototypes, and modify existing models. Once the design is complete, we often 3D print it to bring it into the physical world.

Creative Storytelling

Beyond its technical capabilities, Fusion 360 has also become a tool for creative storytelling—helping us turn abstract ideas into real, usable forms. From phone stands and keychains to prosthetic limbs and mechanical components, the software gives us a platform to solve real-world problems through design.

Just last year, only one person on our entire Makerspace team—Elena—knew how to use Fusion 360. Over the course of the year, more people joined the team and undertook projects that required Fusion 360, and as a result, more people were able to develop skills to use Fusion 360 confidently. Now, that number has grown to over six team members, myself included. During the summer, I worked on a project that focused on developing prototypes for STEM kits, allowing me to learn Fusion 360. At first, the software felt intimidating—but with time, persistence, and plenty of trial and error, I started to get the hang of it. Through consistent practice, I gradually became more comfortable navigating the tools and bringing my designs to life.

Rewarding Moments

One of the most rewarding moments for me was seeing a digital model I created—a small gear-based mechanism—emerge from the 3D printer fully functional. That moment bridged the gap between theory and reality. I realized then that Fusion 360 wasn’t just about modeling—it was about building confidence, persistence, and a mindset of continuous problem-solving

This shared growth in Fusion 360 skills has sparked a transformation in our Makerspace. It has cultivated a culture of experimentation, collaboration, and innovation. Team members are now able to collaborate on a greater number of projects, many of which are more advanced and ambitious than before. We’re no longer limited by unfamiliarity—we’re empowered by our creativity. 

Created: A Guide to Learn Fusion 360

I’ve compiled a guide to the essential steps for starting your first Fusion 360 design. Whether you’re building something simple or diving into a complex idea, I hope you enjoy the process of learning as much as I did. If there’s one thing Fusion 360 has taught me, it’s this: you don’t have to be an expert to start—you just have to be curious.

Here is a link to the presentation:  Fusion_360Guide_Presentation

From Summer Sunshine to STEM Making: Makerspace’s Reflections on a Season of Innovation

Divine Uwimana ’27 and Qi Wang ’26 have an ice cream chat at Spoon Cafe on Spring Street with Makerspace Program Manager David Keiser-Clark.

Divine Uwimana ’27 and Qi Wang ’26 have an ice cream chat at Spoon Cafe on Spring Street with Makerspace Program Manager David Keiser-Clark.

Written by: Qi Wang ’26, Divine Uwimana ’27, Divya Sijwali’ 28.

What happens when you mix a dash of creativity, a sprinkle of STEM magic, and a whole lot of teamwork? Well, welcome to a summer at the Makerspace! Imagine learning how to 3D print parts for a science kit by day and swapping sketches on designs over ice cream by night. 

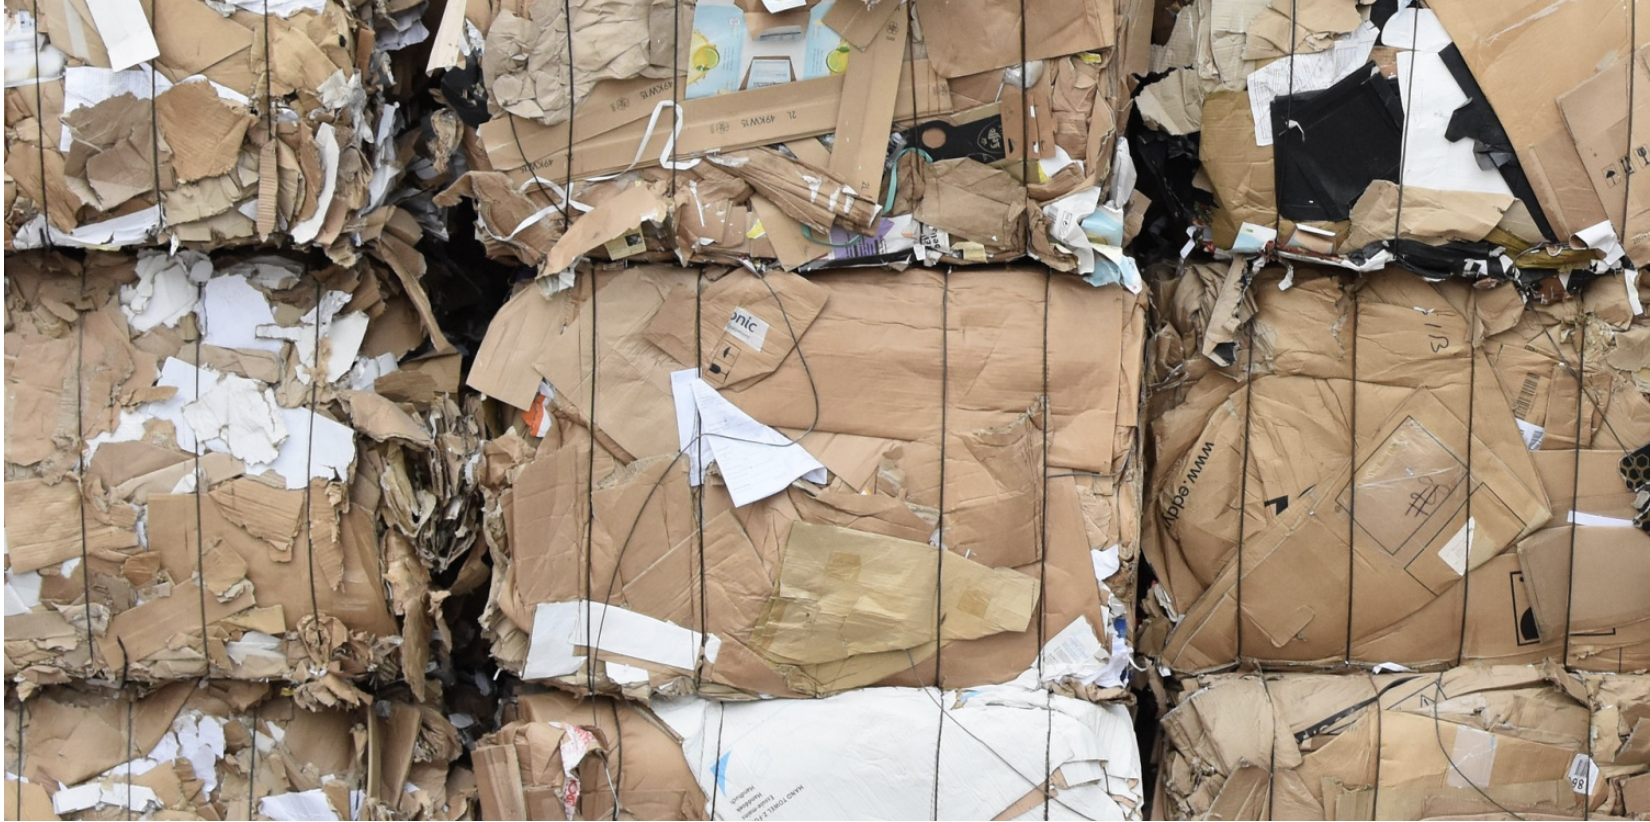
Divine Uwimana ’27 and Qi Wang ’26 worked in the Makerspace this past summer as student workers. They made significant progress on a Towards Inclusion, Diversity & Equity (TIDE) grant awarded to develop sustainable and reusable STEM learning kits for 5th-grade students in nearby under-resourced elementary schools. 

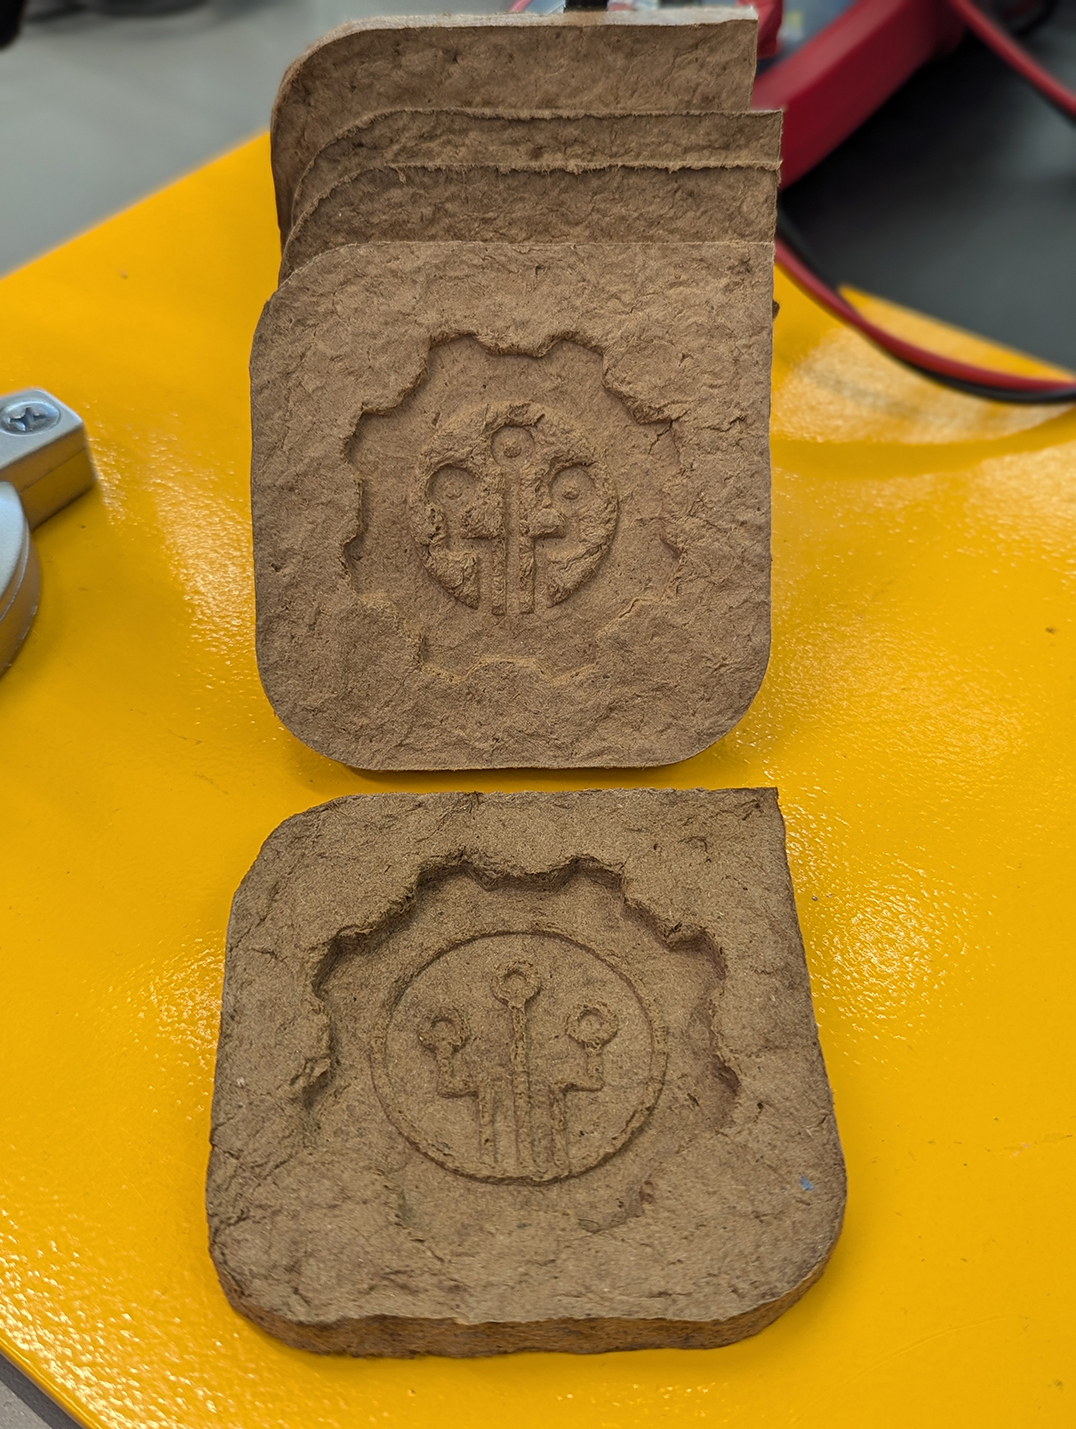
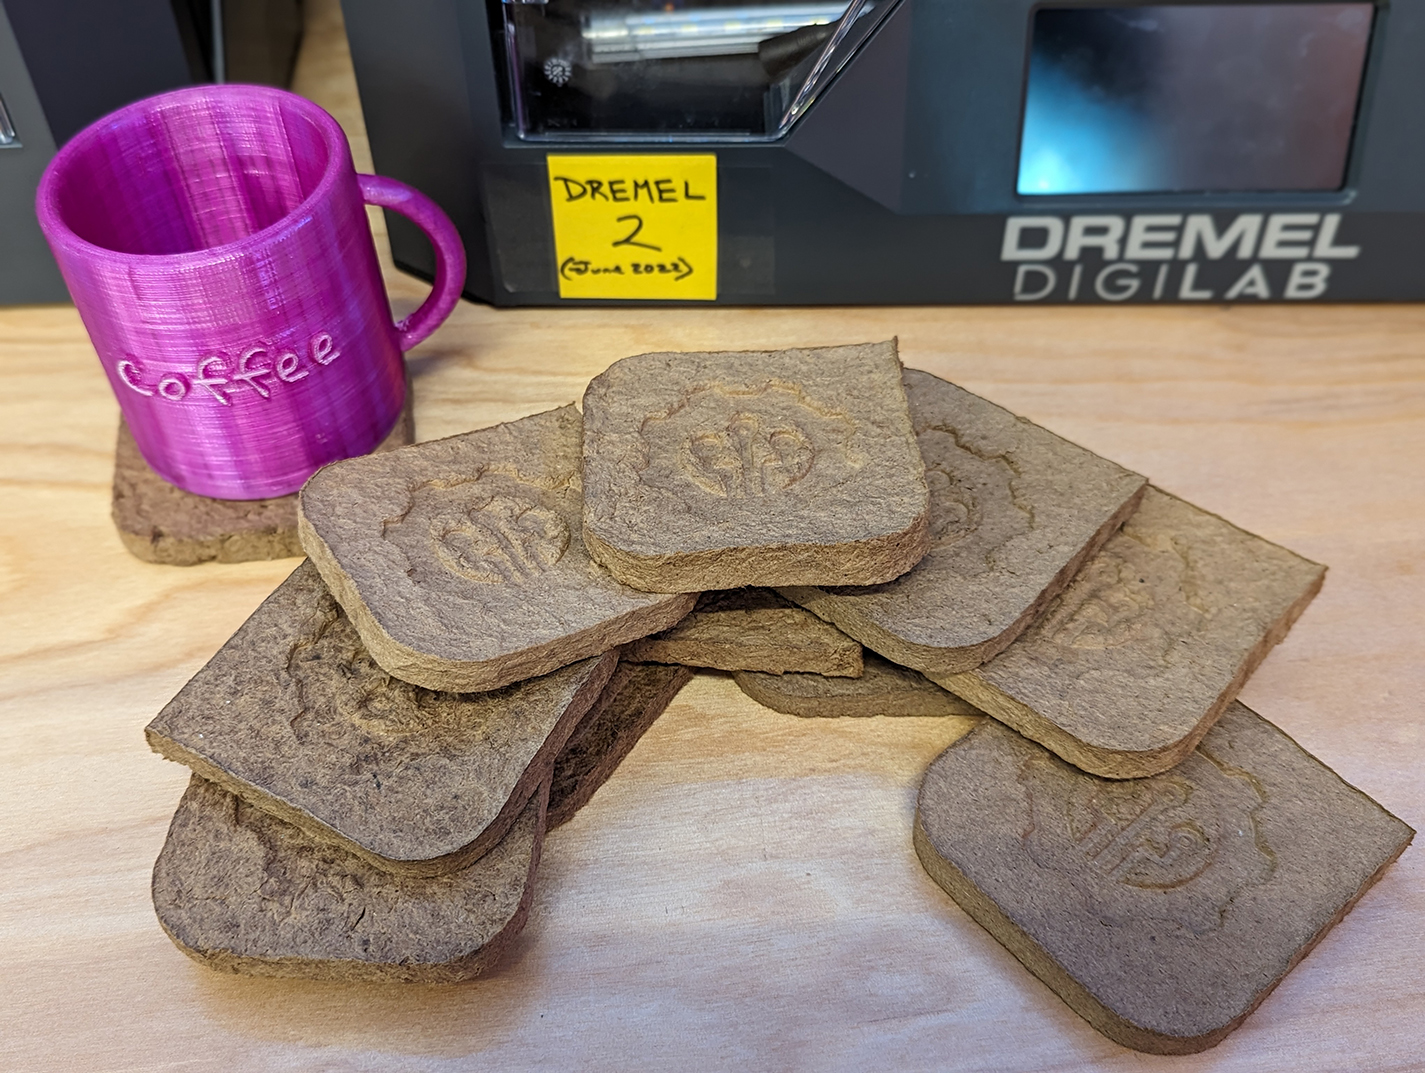
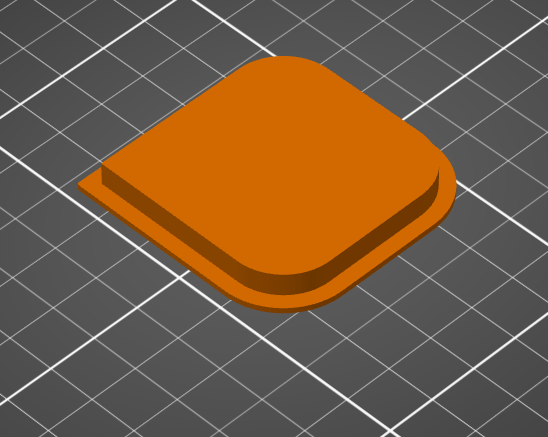
In the summer, Divine and Qi learned Fusion 360 (computer-aided design software) and advanced 3D printing, including calibrating printers and determining the most appropriate hot-end temperature settings. They identified and associated core curriculum science concepts with their STEM kit models and learned how to use rapid prototyping to test and quickly iterate on conceptual designs. By the end of the summer, they had developed three STEM kit models. Their kits centered on storing variable amounts of potential energy by using 3D printed torsion springs, gravity, and rubber bands. Their goal was for a single set of common parts to support all three models.

What Does Makerspace Mean to Them?

3D printed wind up car with an embedded rubber band power source

3D printed wind up car with an embedded rubber band power source

Divine Uwimana ’27 has worked in the Makerspace since the start of her first year at Williams. Divine believes that the Makerspace has offered her a place to learn and create. She said, “I love seeing the product of my learning, and it’s motivating to know that my summer experience will help elementary students learn.” As a math major, the Makerspace has allowed her to apply her skills in mathematics and be creative with them. She added, “I’ve also learned to pay attention to details and have noticed how you can see a huge difference when you change the smallest detail.” 

While working on this project, Divine felt a deep sense of excitement and responsibility: it was fun to make the kits, but making them for the kids made them more meaningful. Developing these STEM learning kits was a way to blend her skills with younger students’ needs, hoping it would enrich their learning experiences. Every design and every print felt a step closer to making a tangible impact. As she dove deeper into learning Fusion 360 and fine-tuning her 3D printing techniques, she felt a sense of accomplishment in turning ideas into designs and then finally into design models. Seeing the pieces come together was incredibly motivating for Divine; the process showed how small adjustments, like changing the length or thickness of a model or adjusting temperature settings, could make a huge difference in the final print.

The opportunity to work collaboratively in a focused environment manifested several “aha” moments for Divine. She said that the most notable was having first-time opportunities to assemble a mechanical Scotty dog kit (created at Carnegie Mellon University’s TechSpark Makerspace), a 3D printer enclosure kit, a wall-mounted tool rack, and a DeWalt shop vac. These assembly projects helped Divine conceptualize pieces that go together. It also helped her learn how to approach designing her own STEM kit models.

3D printed gravity-powered car

3D printed gravity-powered car

Qi Wang ’26 started working in the Makerspace this summer. She appreciates the existence of the Makerspace at Williams because of its real-world application. She said, “Williams is a liberal arts college but also very prestigious. The courses here often are very theoretical, while internships trend towards being pre-professional. The Makerspace is a rare space in between these extremes.” As a comparative literature major, she recognizes that Williams’ courses focus on literature critiques rather than creative writing. The Makerspace offers a space for applied hands-on academic work that requires learning how to research and implement STEM concepts while utilizing her creative writing and thinking skills. Qi found this summer work filled a gap that had been missing in her education at Williams.

Qi also points out the invaluable opportunity of full-time summer work in the Makerspace. She said, “During a typical semester, you see progress only after many weeks because you can only work for at most 20 hours a week as a student worker, compared to the summer, where we have been working 40 hours a week. I feel really good about our summer project in the Makerspace because we’re seeing so much success in just over nine weeks of work.”

Qi believes that the connection between Comparative Literature and the Makerspace is a blend of storytelling and science, like finding the plot twist hidden in a machine or crafting a narrative around STEM. In Comparative Literature, she’s used to dissecting stories, examining themes, and understanding every word’s purpose. At the Makerspace, Qi found herself bringing that same attention to detail and creativity to projects, as if each STEM kit was its own story waiting to unfold.

Creating STEM kits is like crafting a hands-on narrative for the elementary students who will one day use them. Just as she analyzes texts to bring out underlying meanings, Qi digs into her projects with a literary eye—considering how each part fits, how each mechanism flows, and how a simple change in design can rewrite the entire “storyline” of a STEM model. The Makerspace offered her a refreshing new way to put her analytical mind to work, letting her blend the theoretical with the practical and transform her love for literature into a hands-on learning journey.

How Was Their Experience Working Together?

Qi believes that working with Divine has been one of the best teamwork experiences she has had at Williams. She said, “We each have our strengths and have learned how to contribute our ideas to each other’s established work. People often love to give advice, but we’ve figured out how to have our advice add value to our ongoing work.” 

“I’ve also enjoyed working on these kits with Qi and learned a lot from her,” Divine said. “She was always willing to help and provide me with honest feedback. She always had a positive attitude and always made the working atmosphere fun and motivating.”  

In the fall semester, they will hand off their work to two first-year students to develop it further. Divine said, “I am looking forward to seeing the impact of our work and to hearing feedback from both students and teachers at the Pownal Elementary School.” 

Alumni Reunion Weekend at the Makerspace

During the sunny and pleasant reunion weekend of June 7th and 8th, the Makerspace was bustling, offering tours and hands-on making experiences to over 200 Williams alums and their families. We prepared a hands-on project that would allow people to use 3D-printed molds to cast Makerspace-themed coasters, sourced from upcycled Amazon cardboard boxes. This fun experience allowed us to share and discuss an environmentally friendly DIY project that people could easily replicate at home. People can even create their own custom molds!

During the alumni reunion weekend, the kids seemed most excited to mix the ingredients, mold the pulp, and finally clamp the coasters. They also got to take home coasters that we had prepared (and dried!) ahead of time.

Alums in the Makerspace on June 7th, 2024

Alums in the Makerspace on June 7th, 2024

Recipe

  • Cardboard boxes (50g)
  • Water (170g)
  • PVA Glue (15g) (we used Titebond II woodworkers glue; Elmer’s white glue works, too)

Tools

Instructions

  • Cut the Amazon boxes into small pieces
  • Add into the blender: 50g of cardboard, 170g of water, and 15g of glue

    The kids were excited to mix the ingredients (cardboard, water, and glue)

    The kids were excited to mix the ingredients (cardboard, water, and glue)

  • Blend until it’s thick and looks like wet clay
  • Assemble the 3D-printed mold: we used and modified this Pulp-it model

    Kids took turns squeezing extra water from the pulp

    Kids took turns squeezing extra water from the pulp

  • Put the pulp in a cheese cloth and squeeze the excess water out
  • Fill the mold with the damp pulp
  • Press the pulp with your hands so that it is dense and evenly distributed in the mold

    And this is how you squeeze the clamps on the mold!

    And this is how you squeeze the clamps on the mold!

  • Attach the lid to the mold
  • Press the mold using a clamp
  • Let it dry for 24 hours
  • Carefully remove it from the mold and gently place it to dry in direct sunlight (or in front of a fan or heater vent) for about 6 hours
  • It should now be 100% dry and solid
  • Nice work!
Fusion 360 software: We ended up iterating and tried inverting the extrusion of our design. Which version do you like better?

Fusion 360 software: We ended up iterating and tried inverting the extrusion of our design. Which version do you like better?

The kids had a blast making the coasters while learning about how upcycling minimizes waste in our environment. This activity demonstrated how individual action, no matter how small, may collectively impact positive change.

A pile of upcycled coasters made by our alumni's children (from scrap Amazon boxes)

A pile of upcycled coasters made by our alumni’s children (from scrap Amazon boxes)

According to the Environmental Protection Agency

Packaging materials account for 28.1 percent of the total municipal solid waste (MSW), amounting to 82.2 million tons of generation in 2018. This amount poses a high environmental risk and requires systemic and individual actions to mitigate the risks.

A pile of Amazon boxes

A pile of Amazon boxes

We were inspired by this Pulp-it project, and then we modified their open-source parts by using Fusion 360 software to add the Makerspace logo onto the coaster. To do this, we added an image of the logo and then extruded (raised) it about 8mm. To minimize waste, we tested our prototype models by printing it at 15% of the actual size. 

Fusion 360 software: Before adding our logo

Fusion 360 software: Before adding our logo

Fusion 360 software: After adding our logo

Fusion 360 software: After adding our logo