Utterly Deadly Southern Pecan Pie

IMG_1003 IMG_1008

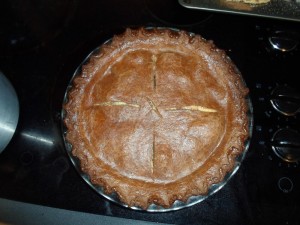
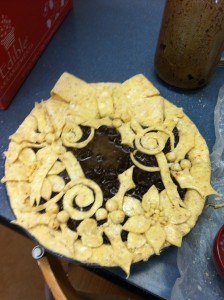
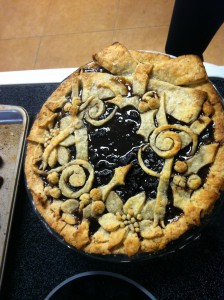
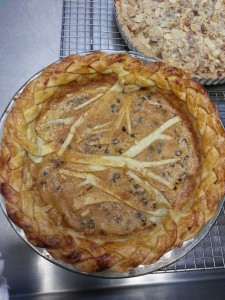
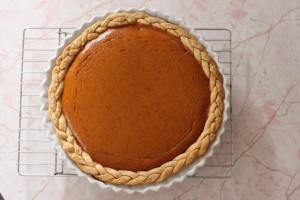
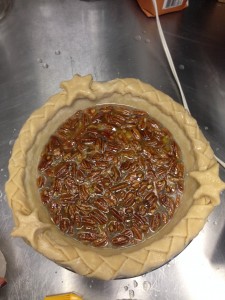
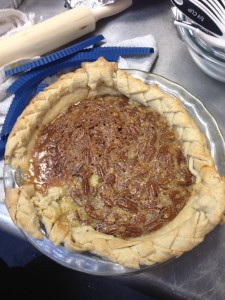
This was my first disaster pie. Although one would think the “utterly deadly” portion of the title comes from the abundance of delicious sugar and butter in the recipe (which I assume it originally did, as that was the name I found for this recipe online), the deadly attributes of this pie took on an entirely different meaning during the baking process. Now don’t get me wrong–this pie was fantastically delicious. I had three self-proclaimed pecan pie aficionados (from the South, no less) tell me this was one of the best pecan pies they had ever tasted. I kid you not. However, it was a long and perilous road creating the tasty, yet horrifyingly ugly final product pictured above. The picture to the left of the horribly ugly final pie illustrates my pie pre-baking in all of its braided glory…but I’ll get to that.

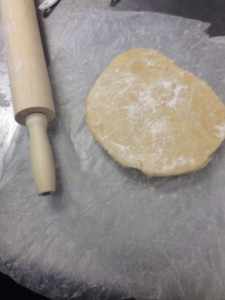
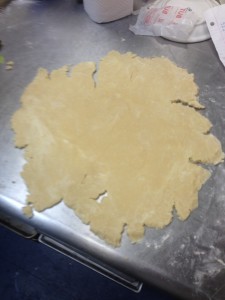
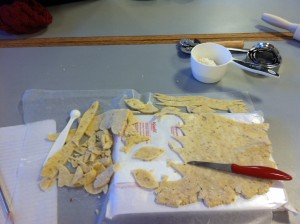
To begin, I decided to use the food processor and vodka trick that everyone was raving about for my pie crust. Previously, my dough was a little too moist, so I was looking forward to avoiding the doughy mess, and simplifying my crust-working with the processor.  Lesson of the week: shortcuts are not always so short. First of all, I had some issues with the food processor. While the dough was relatively pea-sized on top, the majority of the butter clumped at the bottom. Then, when I was working in the water/vodka, I think I overworked the dough because it was difficult to handle. Later, when I was rolling out the pastry, it kept cracking.

IMG_0988IMG_0992IMG_0993

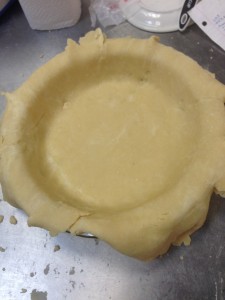
Although I knew I needed to wait for the dough to warm a bit, I was afraid of overworking it and having it end up too tough. The process of rolling and mending, rolling and mending continued until the dough was finally large enough to fit the pie plate. After cutting off the excess, I worked it together and rolled that out as well. I cut this dough into long strips and braided it together to make a pretty crust. Connecting the three braids wasn’t easy, but I finally figured I could just put some additional decorations around the connection points…in my case, stars. After all of the dough working, I was ready to shift away from the gluten and focus on the filling.

The first folly: I confused corn starch and corn syrup and mistakenly tried to boil the former with sugar–both obviously solid together in a pan.

IMG_0998

Big whoops. After starting again, I saw the results I was looking for, and I threw in the butter, pecans, vanilla, and eggs to complete the filling. Word to the wise–although the final product tasted wonderful, I advise anyone who plans on washing their dishes by hand to stay away from the corn syrup…the excess transformed in to this horrifying dried rubber meets plastic consistency all over the pan.

Finally, though, I was ready to complete the beautiful union of filling and crust. I thought I secured the delicate crust fairly well with water and egg yolk, but…well we all saw how that turned out. When I opened the oven to check on my pie, I was shocked and mortified to see the pathetic crust slumping into the filling. My braid! All of that time! All of that patience! Filled with woe, I removed the pie a tad bit earlier than the recipe suggested. As a result, my crust had more of a shortbread texture, but it was commended by many which leads me to think…blessing in disguise?…but no. Absolutely not. I would have readily sacrificed the tasty, slightly under-baked crust for even an over-crunchy, yet pretty crust.

Alas. The disaster pie was finished. Quite literally. I brought home about a piece and a half, and my friends annihilated my ugly pecan pity party with their voracity…success? You can try out the recipe and decide for yourself.
 

Pear and Almond Cream Pie with Chocolate Crust

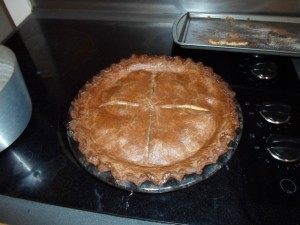
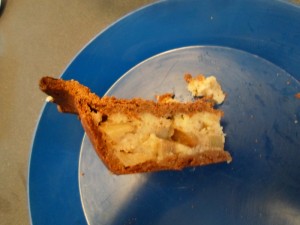
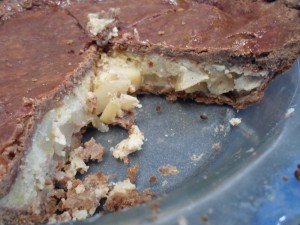
So I found this recipe online, originally calling for canned pears, but decided to use fresh ones instead. It was also originally meant to make a tart, rather than the double crust pie you see in the photos, but the crust recipe (7 egg yolks!) made enough for two crusts, even though there was barely enough almond cream for one pie, so after I made the mistake of trying to pour the almond cream over the pears instead of settling the pears into a layer of almond cream, I put the top crust on it in an attempt to protect the texture somehow. So you can’t see the artful arrangement of the pears, but it still looks okay. The crust was weird. The recipe I had said it required kneading prior to rolling out, unlike normal pastry, and it was correct. When I pulled the pastry out of the fridge, it was super crumbly and chalky looking and hard, but after a few seconds of kneading, the dough came together into what I would expect chocolate pastry to look like. I hope it tasted okay too, but sadly this pie was not destined for eating. One day I’ll give it another go.


SAM_1400 SAM_1401 SAM_1402 SAM_1403

Pies for this week and Reviews on Last Week

Hey hey,

I just wanted to make a quick comment on the custard pie. The custard was pretty good. It wasn’t too sweet and was slightly tart. I think I went overboard on the crust though. I probably put it in the oven for too long. I also added too much water, probably. The crust was very hard to cut and I think it was really hard. I probably added too much water.

As for pies for this week, I’m thinking of spinach/mushroom handpies and a chocolate peanut butter bacon pie. I wanted to make a vegetable pie because I like spinach and mushroom. I have no clue how much work the handpies will take. I also don’t think can handle too much heavy pies. As for the chocolate peanut butter bacon pie, I really like bacon and chocolate as a combo. I know for sure that I’ll tweak the chocolate sauce a bit with half as much sugar and using dark chocolate instead of semi-sweet chocolate. I just hope that it doesn’t turn out too sweet.

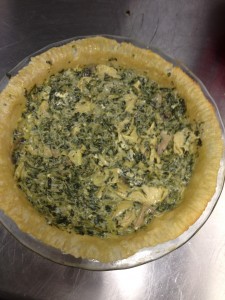
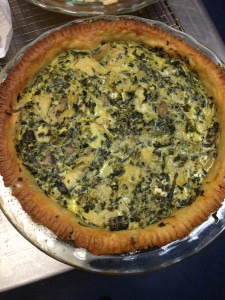
Quiche Qrave (Spinach, Artichoke, Goat Cheese, and Mushroom Quiche!)

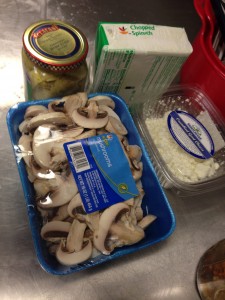
IMG_0936 IMG_0945 IMG_0934IMG_0933 IMG_0941 IMG_0946 IMG_0947 IMG_0948 IMG_0950 IMG_0952

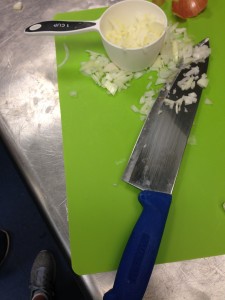
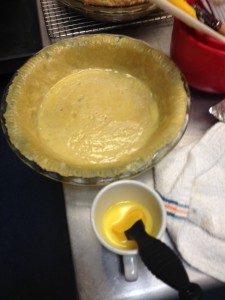
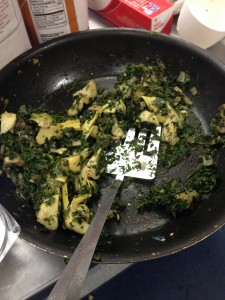
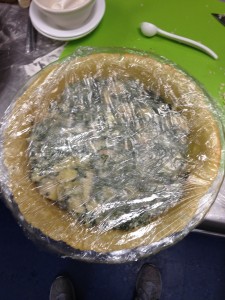
Although I’m a little late to the blogging scene, I figured I start out at the beginning… After a perilous stretch in the airport (nearly a week of full days, although I sleep at home), I arrived on campus, recuperated for a few days and walked in class on Monday, January 13, ready to get to work. David quickly brought me up to speed with Pastry Dough 101, and that day I made my first successful pastry dough. I say successful because I was able to form it to the pan with very little angst (little did I know the horrors that would befall me in the upcoming week). However, my pastry was a little too moist and had the consistency close to cookie dough. Needless to say, I was pleasantly shocked at the workable dough a solid amount of chilling time could produce. The smooth sailing continued on through pre-baking, and before I knew it, I had a lovely crust in my pie dish. Next came the filling. My idea for a filling sprung from a craving I was experiencing that Monday afternoon. After a bit of Internet surfing, Qraving Quiche (if one can forgive the lousy forced alliteration) was born. It was a delightful combination of spinach, artichoke, mushroom, onion, goat cheese, and egg that came together quickly and simply. All I did sauté the ingredients, mix them together directly in the pie, bake it all for the exact time listed on the recipe and voilá: a beautiful pie complete. My first pie was an overwhelming victory in my book; it was almost completely finished by the end of tasting (and the last piece served as a super midnight snack). Although some may consider my quiche a cheating spin off the traditional double crust creation, I like to think that I was easing myself into the kitchen, rather than diving headfirst into the treacherous waters of potentially fallen crusts and confidence. Week 1 (but actually 2): success.

Mincemeat Pie!

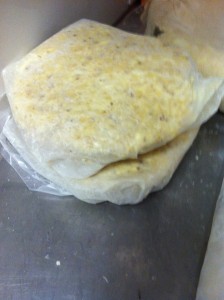
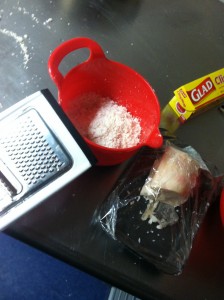
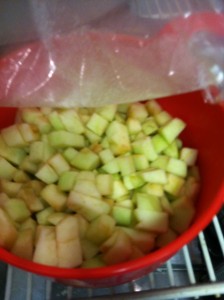
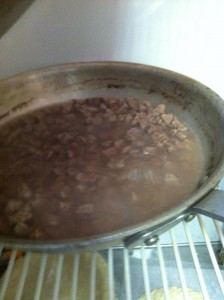
(Nikki here) To begin this week’s pie, on Tuesday I did mostly prep work. As I had decided to cut shapes out of the dough for the topping in spirit of decoration week, and to facilitate the actual making of the crust, I used a larger recipe than in previous crust attempts, using ratios relative to 3 cups of flour and 2 and a 1/4 sticks of butter. I also added about a 1/2 cup of almonds to mix it up (and they seemed like they would go well with the mincemeat).  Further prep work included looking incredulously at the chunk of fat (formally called suet) I was supposed to grate, which looked incredibly like mozzarella (but was sadly just white, slimy little slivers of animal goo. Too descriptive? My apologies to the weak stomached and the vegans). I also chopped up some apples while I waited for the 2 lbs of beef to simmer to tenderness in a small layer of water (roughly 20 min, covered in a large fry pan).

photo 1 (2) photo 4 (2) photo 3 (2) photo 2 (2)

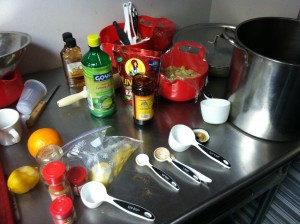
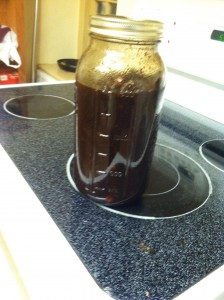
The meat had to cool in its liquid overnight, so I waited for the next day to assemble the ingredients and throw it all together. The filling had quite a lot of flavors: juice from a fresh orange and a fresh lemon, molasses (I think I would opt for a about 3/4 or 2/3 of what the recipe called for, but that’s just personal taste), cinnamon, nutmeg, allspice, cloves, apple vinegar, apple cider, suet, meat-water from the cooking of the meat, and of course the actual edible stuff: apples, beef, and raisins. Simmer for 2 hours or until the liquid mostly goes away, add a bit of brandy, and store for a few weeks in a large jar! (I of course didn’t store for a few weeks, since the pie was due the next day). While I waited once again for the simmering filling I cut holiday-themed shapes, rather poorly, I might add,  with a small paring knife and a pastry cutter.

photo 1photo 3 photo 2

I let the mincemeat filling sit overnight to further let the spices infuse the meat and fruit. I could hardly wait to put it all together I had been waiting and anticipating so long! I loved how the poinsettias and the ribbon turned out. How holiday-ish!

My only issues, I would say, involved slightly burning the molasses while the filling was simmering, forgetting to add the brandy until I had already dumped in the filling and lain on the topping, and forgetting to line the edges with tinfoil to prevent excessive darkening.

All in all, however, it turned out pretty well! I loved how the meat became somewhat candied, and the crust was really yummy. It was a very rich pie. 🙂 Perhaps not my favorite, but certainly a keeper! I think I might ask David for his recipe though, as I think his was even more delicious.


photo 4 photo 5


Apple Goat Cheese Pie with Maple Caramel

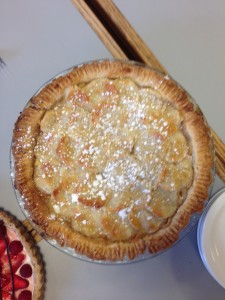
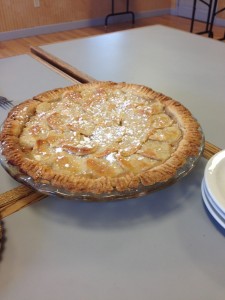
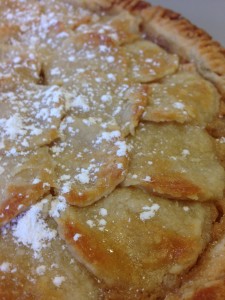
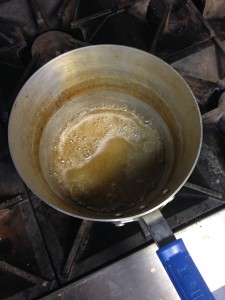
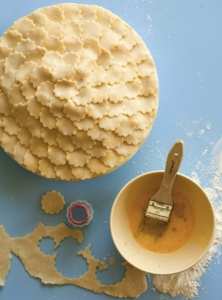
So I seem to have deviated from my original plan to make a tart, but I hope the choices I made in the presentation of this pie come across as interesting! I just though the idea of maple syrup caramel and goat cheese sounded too delicious to be missed out on. The pie was challenging to make especially because it called for special pastry that used cream as the liquid in the pastry rather than water (which required 3 hours in the fridge rather than just 1 before rolling it out…), the caramel was challenging in both preparation and maintenance before it could be put in the crust (caramel that was too hot would melt the pastry, but caramel that was too hard wouldn’t pour…), and finally tackling the presentation aspect itself required quick precision to cut the pastry before it got too warm. I decided that rather than using the standard single, unified piece of circular pastry for the top of the pie I would cut the pastry up and make a sort of pastry mosaic for the top crust. This turned out to be both an aesthetic and functional decision in that the mosaic of concentric layered circles of pastry was both pretty and provided little gaps to serve as steam vents in this very bubbly pie. Before serving it I’m going to throw some granulated sugar on top and warm it. Then I’ll add some confectioners sugar.
IMG_1392

IMG_1393

IMG_1394

Making Caramel!  Just cooked maple syrup and sugar!!!

Making Caramel! Just cooked maple syrup and sugar!!!

White Fish Pie

So, as a continuation of my previous post, today I finished baking the white fish pie. To my partial surprise, it turned out pretty solid; my biggest concern, that the structure wouldn’t hold and the filling would explode everywhere, did not come to pass, so that was spectacular, haha.

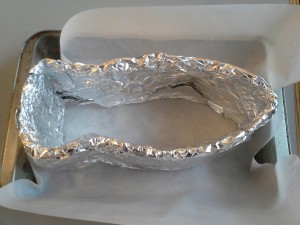
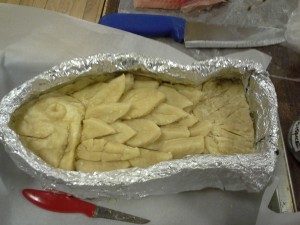
I went with the No-Rolling-Pin Pastry because I felt that it would be the easiest to work with while fitting the pie to my mold. That part definitely turned out to be true – the oil-based pastry worked wonderfully with my cardboard and aluminum mold, allowing me almost play-doh like control over my pastry so I could design and implement the base structure.

The filling was simple and easy. It is a tried and true recipe I’ve cooked for dinner before, and I thought the light, cheesy flavors would sincerely compliment the baked pastry. I layered the seafood, sauce, and cheese so that all ingredients were symmetrically arranged and even the cross-section may be beautiful. This idea was further led by the fact that many towering medieval pies also contained layers of ingredients.

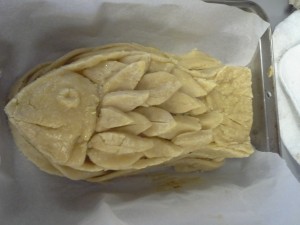
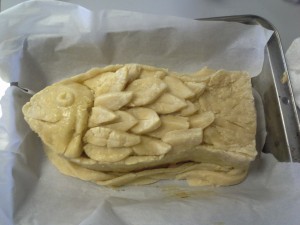
Finally, the top crust was made in three parts: first, a fish head, onto which I molded a raised eye and cut in a gill and a smile, for good measure. Then, came the fish tail, which was simply a layer of pastry shaped to the mold of the tail. Onto that, I cut in lines to represent the tail fins. Finally, I created a series of individual scales onto which I cut in small, either single-line or triple-line striations. I thought this leaf-shaped design would look better than the cloud-shaped scales I displayed in my previous post, and I believe the gamble paid off. Furthermore, to achieve proper browning, I used egg yolk on the head (for a yellow tint as well as a lighter color), egg white on the scales (to impart a glistening sheen), and sugar water on the tail fins (to cause a golden brown).
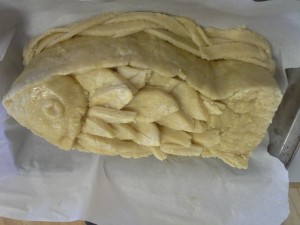
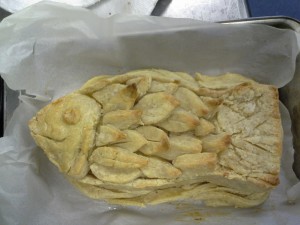
With a hunk of additional dough I had left over, I added a braided border along the bottom. This was attached after about 40 minutes of cooking, when the mold was removed. This invokes a rippling effect, as if the fish is swimming through water. I also added an egg wash on that to cause browning.

The biggest gripe I had with this piece is how brittle and hard to work with the pastry became. It was initially good for the structure, and fitting to the mold, but next time, I would use a different pastry for the top crust as well as the braid – likely a flaky all-butter pastry. The use of the other pastry just caused some issues with designs staying as well as the crust flaking in unusual places, marring the design.

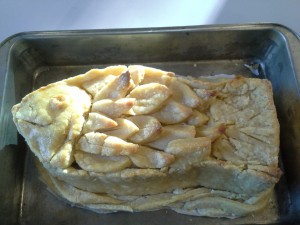
Another issue involved browning – the effect of a dark tail, shiny scales, and a slightly brown/yellow head was not achieved. Overall, it turned out well though.

Take a look and judge for yourself!

20140121_143809
[The Mold in the shape of a Fish]

20140121_174001 [Raw Pie – the Crust as well as Filling is all in – take note of the Designs cut into the Top Crust]

20140122_152602
[After Pre-Baking in the Oven with the Braided Border around – some of the glisten and color from the Wash can be seen]

20140122_152609
[Another Angle]

20140122_152620
[This side came out well – note the Ripple Effect created by the Braid]

20140122_161804
[All done Cooking!]

20140123_152729
[After Reheating – the Final Presentation]

Questions? Comments? Post them below!

Strawberry White Chocolate Mousse Tart

I made my first ever tart this week!

The first thing I did was make the crust. It was a variation of the basic flaky pastry that we’ve been using so far. I also tried my hand at the vodka trick; the liquid in the crust was made my substituting half of the water for vodka. It’s a good thing I did this, because I think I might’ve added a little too much liquid to the pastry.

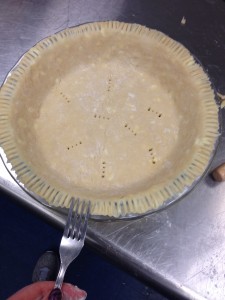
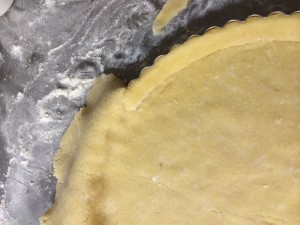
It was surprisingly easy to roll out the pastry. I then pressed it into the tart pan and folded over the edges in order to make a doubly-thick crust around the sides, as seen here:

IMG_1305

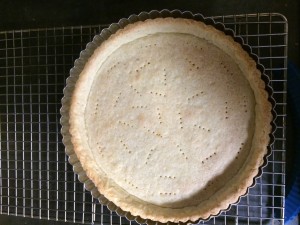
The crust was frozen for half and hour and then pre-baked for 45 minutes. Boom:


IMG_1308

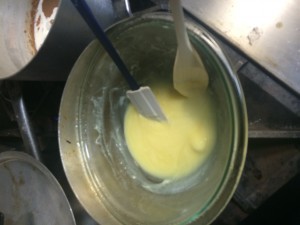
The next part of the process was to make the white chocolate mousse. I used a double boiler method to prevent scorching while melting the white chocolate. After melting, the white chocolate mixture was set aside to cool.

IMG_1309

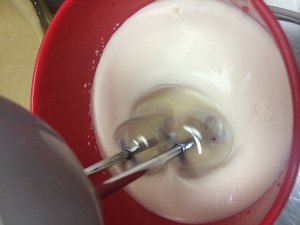
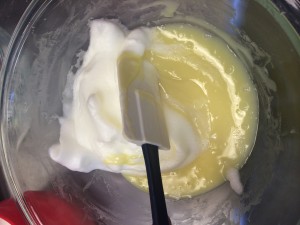
In the meantime, I beat the egg whites and the whipping cream mixture.IMG_1310


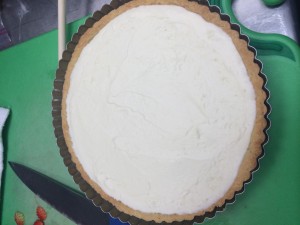
These were each folded into the melted white chocolate. This mousse was then poured into the tart shell and left in the fridge to chill.

IMG_1311


IMG_1318

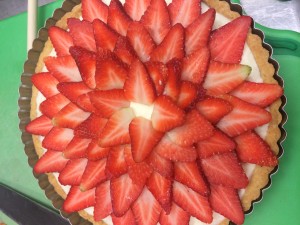
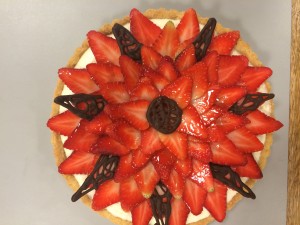
This is where the decoration part of the tart began. I cut the 16 oz of strawberries into thin slices and carefully arranged them into concentric circles on top of the mousse.

IMG_1319

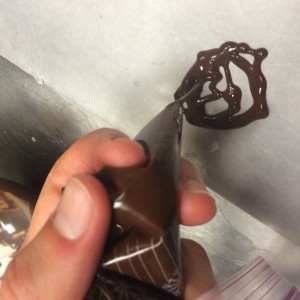
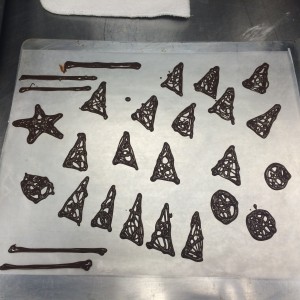
I thought that the tart needed a little contrast in color, so I thought it would be a good idea to put some dark chocolate on there. I’ve always wanted to try making decorations out of chocolate drizzle, so I melted some semi-sweet chocolate pieces with shortening over a double boiler and made a makeshift piping bag.IMG_1315

I played around with some shapes and left them to cool/harden.IMG_1316


And then arranged them on top of the tart. I finished it off with the tart strawberry-jam-and-lemon-juice glaze, which gave the tart a shiny look.

IMG_1324

I’m happy with how it turned out!I was a little nervous about it, but everything went pretty smoothly and I think the final product looks nice. I hope it tastes good. I tasted the chocolate mousse and it was super sweet, so I’m hoping that the strawberries and the glaze add a little tartness to counteract the overwhelming sweetness.


Blueberry Custard Pie

This one I just made for fun this week because I thought it looked good. I baked it back at my place on Tuesday and made the mistake of leaving it out in my room… Most of it has been devoured at this point by friends and roomates, so I’ve opted to just present my apple caramel goat cheese pie this week. This pie was a really easy pie to make and I definitely recommend grabbing some frozen blueberries and throwing it together in your spare time. It’s really good especially with the sour cream and sugar custard, and with the streusel top. IMG_1390

Currant Custard Cream Pie

20140122_170134

I had a lot of trouble with this pie. I had never made a custard pie before and there were a lot of factors in play. Custards have to cook at a low temperature while pie crusts have to cook at higher temperatures. And then I had thought to put this braid crust rim on the top, with the braids unfolding into tree branches. The branches fell into the custard, as you can see. I didn’t wait to put it in later because I was afraid that the braids wouldn’t’ have stuck to the edge of the pie. Luckily, the braids stick. Also, the custard browned a lot more than I expected. If I knew that were the case, I would have not glazed the rim with an egg wash.

I made this pie crust with a vodka trick with about 5 tbsp each of water and vodka. Besides that, it was the usual flaky crust. I edited the custard recipe from Purdy’s Perfect Pie book and used dried currants instead of fresh currants. Let’s hope it works out today when we taste them.

Blueberry Pie with a Lattice Crust

Ever since it was announced that the third week of “Life of Pie” would be decoration, I was dreading the day it would come. While I was excited about the first two weeks, where we had to make a sweet and then a savory pie, in both instances I did not have to show craftsmanship of any sort. The reason that I was nervous about decoration is that I am artistically challenged. So much so, that when I was in an art class my freshman year in high school, my teacher made me draw circles while the other students drew self-portraits. While my Mom and two sisters are terrific artists, due to my terrible fine motor skills my best bet for something artistic is something abstract in the vein of Jackson Pollack. In fact, my handwriting has gotten worse since I was a little kid, not the other way around!

As a Pie maker whose father once proclaimed that his chicken scratch handwriting looked like Egyptian hieroglyphics, I thought to myself, “what could I bake this week that looks pretty, but is relatively easy to make/not screw up”? Enter the lattice topped pie. For whiling the weaving is intricate, to quote the Geico commercials, “it is so easy a caveman could do it.” With that in mind, I was set on my decorative style for this week.

But what of the pie itself? Last week I took English eloquence and bastardized it with American excess and opulence when I put a twist on the English pork pie. After eating all of those savory pies, not to mention the time it takes to actually make them, I figured I would go for something sweet and quicker to make. Although I am a major blackberry fan, for some reason, the idea for its berry cousin, blueberry, popped into my head. As George Clooney said in Wes Anderson’s terrific The Fantastic Mr. Fox when voicing the titular character, “Beagles love blueberries” and so do people as well! Unlike my beloved tart blackberry, I figured this would be a pie that is more user friendly, that everyone will like (hopefully). I got my recipe from: http://www.food.com/recipe/blueberry-pie-2452 which you can check out if you want to replicate it.

Blueberries Sugar Mixture

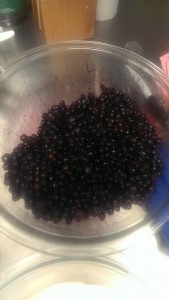
Unfortunately though, it is not blueberry season. Luckily I got Wymans terrific fresh then frozen blueberries which looked and tasted great. Notwithstanding the use of Wymans blueberries,  I liked this recipe in particular in that in calls for a cup of sugar. While that would seem to be more than usual, I thought it was useful for the winter, since it compensates for the lack of sweetness that would normally accompany these berries during blueberry season. After washing the berries and adding lemon juice, I proceeded to create the sugar/flour/cinnamon mixture which you can see in the recipe. Then I mixed the sugar mixture and the blueberries together until it reached an almost stew consistency. It looked and tasted great.

Blackberries and Sugar MixtureMixing in the Sugar MixtureStewed Blueberries

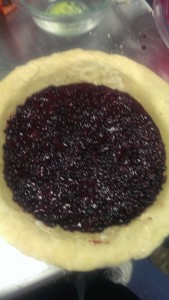
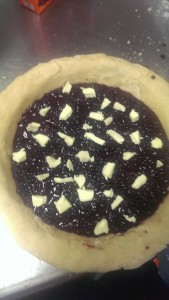
Then, I proceeded to put my filling in the pie tin that I had pressed my dough into. Afterwards I dotted the top of the pie with butter as the recipe called for. Between all of the sugar and the butter, I feel like I made a pie from one of Paula Deen’s shows! But hopefully all of that means the pie will turn out well.

Blueberries in Pie CrustDotting Blueberries with Butter


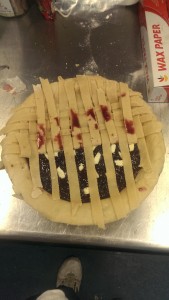
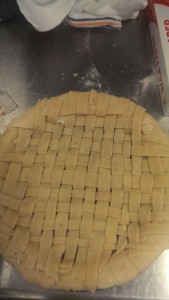
Then I proceeded to start my lattice crust. I have included a link: http://www.simplyrecipes.com/recipes/how_to_make_a_lattice_top_for_a_pie_crust/ that easily explains the process in depth. All in all, I got to say that while I was nervous of my ability to make a pie beautiful, even I could make a lattice, as evidenced by these pictures:

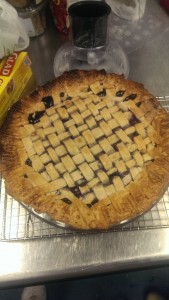
Beginning LatticeFinished Lattice Pre BakedBaked Blueberry Pie


The pie looked and smelled great when it came out of the oven. The recipe was very easy and straightforward. The only difficulty I found was that it required a greater cooking time to get the center a golden brown. Even then, it was much lighter than the crust.


Fig Goat Cheese Tart

I have been super into figs recently, and I love cheese, so I decided this would be a perfect pie for me to try.  I decided for a little umph I’d put some nuts into the crust since the topping called for nuts..  Unfortunately, I combined the recipe for the nutty pie crust and the one for the vodka trick, which called for significantly more shortening.  By the time I added the liquid, it was much too wet to be able to roll out, so I decided to make a push-in  tart instead. I’m not totally sure what went wrong with the pastry, but I hope it still tastes good.

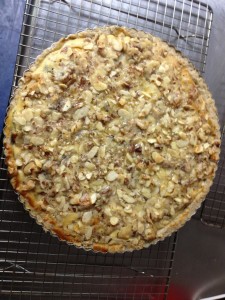
I followed the recipe pretty much exactly except with the dried figs, I reconstituted them by pouring boiling water over them and letting them in a bowl for fifteen minutes.  We also didn’t have enough almond slices for the topping, so I ended up putting some pecans in there as well.  I think the topping is sort of interesting because it’s not quite a crumb but it’s made with all crumb-like ingredients with the exception of the slices for little pieces. I also find this pie interesting because it obviously has a lot of sweet components (such as the topping) but also has the basil, so it’s clearly not supposed to be completely dessert-y.  I’ll be interested in seeing how all the flavors come together.

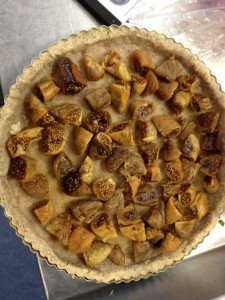
Doing the tart made me slightly confused on the decorative piece. How was I going to do decorations with a tart? I decided to try to lay out the figs in a way that would be decorative.

IMG_5134-2

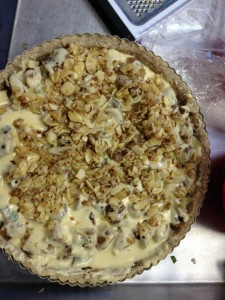
But by the time the cheese batter was poured on top and the crumb added, it was hard to see the attempt at some special lay-out…

IMG_9252-2

We’ll see how it tastes tomorrow!

IMG_1326-1

http://alwayswithbutter.blogspot.com/2011/11/fig-goat-cheese-pie-with-basil.html

The Design Aesthetic

This week, the assignment is a design challenge; we have been tasked with “mak[ing] a pie of your choice with a focus on the decoration, shape, and overall presentation of the final product.” First off, obligatory ‘Challenge Accepted!’ Second, what in the world does that mean?

To help us understand this, we were shown two demonstrations in class. One for a nifty Spinach pie which displays the filling beautifully (found here) and another step-by-step on how to create a woven lattice crust (such as this). Further tasked with coming up with an idea as well as a list of ingredients by the end of class, I decided to go ahead with the Fish Pie idea I had been knocking around in my head over the weekend.

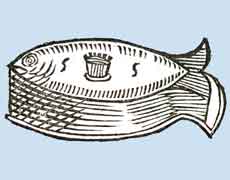
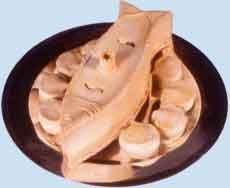
What makes this pie a worthy contender for accomplishing this week’s goal? First, the base concept is a Fish Pie…shaped like a fish. It will be a free-standing pie with a baked fish filling as well as a fish-like exterior (see here for an example of a creative free-standing pie). Essentially, something similar to this:

fish-pie-bw

Another technique the pie will employ is the use of scales in the top crust, made with pastry. The scales will look similar to those in the following picture:

fefeefe

Furthermore, extra details such as the eye and fin will be created by shaped pastry added to the pie proper. Striations in the tail will be added by the liberal application of a fork. The pie will be erected through the help of a cardboard and aluminum mold, and be presented in all its free-standing glory!

Further considerations that were made but not implemented are as follows: The use of food coloring (specifically black) to make the outlines more vivid so they could ‘pop!’ This was struck down as black might be an unappetizing color. The idea that was suggested instead was to coat the parts that I wanted to make distinct in something like sugar water, so further browning would achieved.

Another idea I haven’t completely thrown out yet is to create a braided border around the top and bottom crusts. While it doesn’t lend specifically to the fish-themed pie, it does add to the overall beauty of the final product as it is something more pleasing to see than a simple line and more technically intricate. The major consideration for the implementation of this idea is time. (See braid example below)

IMG_7511

It will be a difficult task to bake the Fish-shaped Fish Pie, but I am excited to take on this endeavor. Hopefully, the use of a no-rolling pin crust as well as a three-stage crust process serves to aid in making this endeavor a reality. Tune in over the weekend to see the final product! Hopefully, it looks something like this:

fish-piethmb


Decoration Ideas for Mincemeat Pie

(Nikki) This week I plan on making a REAL, actual mincemeat pie with meat. As this traditional holiday pie reeks of christmas, I’m thinking of making a wreath-like border using various shapes cut into the pastry top, probably in overlapping layers that encircle the pie but leave a hole in the center. Such shapes would include apple shapes, holly shapes, wreaths, yule log shapes, curlicues, and ribbons, more or less.

I would essentially be doing the following:

holiday-wreath

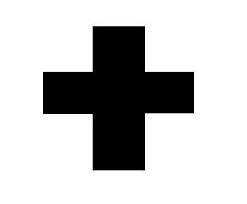
plus sign

mincemeat


Savory Stuff


Nikki here!

So I decided to make two pies for Savory Week: Steak/Beef Stew Pie and Chile Relleno Pie.

Steak Pie/Beef Stew Pie:

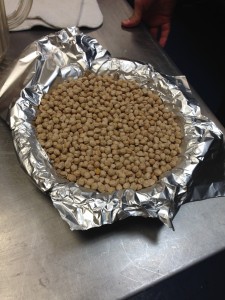
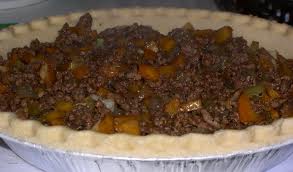
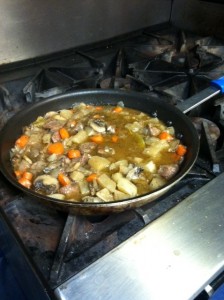
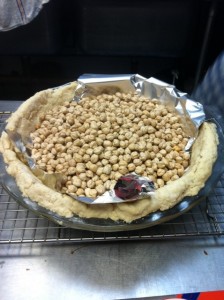
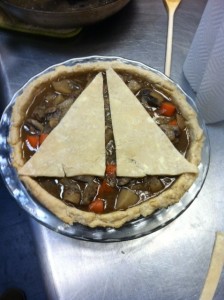
This recipe was originally only steak and onion with a puff pastry top, but I wanted to expand upon it with more vegetables (carrots, turnips, garlic) and an actual pie crust. It also originally called for mushroom gravy, which I replaced with actual mushrooms and beef broth, as well as a few spices such as rosemary and a bay leaf or two. Since the broth made the filling a bit watery, I knew I would need to prebake the pie crust; it was kinda fun to use the bean method (but not really…its not that exciting…); at any rate, I suppose this pie would either require a) more stewing time pre-bake; or b) time in the refrigerator to congeal and be served cold.

image (2) image (4)

I think my experiment went fairly well; it was very tasty and savoury, and the lard crust was well suited to its beefy contents. The meat was a bit tough, so I’m not sure whether it needed to stew more or less (any meat experts out there?)

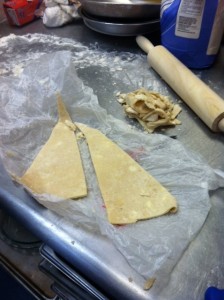
I topped it off with a goofy attempt at the Harry Potter Deathly Hallows symbol, which I then watched over the weekend and realized that the circle actually goes inside the triangle (whatevs). It all went to the same place anyway 😉

image (3) image

Pie number two: Chile Relleno

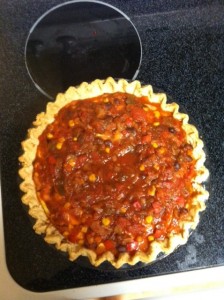
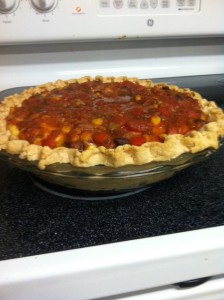
I found this recipe online and stuck with it the whole time. It was actually really freakin good; I believed it would be awesome, but a few of my friends were a bit skeptical (also, for all those Williams College people don’t know what Chile Relleno is, it’s a mexican dish made from stuffed, roasted Poblano Peppers, which are not spicy;cheese, and an egg batter. The pie also included precooked chicken and was topped by salsa. The lard crust was fine, and held together fairly well (probably my best crust yet as far as handling and timing goes).


Since it got raving reviews I would absolutely make this pie again, but with a few more peppers, as it is of my opinion that the more the merrier in regards to roasted peppers.

image (5) image (6)


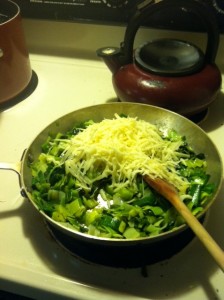
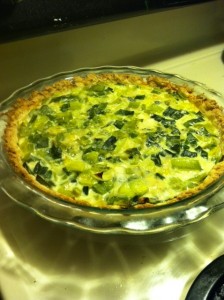
Outside of class, I was inspired to try this Leek and Gruyere cheese pie, which, with a delicious all butter crust, was pretty amazing in all its simplicity. How unfortunate that gruyere is so expensive!


image (8) image (7)