
Summary: This section explains some more details, including Validation and Quotas, to customize the survey before moving on to distributing.
Validation Features
You can use Forced Response to ensure a participant provides an answer and doesn’t skip over a question. This is usually necessary so that you can compare all your participants’ data fairly. You can find this option under validation options. When you select it for a question, participants can’t move on with the survey until they have answered that particular question.
If you want to give your participants the option/reminder to answer but are not requiring an answer, you can select Request Response instead to give them a reminder message before they proceed.
*When Previewing your survey, you can select “Disable Validation” through the settings bottom at the top of the screen so that you can easily click through your survey yourself without the tediousness of having to answer all the questions yourself every time
*If you use forced response, participants will see the error message “Please answer this question” if they try to move on without answering a given question. You can customize this error message under Survey Options (select “Use Custom Survey Validation Messages” and “Load a Saved Message”). These can be created, saved, edited in the “Message Library.”
Custom Validation
Under “Validation Type” on the right side of the page, you can set even more specific criteria for how a participant must answer in order to move on. You can also create corresponding error messages for those questions that use custom validation.
Quotas are another validation feature to help keep track of how many participants taking your survey meet certain conditions you put in place. For example, if you know you want a certain number of males and females, quotas can help you keep track and give you an idea of when to stop data collection.
You can set a quota by clicking tools at the top of the survey creation page and selecting “Quotas.” Select “Simple Logic Quota” and set your quota preferences and limits. This works in a similar way to Display Logic and Branch Logic. You can also choose what should happen when your quota is met. Once you have acquired 50 responses from males, for example, you can set Qualtrics to end the survey, adjust the questions that will present, keep new respondents from beginning the survey, or just use regular Skip Logic/Survey Flow that you have in place.
*You will most likely want as many participants as possible to take your survey without doing much quota manipulation. This feature may be helpful for getting a more exact amount/type of data for your study (i.e. 50 males and 50 females).
Idnum
For studies you run on Mechanical Turk or other online services, it is helpful to have an embedded idnum which is specific to your study so that when your subjects input the code into MTurk, you can verify that they took your study.
Here’s how to set that up:
1. In your screener, add a “Web Service” to your Survey Flow. Ask Professor Cone if you can use his lab’s web server. The link below is what you should input.

2. If your study is only one survey, then you should also include embedded data as shown below. If you have a separate demographics page, then you can put this information there.
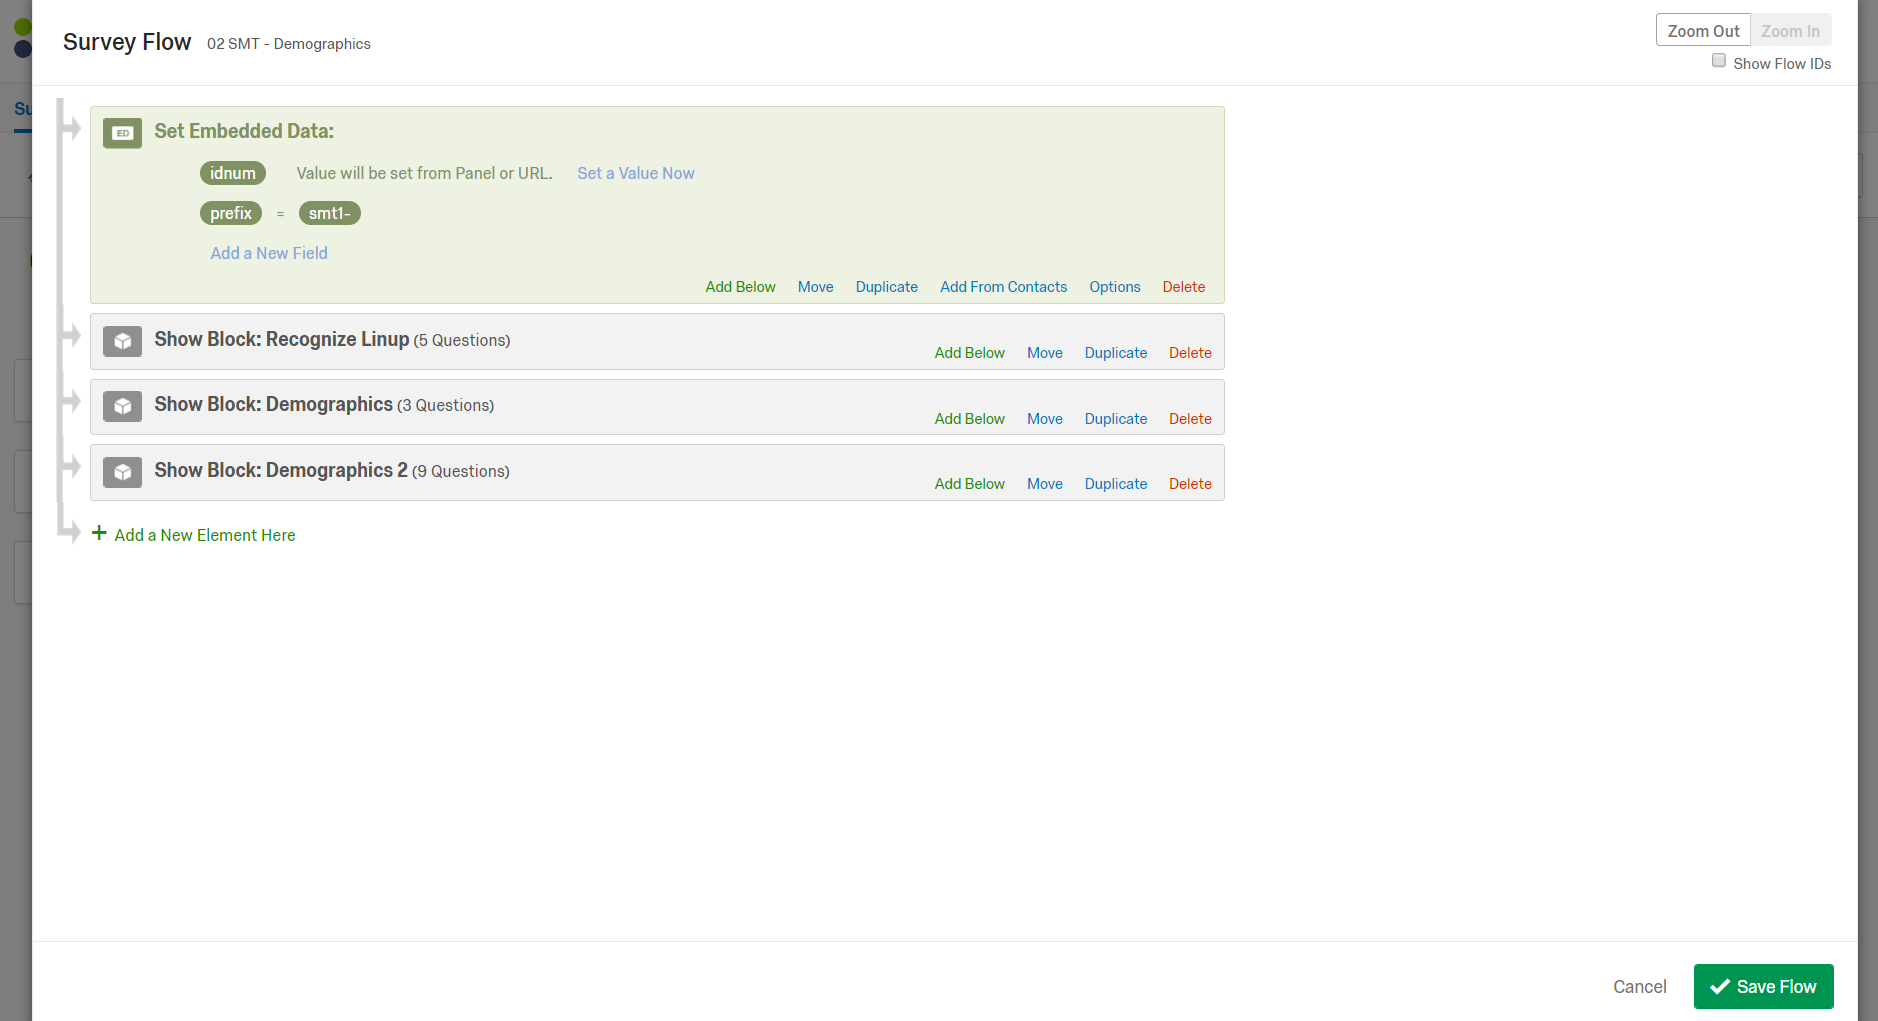
3. Finally, insert a block that looks something like this to the end of your survey. The information in bold is piped text which you can find in the Rich Content Editor or by right clicking on the question.
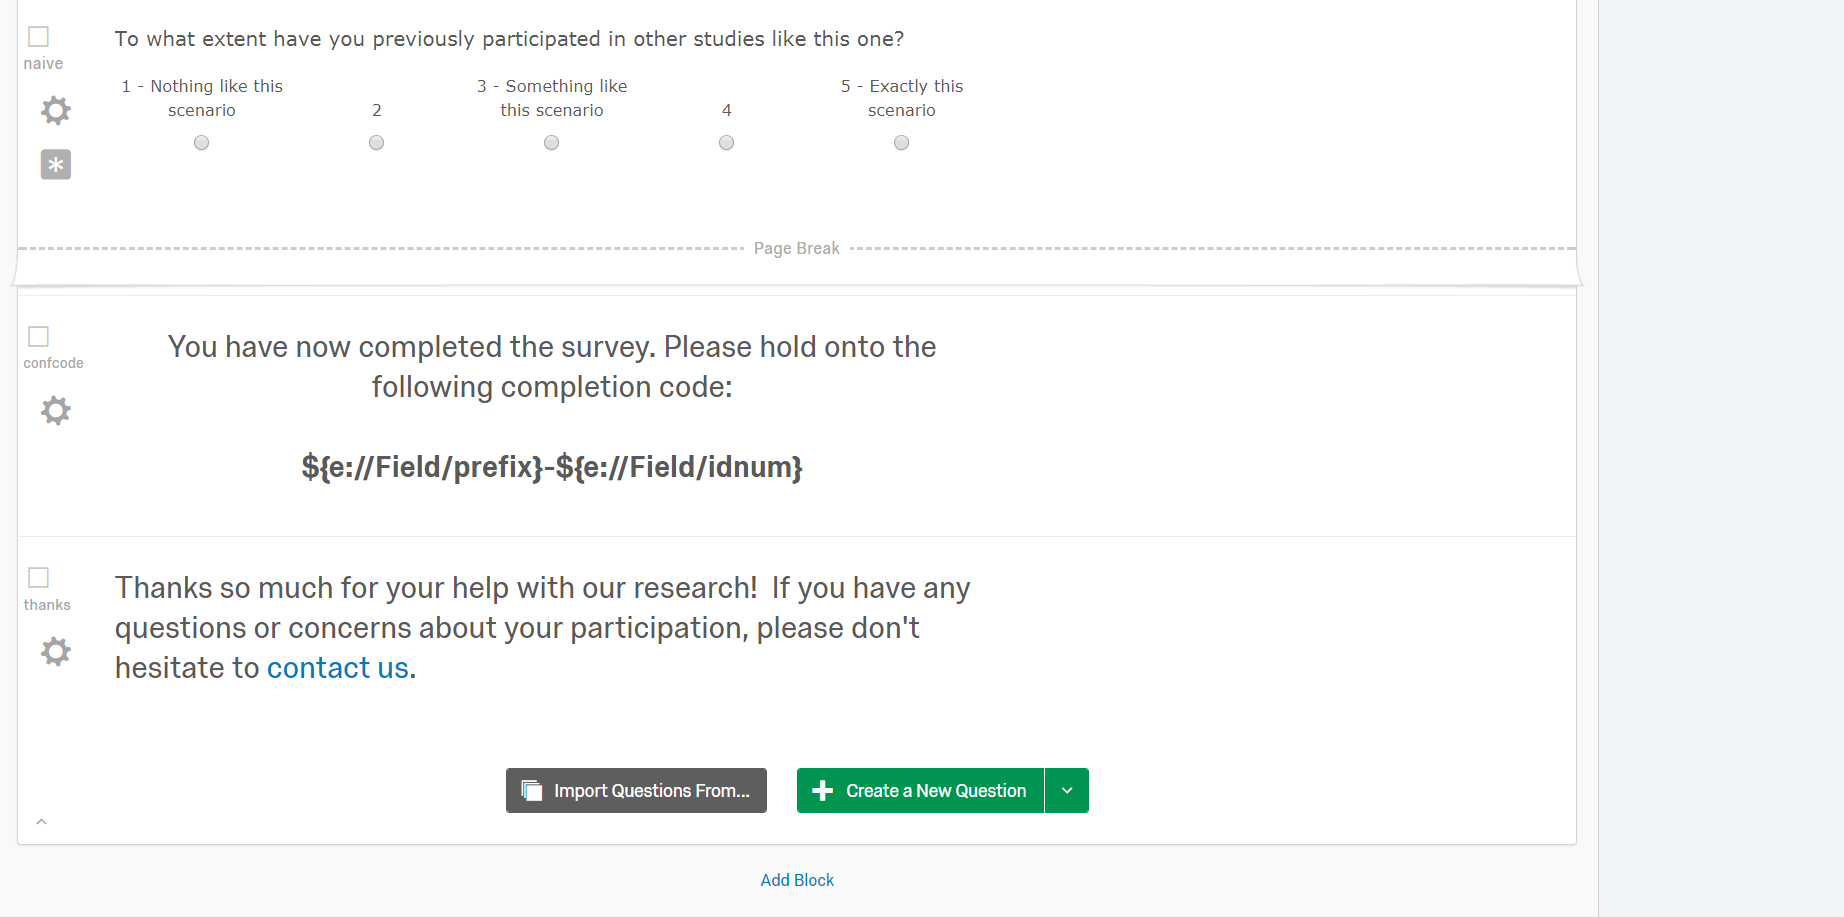
Click on the {a} icon to insert piped text.
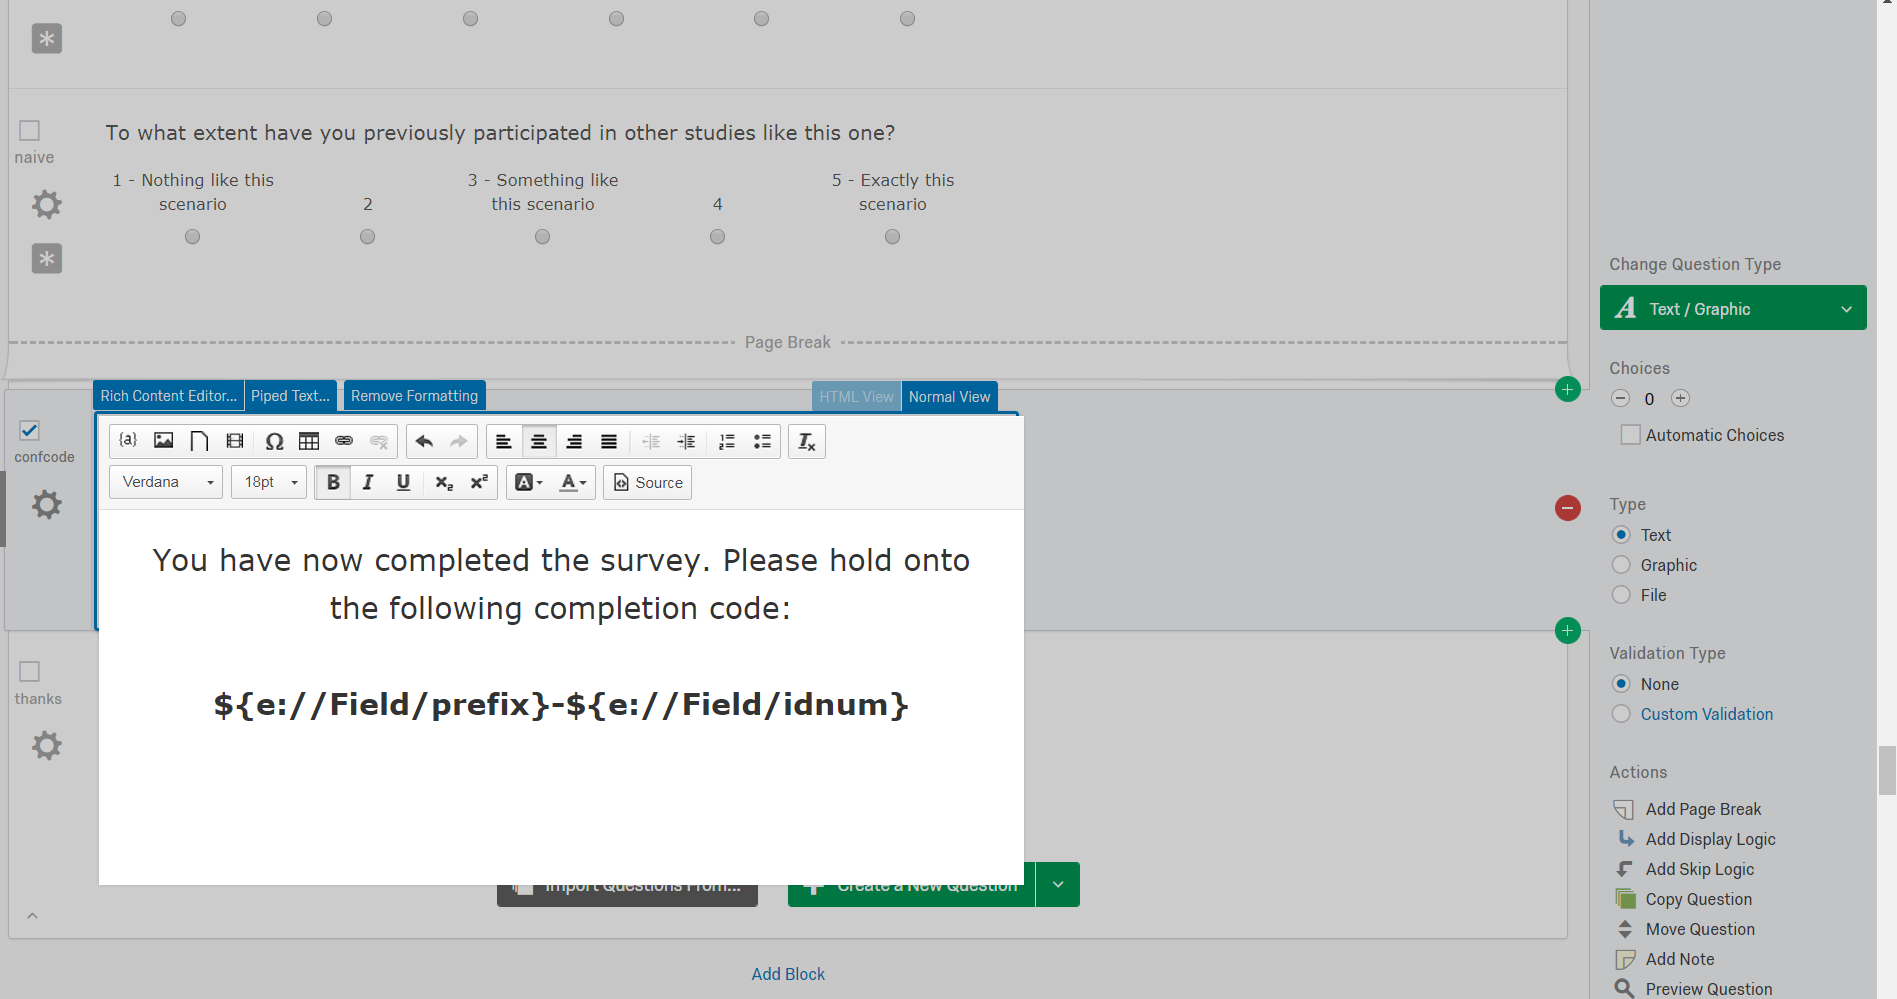
Be sure to add a prefix to your embedded data in the Survey flow. Try to choose something related to the study (ex: celeb, emp, smt, bobrc).