As I entered the kitchen of the First Congregational Church on the first day of this year’s Life of Pie winter study, I knew I was in for a treat. For the record, I had never made a pie before prior to this week but I have been cooking and baking other things for a very long time. That said, the world of pie-making just lured me in – making pies is an intricate an art as painting or sculpting and I could not have been more excited to make my first ever pie this week.
Earlier this week, we learned how to make a basic flaky pastry crust for our pies. My team mate, Neftaly, and I made both an all-butter and a half butter, half shortening pastry crust just to the difference we would get. Making the pastry was actually much easier than I thought it would be but having a tutorial from DGM was certainly the only reason it was so. Getting a feel for the texture of the pastry dough at different stages and understanding the chemistry behind keeping the fat cold and solid was fascinating.
The next step, obviously, was deciding what pie I wanted to make. I had SO many choices. But I knew I wanted to make a double-crusted pie with fruit in it and I also wanted to use fruits that were in season. I looked up a few different recipes including a Pear and Raspberry pie, Peach and Blueberry, and Apple and Raspberry in hopes of finding the answer regarding which pie I should make once I went shopping. A trip to Stop & Shop (thanks to Steph for the ride!) helped me solved the dilemma as I walked through the fruit aisle and saw some gorgeous pears. The recipe I had called for only 6 Bartlett pears but for the sake of having a variety of textures, flavors, and aromas, I picked 3 Bartlett pears, 1 Red pear, 1 Anjou pear, and 1 Bosc pear. I also found some fresh organic raspberries and I knew making this pie was going to be interesting experience.
Overnight, I binge-watched a few pie-related episodes of The Great British Bake-Off and educated myself on how to avoid a soggy pie bottom due to a liquidy filling especially in fruit pies. Some research allowed me to learn that an egg-white wash, a chocolate wash, blind-baking, and adding cornstarch to the fruit, all seemed like viable options to avoid the disaster of a soggy bottom.
And then it was finally bake day! One thing I would say is that I really underestimated how much time it takes to make pies because it took almost four hours in total just to make one pie! Most of the time was probably spent because I was being as careful as possible and trying not to mess up and also because the baking time of the pie was almost 2 hours.
So I decided to follow the Pear and Raspberry pie recipe by Martha Stewart because it seemed like it would work. I started off by taking my pastry out of the fridge which had been in there for two days. Then I washed my raspberries and pears and dried them out.
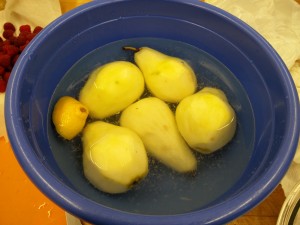
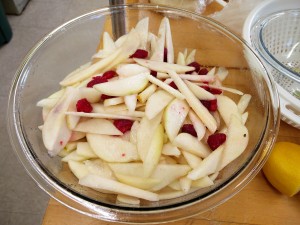
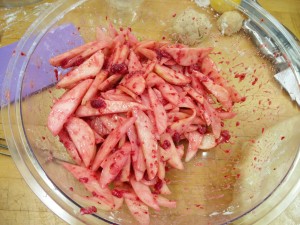
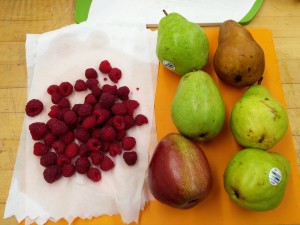 I set up a bowl with water and some lemon juice before I started peeling the pears in order to avoid browning. Once all the pears were peeled, I removed them from the acidified-water one-by-one and cut them in somewhat big slices. I was not entirely sure about the size of the slices but some advice from DGM helped me realize that it did not really matter as long as all the slices were similarly sized. I put the pear slices and the raspberries in a bowl and put in 1/2 cup of sugar. The recipe doesn’t call for this step but I wanted to remove as much juice as possible from the fruit so I just let the fruits and sugar sit for almost 30 minutes.
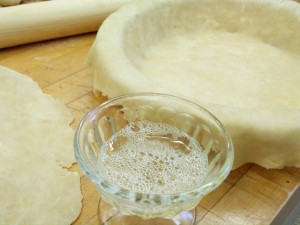
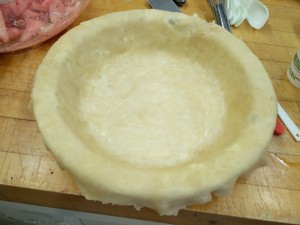
In the meantime, I rolled out my first pastry crust. Following a tip I found on the internet, I rolled only in one direction in order to avoid “confusing” the dough and to avoid forming gluten that would toughen up my crust. I placed the rolled out pastry in my pie plate, trimmed off the edges leaving some overhang and put it in the fridge to chill for a few minutes.
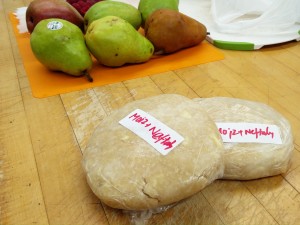
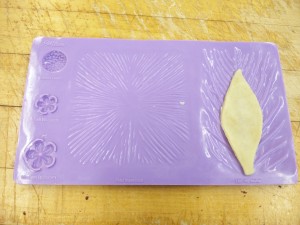
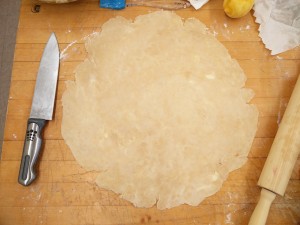 Meanwhile I rolled out my second pastry dough and even the recipe called for heart-shaped pastry cut-outs, I did not have a heart-shaped cookie cutter but did have a leaf-shaped cutter and even a leaf pattern-maker (thanks to Neftaly!) so I decide to use that and cut out around 50 leaves. Jordan helped me put patterns on the leaves (thanks!).
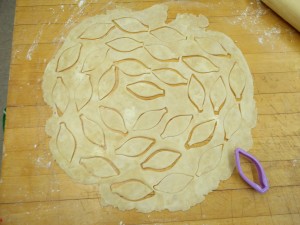
 I took the pie plate out from the fridge and made an egg-white wash with a little bit of water and brushed a very thin layer of this on to the bottom of the pie. The egg wash contains proteins which do not interact with water and hence form a protective layer against the fruit juices while cooking. I put this pie plate back in the fridge to harden the egg wash. I also put the leaf cut outs on a baking sheet lined with parchment paper and put them in the fridge to harden.
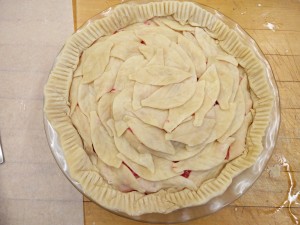
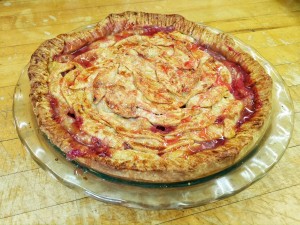
Now, I whisked together some corn starch, cinnamon and salt in a bowl and added the fruits which I had just drained over a colander. I reserved the fruit juice in hopes of making a sauce later. I tossed the fruits and corn starch mixture together. I took out the pie plate from the fridge and put in the pie filling. I forgot to put in dots of butter at this point but I remedied that later. I arranged the leaves in sort of a circular pattern until the whole pie was covered. The overlapping of the leaves created natural vents so there was no need to score the crust on top. I mixed together an egg yolk and some milk and brushed this wash on top of the pie.
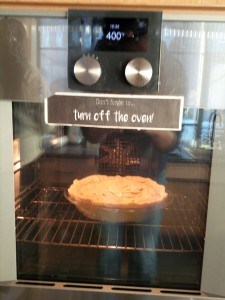
At this point I had to go to the Zilkha center kitchen because we ran out of time in the church’s kitchen. I wrapped my pie with plastic wrap and took it to the Zilkha center kitchen. As I peeled off the plastic wrap, a few leaves came off naturally so I just put in some butter into those gaps and then sealed the leaves back on. I also sprinkled some granulated sugar on top of the pie and then it was time for baking. 25 minutes on 400F and then around 1 hour 15 minutes on 360F till the pie looked golden brown and beautiful juices were oozing out and bubbling.
I took out the pie, let it come to room temperature before wrapping in plastic wrap and now it has been sitting on my window sill overnight ready to be eaten! Let’s hope it gets the seal of approval from my class mates.
Link to Martha Stewart’s recipe: http://www.marthastewart.com/335569/pear-raspberry-heart-pie
Pear-Raspberry Heart Pie
Ingredients:
- Homemade double-crust pastry dough
- All-purpose flour, for surface
- 1/2 cup granulated sugar
- 3 tablespoons cornstarch
- 1/4 teaspoon salt
- 1/4 teaspoon ground cinnamon
- 3 pounds (about 6) ripe Bartlett pears, peeled, core removed, and cut into 1/4-inch slices
- 6 ounces (1 1/2 cups) raspberries
- 2 tablespoons fresh lemon juice
- 1 ounce (2 tablespoons) unsalted butter, cut into small pieces
- 1 large egg yolk
- 1 tablespoon water, plus more for brushing
- Sanding sugar, for sprinkling
Directions:
- 1. On a lightly floured surface, roll out 1 disk of dough to a 13-inch circle, 1/8 inch thick. Fit dough into a 9-inch pie dish, and trim edges, leaving a 1/4-inch overhang, and refrigerate. Reserve scraps. Roll out second disk to 1/8-inch thickness. Cut out 48 2-inch hearts, using scraps from bottom crust if necessary. Transfer to a parchment-lined baking sheet, and refrigerate until firm.
- 2. Whisk together granulated sugar, cornstarch, salt, and cinnamon in a large bowl. Add pears, raspberries, and lemon juice, and toss to coat. Spoon mixture into pie shell, piling high in the center. Dot with butter. Tuck overhang under dough so edges are flush with rim. Brush lightly with water. Arrange 22 hearts around edge of pie: Press hearts gently on edge, alternating direction and overlapping slightly. (To help hearts stick, lightly brush each with water as needed.) Repeat, overlapping 16 hearts for the second circle. Repeat, overlapping 10 hearts, points in, for the final circle. (The hearts’ points will create a star-shaped vent in the center, about 1 1/2 inches wide.) Whisk yolk and water in a small bowl. Lightly brush entire piecrust with egg wash, then sprinkle with sanding sugar.
- 3. Alternatively, make the cut-out-heart pie: Following the directions in step one, leave the top crust whole and cut out hearts in center of dough using heart cutters in varying sizes. Transfer top crust to a parchment-lined baking sheet, and refrigerate until firm. Prepare the filling as in step 2, but do not tuck overhang under dough. Brush edge of shell lightly with water, then drape top crust over filling, centering design. Gently press dough around filling to fit, and trim excess dough, leaving a 1/2-inch overhang. Tuck overhang under bottom crust so edges are flush with rim, then crimp edges. Whisk yolk and water in a small bowl. Lightly brush entire piecrust with egg wash, then sprinkle with sanding sugar. Transfer pie to freezer until very firm, about 30 minutes.
- 4. Preheat oven to 400 degrees with rack on the lowest third. Place pie on a rimmed baking sheet, and bake until crust turns light gold, 20 to 25 minutes. Reduce oven temperature to 375 degrees. Bake, rotating halfway through, until crust is golden brown and juices are bubbling, about 1 hour and 25 minutes. Let cool before serving.
Leave a Reply
You must be logged in to post a comment.