The Importance of Remote Monitoring

A screenshot showcasing the Prusa Connect web portal for a Prusa XL printer.
This past academic year, I enabled remote monitoring for our Prusa XL and Prusa MK3S printers. I did this because it makes life a bit easier for us student workers. 3D printers are a fickle technology, and failed prints are common due to an object failing to adhere to the print bed, the filament becoming tangled, or a variety of other common issues. Because of this, many Makerspace workers have resorted to stopping by the Makerspace multiple times during long prints, making sure everything is going according to plan. For this reason, Prusa has designed a piece of software called PrusaLink that can connect both their older and newer printers to the Prusa Connect web portal. Upon learning of this, I began to work towards connecting our printers to the Internet so we could check on the status of prints in real-time and even cancel failing prints, all from our phones.
Bringing the Printers Online

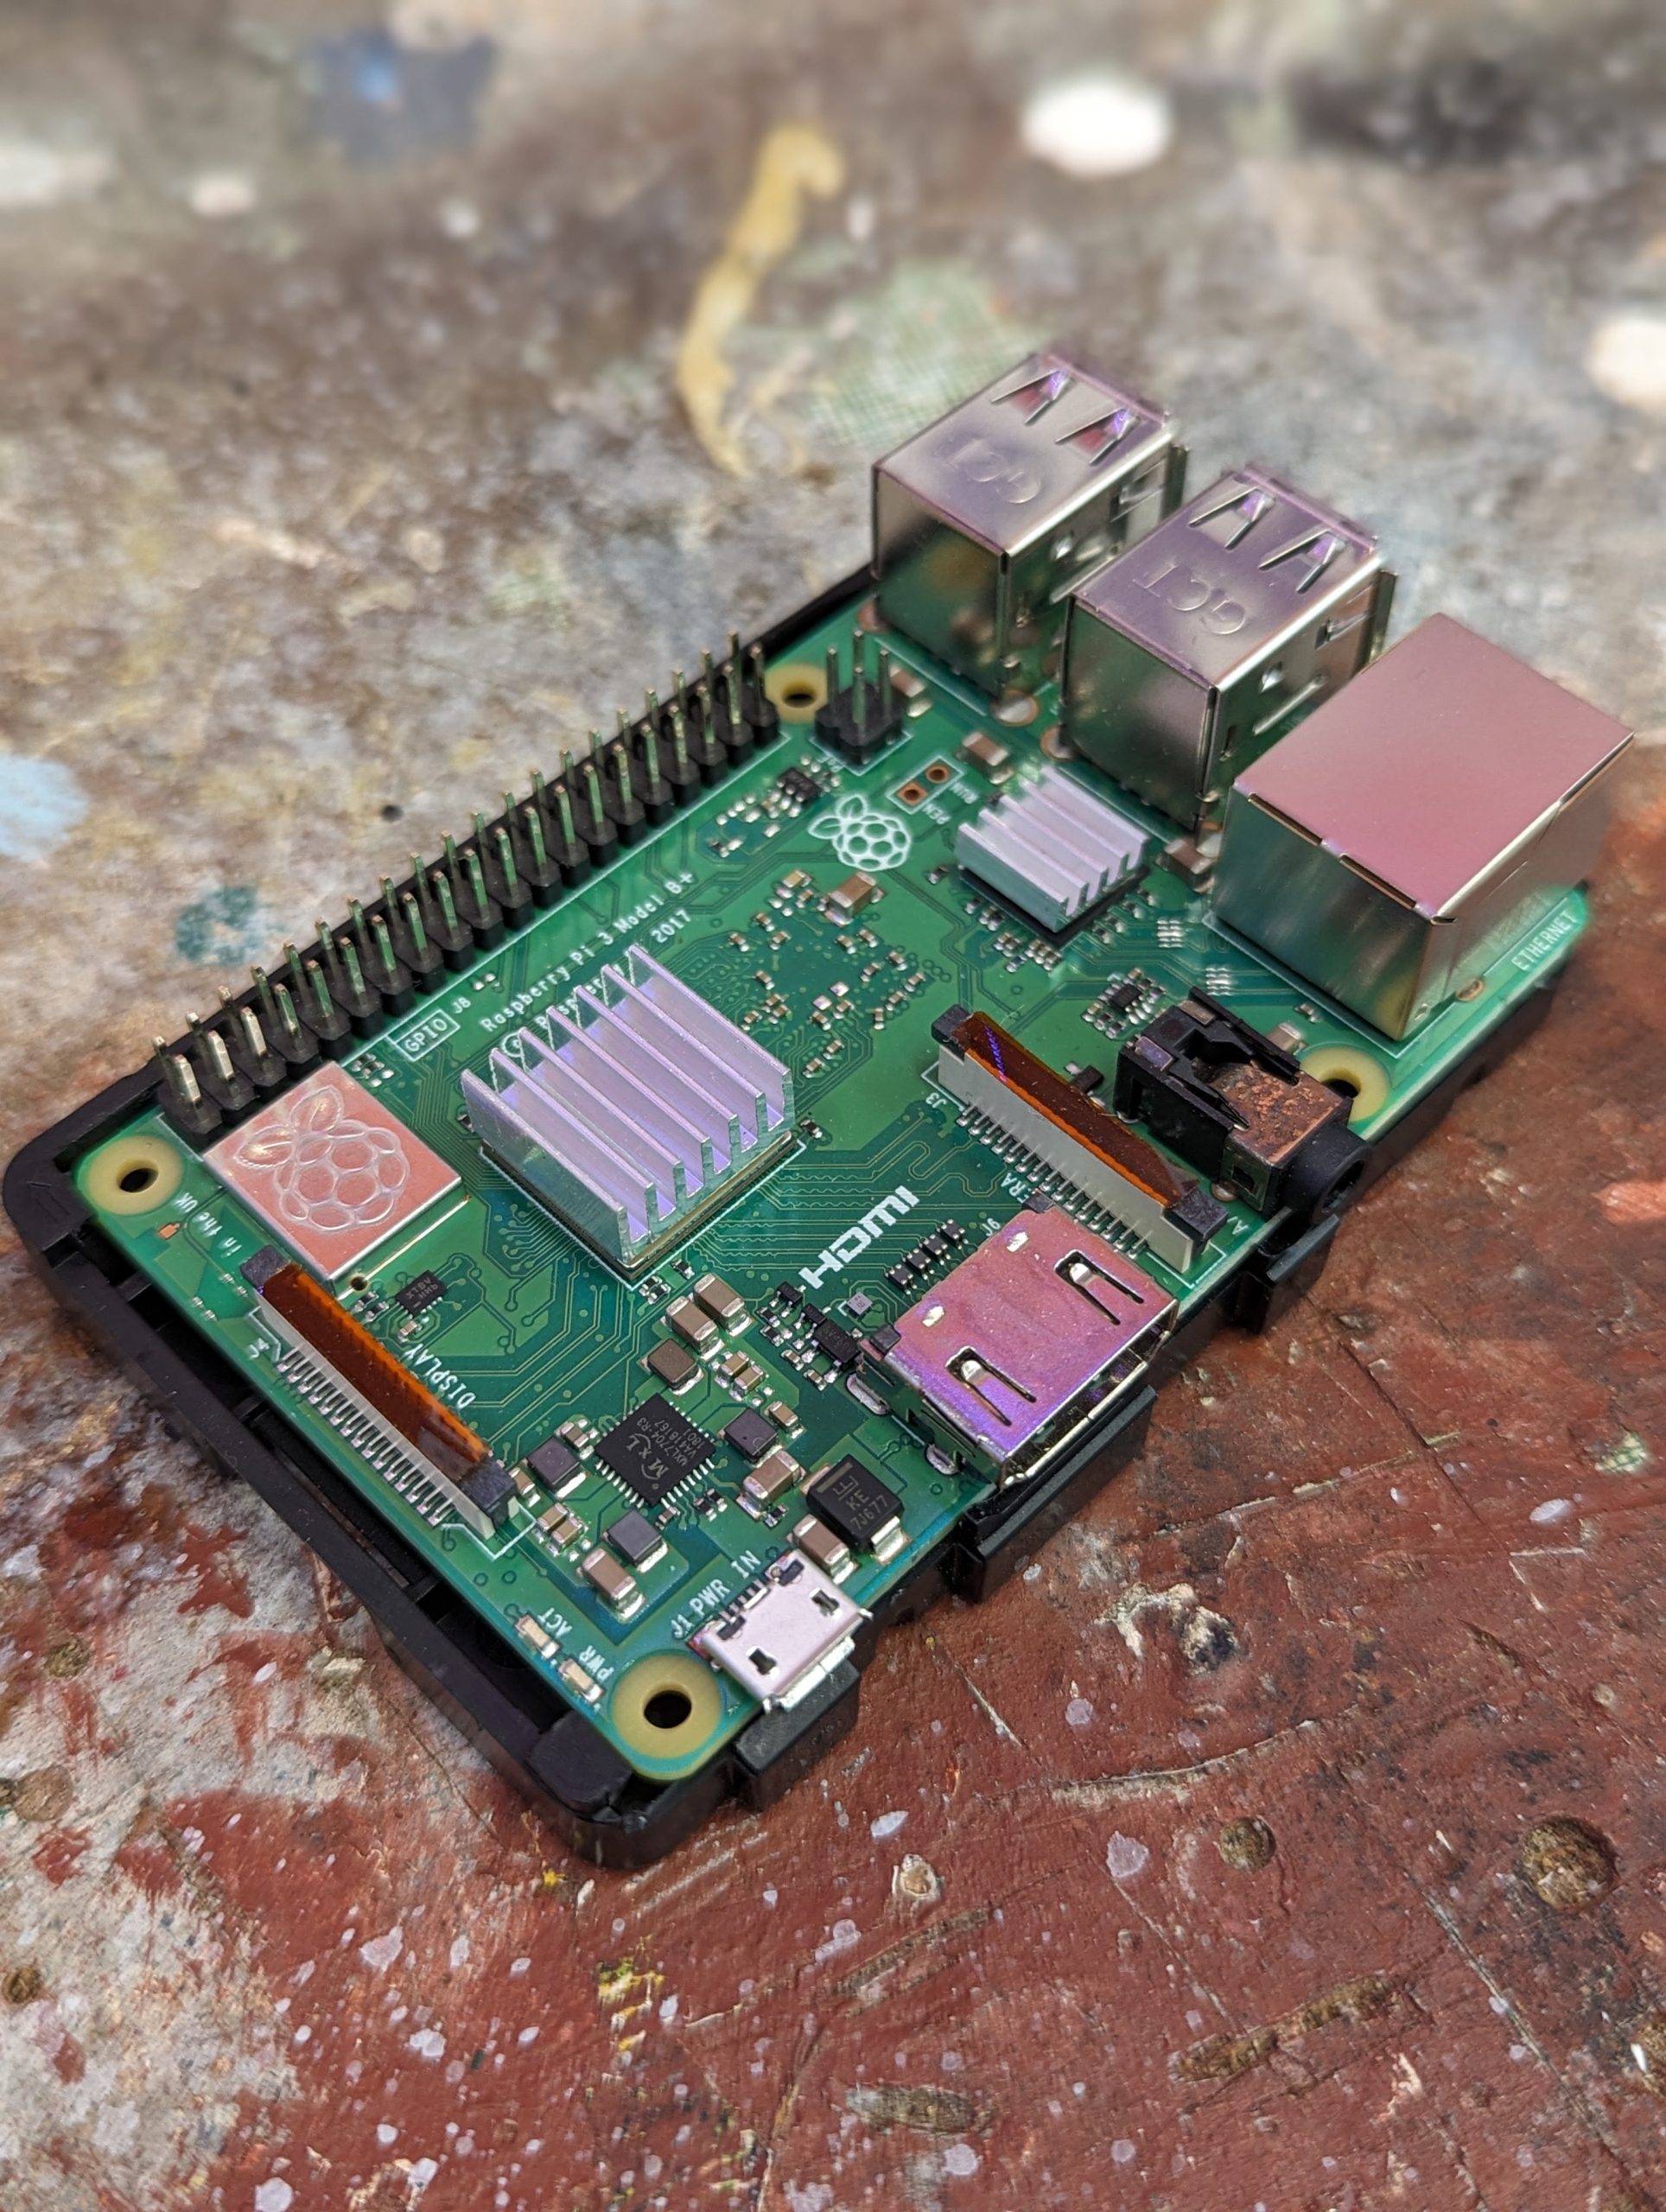
A close-up view of the Raspberry Pi Zero 2W Single-Board Computer with a 3D-Printed Bracket attached to it and 4 pins soldered to the board.
For our Prusa XL, this task was easy. The Prusa XL, being a newer printer, has native support for Wi-Fi and simply requires connecting it to the Williams College network. However, some modifications were necessary for our older Prusa MK3S printers. For each of those, I connected a Raspberry Pi Zero 2W single-board computer. This small board, the one pictured above, is an entire computer that can connect to the back of our 3D printers using four pins I soldered to it. These pins transfer power from the 3D printer to the tiny computer, as well as data about the printer which is then sent over the Internet. This is achieved through a software called PrusaLink, a custom Linux-based operating system developed by Prusa that runs on the board.
I soldered these pins, installed the operating system onto a micro-sd card, and mounted a 3D printed bracket designed to prevent electrical shorts with double-sided tape. I then plugged the boards into the back of the 3D printer and powered them back on. Once powered on, we connected to the IP address listed on the printer’s screen, configured them for remote monitoring, and were able to start monitoring! We could now view the current status of the printers, control them, and upload files to them remotely! However, there was still one problem – we could not yet visually monitor the prints.
Installing Cameras

A 3D-printed camera mount attached to a Prusa MK3S.
For all of our printers, we ended up designing custom mounts for the camera module we purchased, the Arducam OV5647. This module was chosen because of its cheap price, good-enough visual quality, and direct connection to the Raspberry Pi’s camera connector via a ribbon cable. Our main design principles were that we wanted a mount that followed the nozzle so the current layer was always in the center of the camera, while still showing the print below. I attached this mount to the X motor carriage on the Prusa MK3S, as this allows the camera to stay focused on the printhead. The hexagon pattern matches Prusa’s design language with their printers while preserving airflow, as the fan on the printhead can move very close to the camera mount. I have released this design to the public, and you can find both the STL and Fusion 360 files on the Printables website.

A case designed to hold a raspberry pi zero and a camera module monitors a print on the Prusa XL.
For the Prusa XL, a different design was used. The XL has all the functionality of PrusaLink built in, but without a way to directly connect a camera. Therefore, we used the same single-board computer, a Raspberry Pi Zero 2W, running the 64-bit release of Raspberry Pi OS Lite. This gives us a very lightweight operating system that is accessible through the command line for running software. On this computer we set up this code by a github user, which uses the API provided by Prusa to send snapshots from the camera every 10 seconds to the Prusa Connect web portal. I found this mount for a standard webcam on the Printables website, and built my design based on this, adding a box where the webcam would normally mount onto it that holds the Pi Zero and the camera module. This design ended up working perfectly, and is what we are using today.
Real-Time Slack Notifications

A photograph of a slack notification for our Prusa XL printer.
The remote monitoring system shares temperature data, the percentage of the project remaining, visual photographs, and also notifies us if the printer encounters an issue or if the print fails. If, for example, the spool runs out of filament in the middle of printing, the print pauses and we get a Slack notification letting us know details about the issue. The notification contains a link to the Prusa app (on our phones) for more information. This lets us solve these problems when they come up, instead of finding out the next day.
Conclusion
Connecting our printers to the Internet has been a major help at the Makerspace. It makes monitoring easier, allows us to upload files directly from our laptops to the 3D printers (via our network), and lets us confirm that prints are going smoothly or catch issues before they become a major problem — without having to step foot in the office. Remote monitoring for our 3D printers has been a massive help in allowing us to continue providing high-quality 3D prints for our community.
Next Steps
This summer the Makerspace will be upgrading our MK3S Printers, and building two new high-speed Prusa MK4S 3D printers. I plan to connect all of our 3D printers to our remote monitoring system. If you are interested in connecting your own Prusa 3D Printers to the Internet with Prusa Connect, you can find official guides on how to do so here for all compatible models.