Category Archives: Software

Posts about software and software distribution at Williams College

Windows 10 – SMB Guest access denied by default

Windows 10 now, by default, denies an SMB client from connecting to an SMB server with “guest access”.  See:

https://support.microsoft.com/en-us/help/4046019/guest-access-in-smb2-disabled-by-default-in-windows-10-and-windows-ser

The temporary fix is to change the registry to allow guest account access

With windows regedit I set :
HKEY_LOCAL_MACHINE\SYSTEM\CurrentControlSet\Services\LanmanWorkstation\Parameters
“AllowInsecureGuestAuth”=dword:1
(by default this is set to “0”)


Mac – JAMF manual agent installation

Sometimes, (in my case when using DEP enrollment on a slow wifi connection) the Jamf agent doesn’t get installed properly during DEP enrollment. To fix that here is what I did:

I first ran the following commands to manually download and “install” the Jamf binary from the Jamf server – All commands must be run as root! (“#” indicates a comment in script fashion not a command to run. Also be sure to replace “<Your JAMF Server>” with the address of your Jamf server)

# Get the jamf agent binary to the right location
mkdir /usr/local/jamf
mkdir /usr/local/jamf/bin
mkdir /usr/local/bin
curl https://<Your JAMF Server>/bin/jamf -o /tmp/jamf
mv /tmp/jamf /usr/local/jamf/bin/

# Set the binary to be executable
chmod +x /usr/local/jamf/bin/jamf

# Create a symbolic link for the binary so the “jamf” command is in the default path
ln -s /usr/local/jamf/bin/jamf /usr/local/bin/jamf

# Create the configuration file the jamf binary uses to find the server
/usr/local/bin/jamf createConf -url https://<Your JAMF Server>

# Re-enroll computer to get the server certificate
/usr/local/bin/jamf -enroll -prompt

Once the Jamf agent is installed, the computer was checking into the Jamf server. However I wasn’t able to scope it to policies because it was listed as “unmanaged”.  To change that, on the Jamf server I edited the computer’s “General” information tab by checking the box to set it to “Managed”and entering a local administrative username and password on the computer for Jamf to use to mange the computer. Also, since we use “Sites”, I manually set the site for the computer as well.

Now that the Jamf agent was installed and I set the computer record to “managed”, I was able to scope policies, etc to the computer as I normally do.


Packaging – Comic Life 3

To Package Comic Life 3 –

Here at Williams the concurrent usage of Comic Life 3 is controlled by the KeyServer. Therefore, we distribute a “keyed” version of the application. The application will only run if the individual is running the KeyAccess client and connected/logged into the Williams network.

For Mac OS –

  • On a test system or virtual, install the Comic Life 3 application by double clicking on the supplied installer from the vendor.
  • Run Comic Life and register it with the current license information.
  • Ensure that the application opens and is registered.
  • Copy the Application to the Desktop and, using the KeyServer Admin Client, key that copy.
  • Copy the unkeyed application and put it in a safe place in case this is needed later.
  • Delete the unkeyed application form the Applicatios folder
  • Copy the keyed application from the Desktop into the /Applications folder
  • Using your favorite package tool (Packages, Jamf Composer, etc), package the keyed application from the Applications folder and the “plasq” from “/Library/Application Support/”. This plasq folder contains the register license information.  Set permissions correctly to everyone read and save this as a package

Windows – Windows to Go – Portable Windows on an external disk

“Windows To Go” is a portable windows environment that Microsoft developed. While Microsoft says they are no longer developing this, it is still available for use on recent versions of windows 10. For the Microsoft overview see: https://docs.microsoft.com/en-us/windows/deployment/planning/windows-to-go-overview

I have used this to specifically create “portable” windows environments that boot most hardware from an external SSD drive. I say portable meaning that with “windows to go”, the windows OS installed on the external drive drops back into a setup mode when it detects that it is being booted on different hardware. This setup mode at boot time then tries to bring in the needed hardware drivers auto-magically for the new hardware this disk is being booted on. This is largely successful on most hardware as long as the network driver is sufficient to get a network connection. I have booted the very same Windows to Go disk without having to install anything new on Dell precisions, Dell optiplexes, Apple iMacs, Apple mac minis, Apple Mac Pros, etc.

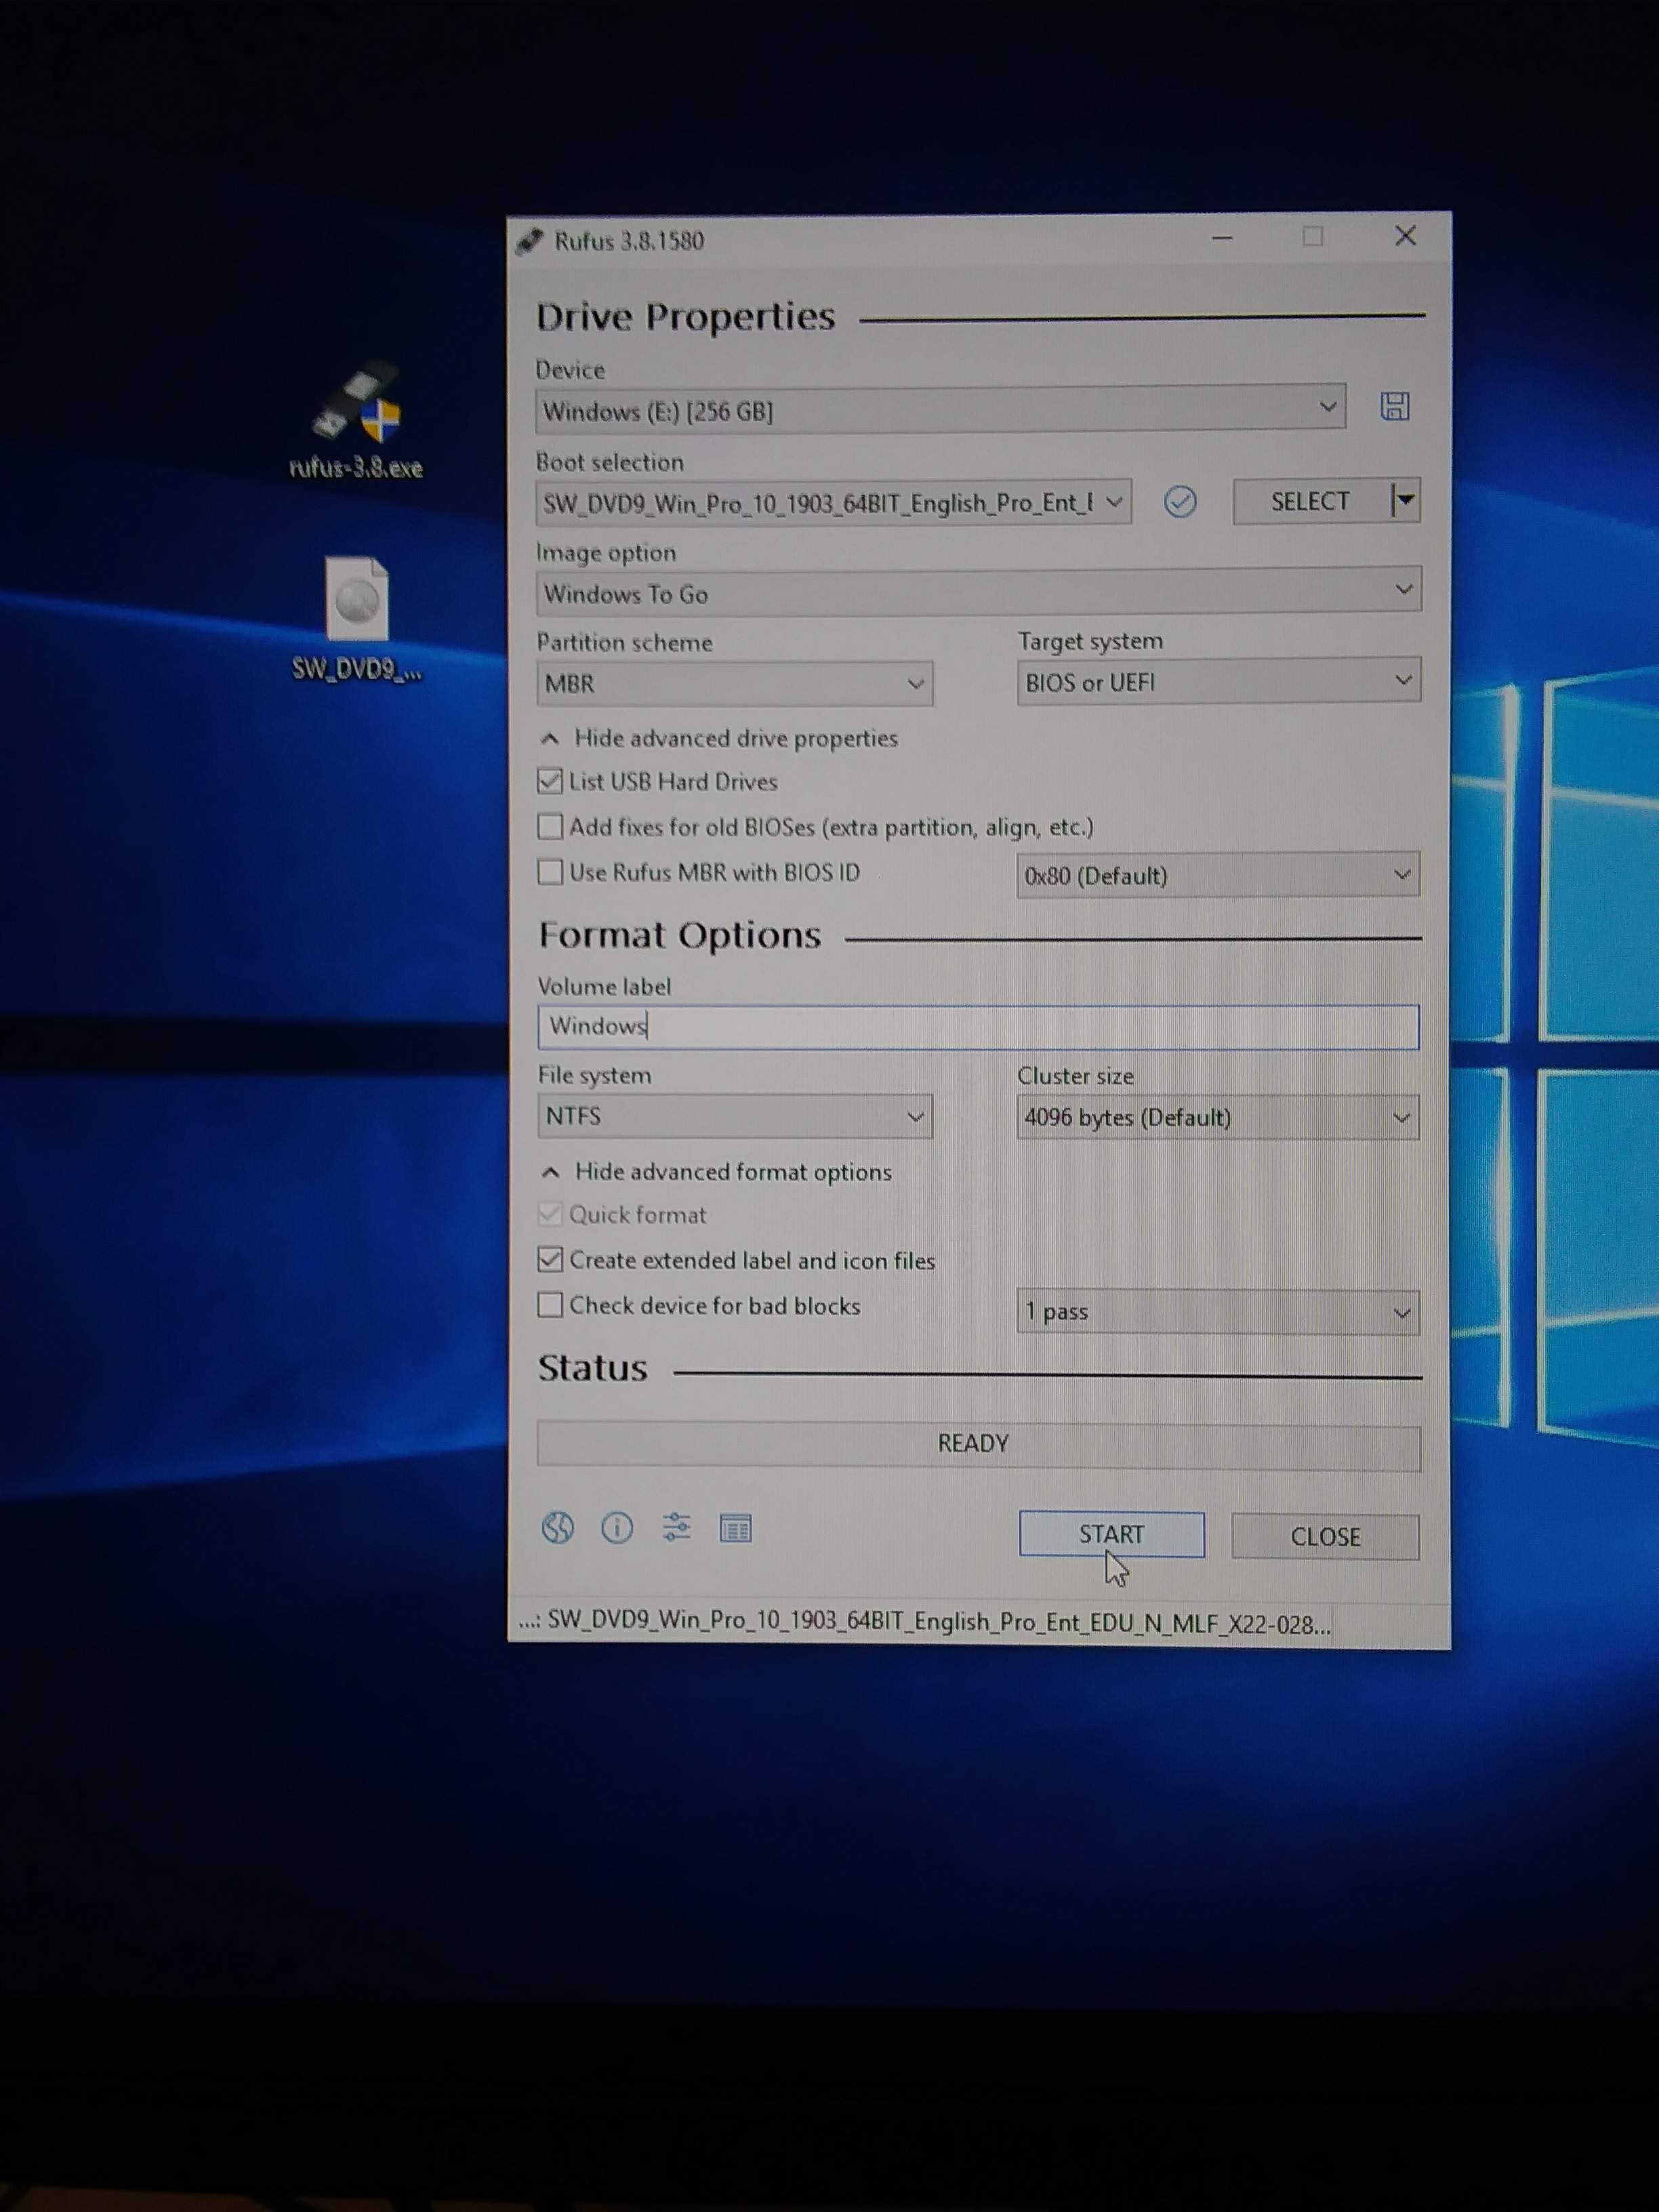
While there is a built in process to create a “Windows to Go” disk in Windows 10 (type “Windows to Go” in the start menu search box), I have most recently been using the free utility Rufus to build these disks directly from our institutional windows ISO. Rufus can be found at: https://rufus.ie/ and below is a screen shot of the settings I have been using.

You will also need a copy of the Windows ISO for your institution, and, if applicable, your windows activation key. (We use KMS servers at Williams to serve our Windows and other MS software license activations so we don’t need to hand out the windows activation keys!)

Anyway, with Rufus, your Windows ISO, and a fast external SSD drive (Samsung T3) use these settings to create your portable windows environment on a bootable external disk:

Mac – Installing Spartan ’18 from JAMF

To install Spartan ’18 with a network license server correctly as a push from Jamf:

1) First create a package that installs the Spartan ’18 application to the /Applications folder and push that from Jamf
2) Create a script (example below) that calls the licensing script in that application
3) Create a policy to push the packaged application and then run the script

#!/bin/sh
cd /Applications/Spartan\ 18.app/Contents/Resources/Support
pwd
echo “running ./cliinstall.sh –network-server=lm3.williams.edu”
./cliinstall.sh –network-server=lm3.williams.edu

(You will want to change the network-server address to the correct address for you installation)

Mac OS – Kernel Extensions

In 2018 Apple introduced secure kernel extensions to their MacOS. Earlier applications could install kernel extensions without the user knowing or specifically being required to “approve” that extension. Think of kernel extensions like drivers and other very deep operating system code that controls significant parts of the operating system. The increased awareness and security of kernel extensions is/was required because malware had begun to exploit these extensions.

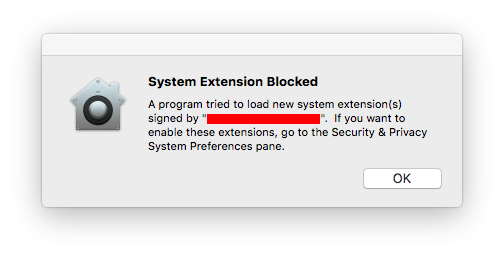
Since about MacOS 10.13.4, any kernel extension had to be “approved” by the administrative user of the mac. In general, users had 30 minutes after software install to “Allow” the installed Kernel Extension in the Security tab in System Preferences with a reboot or reload of the extension resetting that “Allow” clock.
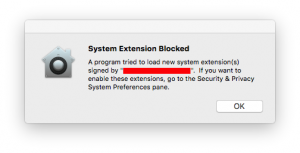
Additionally, Macs that are enrolled in an MDM server can be configured to pre-approve Kernel extensions.

Several things to note:

Kernel Extensions MUST be pre-approved prior to a pushed application install
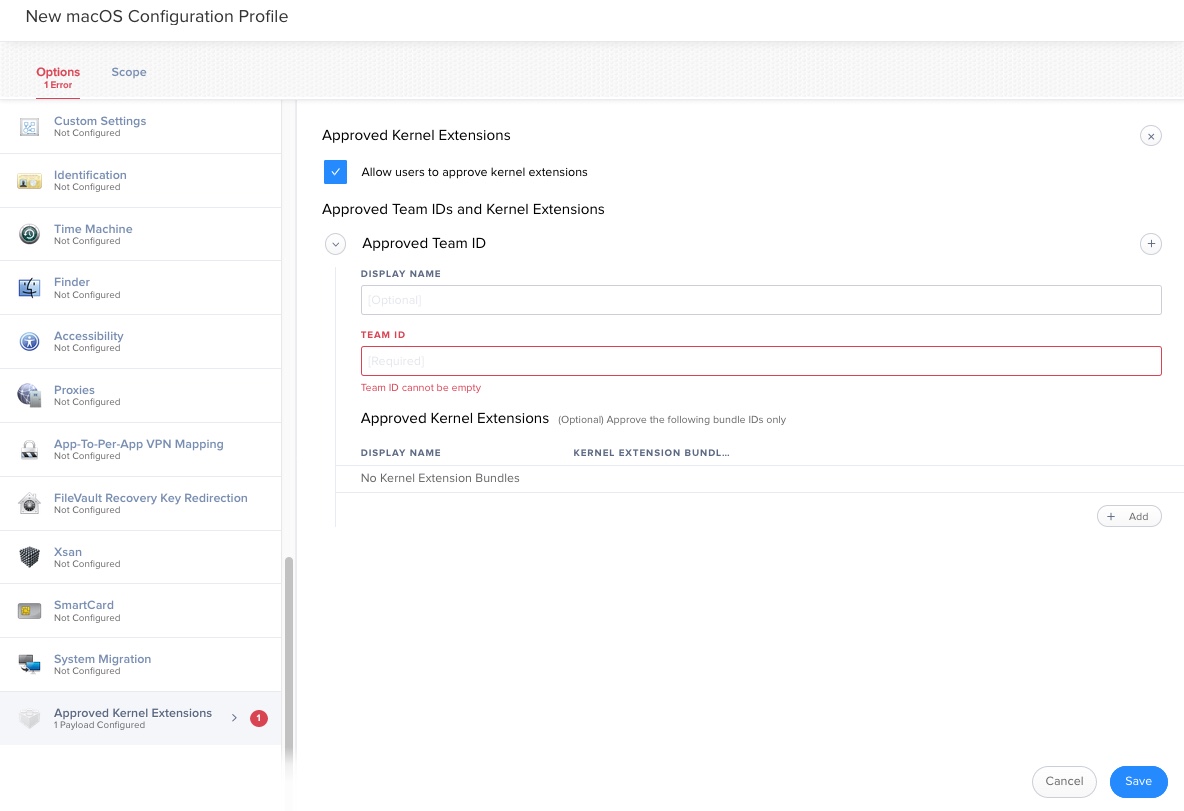
In order to correctly install software that requires kernel extensions using an MDM server like JAMF, you must first pre-approve the kernel extension before installing the software. There isn’t anyway, either manually or automated, to approve a kernel extension after the fact for software installed with the MDM. Conveniently, newer versions of JAMF provide a very easy way to create a configuration profile to approve the kernel extension just with the associated “Team_ID”.
DEP enrolled Macs happy to comply, User-enrolled macs must be sure to “approve” MDM
For MDM controlled macs, only DEP (Device Enrollment Program) enrolled macs can be reliably configured to avoid asking the user to “approve” the kernel Extension. Macs enrolled in the MDM with any other user-controlled enrollment process (i.e. install package, email invite, etc.) can be in a state where the configured pre-approval of kernel extensions will not work. For example, if the user never approved the MDM profile. Look at the Profiles tab in System Preferences.

Pre-approval isn’t installation

You can pre-approve a kernel extension using an MDM server and that will appear in the “Profiles” tab of System Preferences. However, the kernel extension isn’t actually installed until you install it with the installation process from the vendor. Meaning that it won’t show up in the KextStat or Sqlite commands below until it’s actually installed. (That is probably obvious to most but I spent a good 10 minutes on this before it dawned on me!) Pre-approval of the kernel extension essentially avoids asking the user to approve the kernel extension with the 30 minute timer mentioned above. Essentially, the pre-approval process doesn’t load the kernel extension onto the system it just says that once the kernel extension is loaded/installed no additional approval from the user will be needed.

Uninstalling doesn’t remove from sqlite database

When you uninstall a kernel extension, while the extension may be removed the entry in the kextpolicy database is typically not removed. It can become important to remove these database entries. We have found that kernel extensions, even if unapproved, that remain in the kextpolicy database can interfere with the system when new versions of software requiring kernel extensions are installed. Deleting entries from the kextpolicy database can only be done with SIP (system integrity protection) disabled. See below for the details of deleting these database entries.

Some Commands to know:

Kextstat
Displays all running kernel extensions

kextstat | grep -v1 apple
Displays all non-Apple (3rd party) running kernel extensions


/usr/bin/sqlite3 /var/db/SystemPolicyConfiguration/KextPolicy 'SELECT * FROM kext_policy;'

Displays kernel extensions that are installed by the user manually. The returned format begins:
Team_ID | Bundle_ID | Approved (1=approveded, 0=not approved)

/usr/bin/sqlite3 /var/db/SystemPolicyConfiguration/KextPolicy 'SELECT * FROM kext_policy_mdm;'
Displays kernel extensions that are installed by the MDM server as part of a pre-approval process. The returned format begins:
Team_ID | Bundle_ID | Approved (1=approveded, 0=not approved)

To delete a kernel extension from the kextpolicy database: First disable SIP.
Once booted back into the running MacOS:

> sudo -s
# /usr/bin/sqlite3 /var/db/SystemPolicyConfiguration/KextPolicy
sqlite> SELECT * FROM kext_policy;
OR
sqlite> SELECT * FROM kext_policy_mdm;
THEN
sqlite> DELETE FROM kext_policy WHERE team_id = displayed_team_id_from_above;
OR
sqlite> DELETE FROM kext_policy_mdm WHERE team_id = displayed_team_id_from_above;
sqlite> .quit
#
Remember to re-enable SIP!
MacOS – Create a Virtual from a fully loaded Mac

Virtuals are useful for so many things. I often use them to have a clean OS on which to test the installation of various software applications with an extremely fast and reliable way to revert back to the clean OS snapshot.

I recently discovered that using Parallels Desktop Lite (free from the app store) in addition to creating Windows and Linux virtuals on your MacOS host you can also easily create MacOS virtuals.

This Mac on Mac virtualization was documented here:
https://engineering.rallyhealth.com/tools/mac/virtualization/2018/04/27/mac-on-mac-virtualization.html

Using the above as a jumping off point, I was also able to create a MacOS virtual from a disk image of a fully-loaded source Mac using the following steps:

1) Create a basic MacOS virtual (see above) using the same version of the MacOS that is on the source mac. Also, be sure to set the settings to a disk size that will accommodate your disk image. I set my virtual to use 128 GBs since my disk image was close to 95 GBs! I also increased the memory from 2 GBs to 4 GBs at the same time.
2) Complete that entire setup and boot the resulting virtual to ensure it boots!
3) Shutdown that MacOS in that virtual (not suspend, not restart, I mean shutdown!). Use “Shutdown” from the Apple menu!
4) In the Parallels Desktop Lite configuration settings for the virtual you just created, choose to boot the virtual to your bootable, external USB drive that has both the disk image of your source mac and your imaging software of choice (I use Carbon Copy Cloner). Note that I use “read-only, compressed” disk images for this and just about everything else.
5) Once your virtual is booted to your external drive, follow your routine for restoring the disk image to the drive in the virtual. I always completely erase the target drive with something like Disk Utility before restoring a disk image to avoid any strangeness with merged systems!
6) When the restore is complete, shutdown your virtual again.
7) Once again, configure the virtual’s settings, this time to boot to the normal hard disk rather then the external drive that has your imaging software on it.
8) Boot your fully loaded and now virtualized mac desktop!

In my case, I also did a happy dance!

Mac – Tool to help download specific macos installers

It isn’t always easy to get all of the right pieces for a particular MacOS update/install.  For example, if you are running MacOS 10.13.5 already the traditional ways of going to the Map App Store or doing system updates won’t offer you MacOS 10.13.4.

Thanks to dedicated mac folks on the interwebs we now have a tool. See:

https://derflounder.wordpress.com/2018/02/27/using-installinstallmacos-py-to-download-macos-high-sierra-installers/

and

https://github.com/munki/macadmin-scripts/blob/master/installinstallmacos.py

Mac – 10.13.4 – Wipe and clean install of OS

On a mac that is already running 10.13.4 and that has an APFS drive you can wipe the drive and reinstall the OS without having to boot to anything external, external drive or netboot.

Get the MacOS 10.13.4 (or better) installer from the app store and put it in your /Applications folder. This is were it goes by default if you download it. Then give the following command and sit back:

/Applications/Install\ macOS\ High\ Sierra.app/Contents/Resources/startosinstall --applicationpath /Applications/Install\ macOS\ High\ Sierra.app --eraseinstall --agreetolicense --nointeraction

“–eraseinstall” is new in MacOS 10.13.4 and will ERASE the hard drive before installing the OS again.

“–nointeraction” is undocumented but causes this command to run without human intervention (and therefore can not be interrupted!)

This will but the mac back in the out-of-box shrink wrapped state with an erased drive just like the internet recovery process can do.  Once back to being shrink wrapped, you can, for example, let it run through your JAMF pre-stage enrollment process.

More details at: https://support.apple.com/en-us/HT208533