Note one – To install the correct boot loaders and hardware drivers, I recommend doing the actual Linux install on the type of computer you plan to run Linux on. Meaning that, I think, the installer will put boot loaders specific for the hardware you are running the installer on in the boot drive of the newly created Linux external disk. For example, I created an Linux (Ubuntu) disk on a Dell precision tower but it could not boot a Dell Optiplex of the same era!
Note two – Always use USB3 ports (marked SS for “SuperSpeed”) for all connections!
Note three – In the following steps you will be using two different USB drives. One to use as the Linux installer “media” (the thing to install from) and another to actually install Linux on. It is extremely helpful to use two different drives of different sizes and manufacturers. This will help tell them apart so that you can choose the correct disk when installing. In this example, I used a 1 TB “Seagate” drive for the first “Linux Installer” disk and a 250 GB “Samsung” drive for the second disk to actually install and run Linux from.
First – Create a bootable DVD/CD/USB disk with the Linux installer on it. To do that download the Ubuntu ISO or the Linux Mint ISO to a computer and then burn that ISO to disk. (On a Mac you can use Etcher to burn the ISO to a USB drive.) This process does NOT install Linux. It only creates the media from which you are going to install Linux in the next step.
Second – (No matter what computer you used above to create the Linux install disk, move to the type of computer you want to run Linux on before proceeding. This is tested on both a Dell Optiplex and a Dell Precision. Mac hardware will require extra steps to fix the boot loader after install. ) With the SSD external disk you actually want to run Linux on attached to a second USB3 port, boot to the Linux installer ISO disk you created above. This will bring up the “Grub” boot menu.
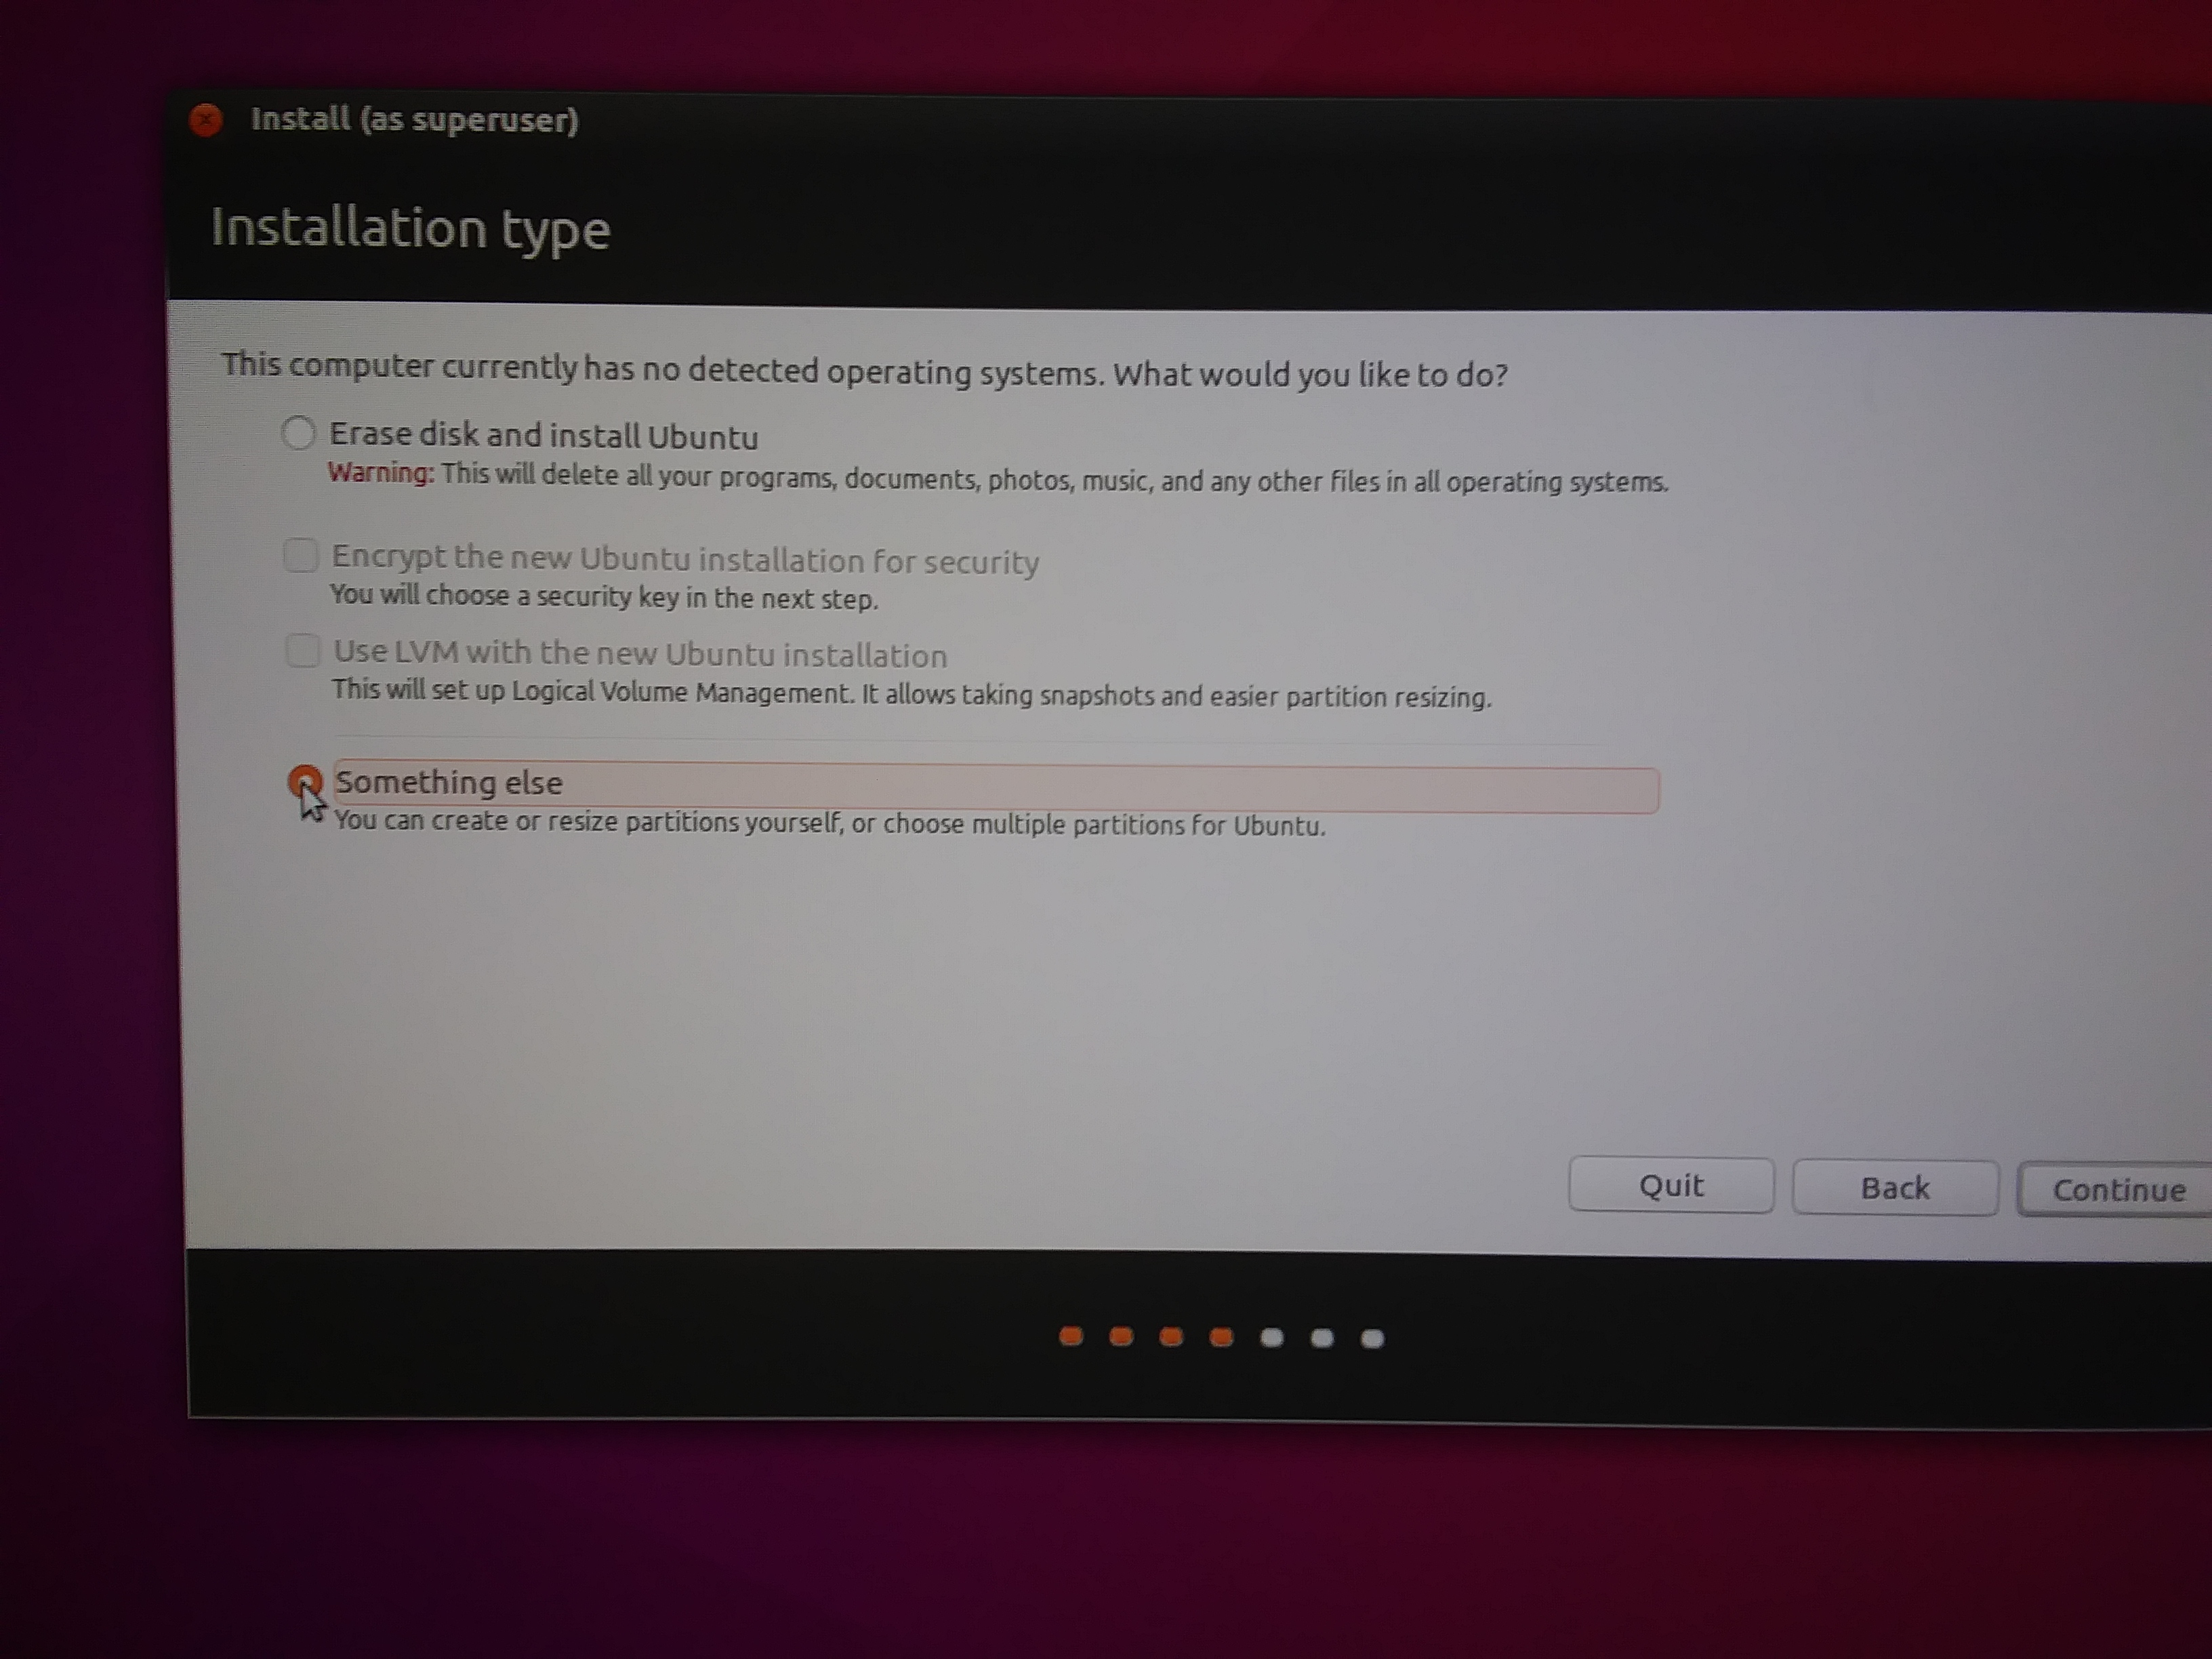
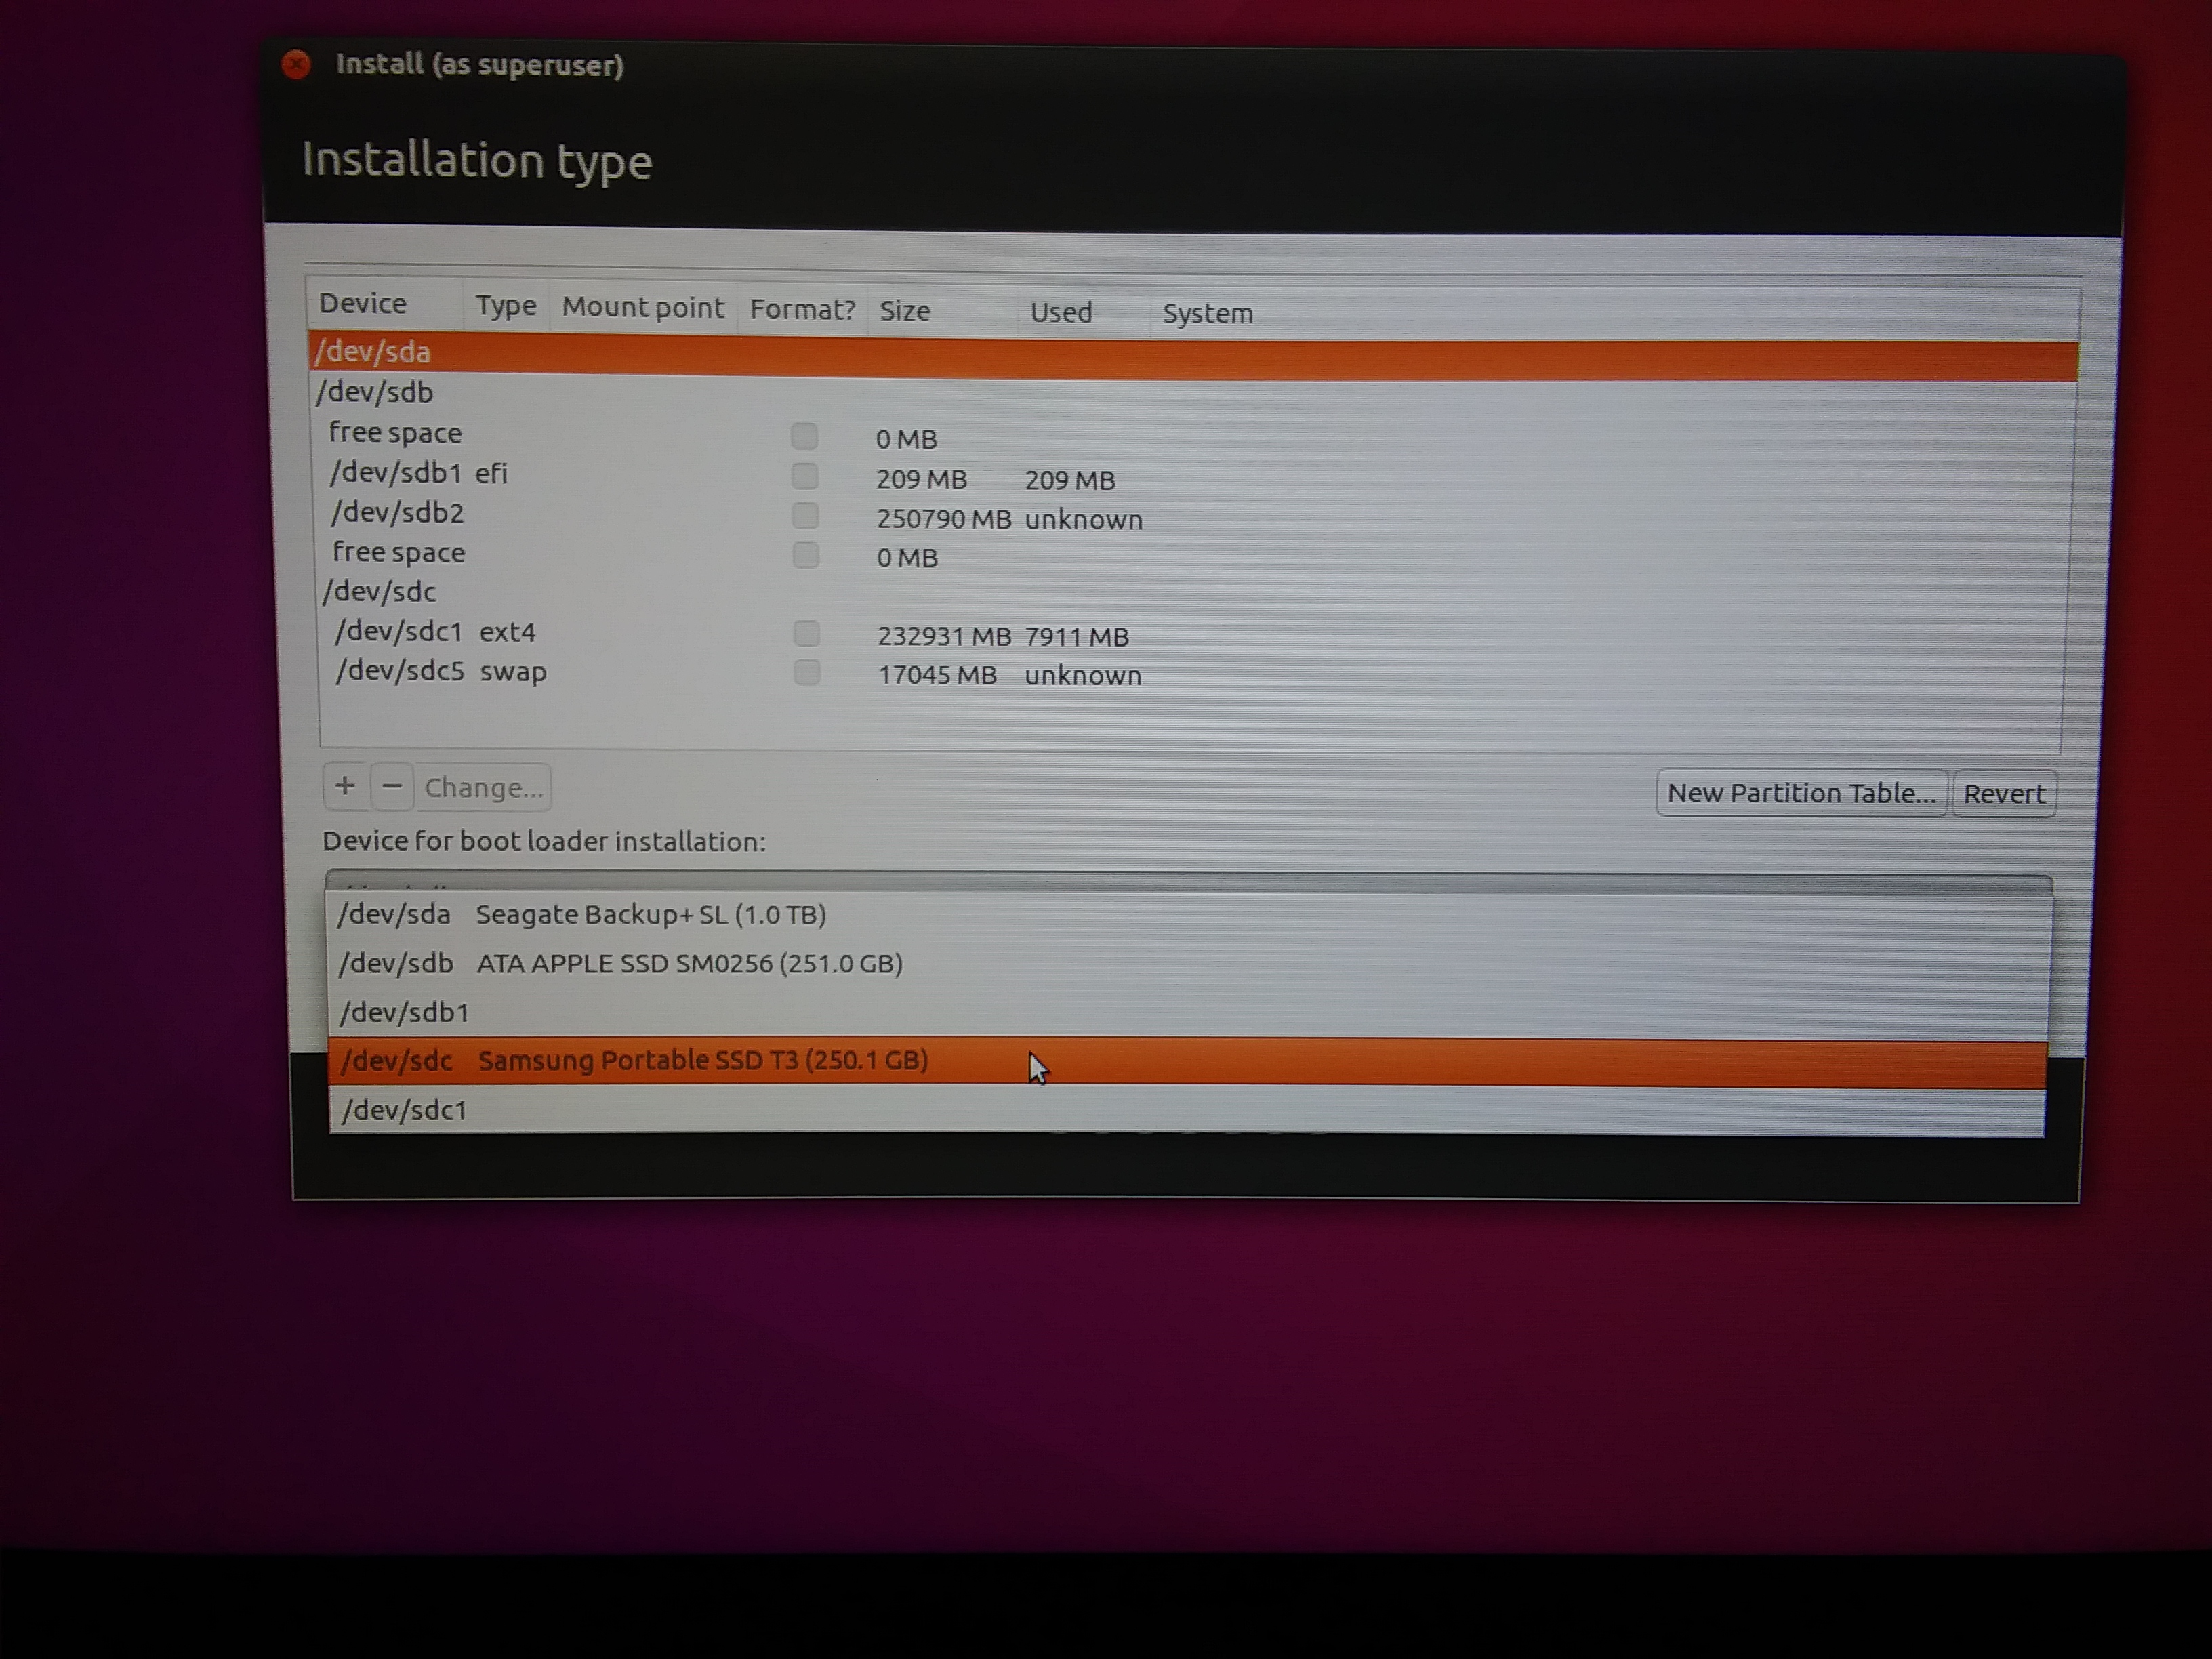
Third – Choose “Install … “. Follow the prompts slowly and carefully. Before running the actual install step, select “Something Else” first and set the option to install the boot loaders to the external disk you will actually be installing Linux on. If you don’t do this you could screw up the internal drive’s boot loaders causing that computer not to be able to boot! Then click on “Back” and select “Erase drive and install …” . Then again be careful to select the external drive you want to actually install Linux on. An erased, internal drive will probably make your day a bit harder then you wanted it to be!
Finally – Boot to the new, fully installed, external SSD Linux disk.