
 Apple’s official how-to guide for GarageBand on the iPad 2.
Seems good.
Some Notes:
(1) Open Screen
-You can swipe through songs once you have more than one
-Four buttons at bottom
1. Export Options –> Send to iTunes / Email Song
2. Import from iTunes
3. Plus Sign –> New Song / Duplicate Song
4. Delete Song
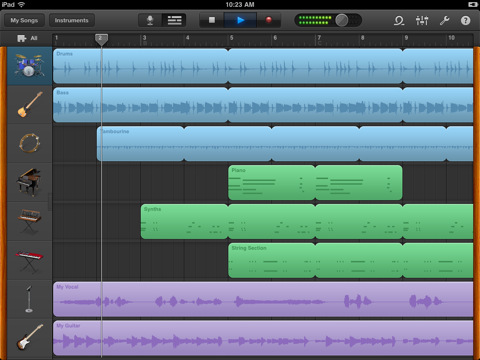
(2) Editing Interface (Buttons from L to R)
-“My Songs” brings you back to the Open Screen
-“Instruments” lets you change the instrument you’re recording with (this will usually be the Voice Recorder for this class’s purposes)
-“Undo”
-“Record/Edit” toggles between recording and editing *** a very important button***
-“Go to Beginning” movies the playhead to the beginning of the song
-“Play” (it’ll keep playing until you tell it to stop)
-“Record”
-“Volume” slider
-“Loop” (only in edit mode) gives you access to add loops to your song
-“Mixer” lets you control the currently selected track
-“Song Settings”
-“Info” (question mark) answers every question you could ever have with little post-it notes next to every button
(3) The audio recorder is pretty self-explanatory. If it doesn’t come up automatically, go to instruments and swipe left or right until you find the microphone icon.
There are two important points:
1. to turn off the METRONOME, tap the wrench in the upper right-hand corner and switch the metronome off
2. if you are going to RECORD SOMETHING LONG – more than “8 bars” – tap the puzzle piece in the upper left, tap the section you want to change (blue circle), and change the length of the song section (32 bar max
(4) The edit mode is a lot like Garage Band on a computer.
–MOVE CLIPS: tap and drag
–TRIM CLIPS: tap and drag edges inward
–BASIC FUNCTIONS OF CLIPS: double tap the clip (Cut, Copy, Delete, Loop, Split)
–VIEW TRACKS: tap and drag column on left to the right
–ADD TRACKS: tap the plus sign in the lower left
–ADD “SONG SECTION”: tap the puzzle sign
–TRACK OPTIONS: you can mute a track (speaker with line through it) or make a track a solo = mute all other tracks (headphones) or adjust the volume of a track (volume bar)
–CHANGE TRACK INSTRUMENT: while a track is selected, tap and hold the instruments button
–ZOOM: pinch two fingers together or pull two fingers apart
***To control where you are, move the playhead (=the tab with a vertical line through the timeline).
(5) To export, choose “Email Song” then you’ll have to do the rest on a computer.
(6) If you have ANY questions, the question mark in the upper right-hand corner should answer them.