Reviving an Ancient Way of Printing

What is this Block?

Tibetan printing block 3D printed using PLA filament

The Tibetan wooden printing block at the heart of this project is a rare artifact estimated to be 100-200 years old, historically used to create prayer flags. Printing blocks represent one of the most significant innovations of the Tang (618–906) and Song (960–1279) dynasties, revolutionizing knowledge-sharing by enabling the mass publication of texts and enhancing literacy (Asian Art Museum, n.d.).

This block was part of a large group of printing blocks that was acquired at auction from the estate of Philip Gould, who was a professor of Art History at Sarah Lawrence before his retirement in 1993. The existing information about the block is based on comparative research and conversations with faculty colleagues who have expertise in the history of the book in the Himalayas. Professor Xiaotian Yin, an art historian specializing in the art of Inner Asia and China wrote:

“The motif at the center visualizes the seed syllable of the Kalachakra system in Tibetan Buddhism, surrounded by the Tibetan transliteration of a Sanskrit Mantra.” The four mystical animals—Lion (seng), Tiger (stag), Garuda (khung), and Dragon (’brug)—adorn its corners, reaffirming the block’s spiritual significance.”

Why is it Substantive to Replicate this Block?   

These historical artifacts are too delicate to use in practical demonstrations. Anne Peale, the Chapin Librarian for the Sawyer Special Collections, would like to create replica of the printing blocks to demonstrate how these would be used. A replica would allow the library to safely make many prints, using a variety of print materials, without worrying about damaging the original blocks.

Anne Peale is also the professor of ASIA 325: The Arts of the Book in Asia for Spring 2025. I asked her about the importance of replicating the printing block and she responded:

“Printing blocks carry the history of how they’ve been used in the ink traces on their surface. Moreover, some blocks become damaged or fragile over time, and we need to ensure that the blocks remain available for future generations of Williams students.”

There are a few features of the printing block that must be preserved. Preservation is a meticulous process, prioritizing the smoothness of the printable surface, the clarity of the text, and the precision of the carved motifs.

3D Scanning with CR-Scan Raptor

The CR-Scan Raptor is a 3D scanner with metrology-grade accuracy, with a maximum accuracy of 0.02mm. Using a blue parallel 7-line laser and a 2.3-megapixel high-resolution camera for scanning, it produces rich details, sharp edges, and restores the 3D shape of the object accurately (Creality, 2024).

Scan Configuration:

  • Scanning Mode: Blue Light
  • Resolution: 0.1
  • Color Mapping: No
  • Turntable: No

Recommended System Operation

Windows

  • Windows 10/11 (64 bit)
  • i7-Gen7 CPU, Nvidia graphics card (6GB VRAM)
  • 16GB RAM or higher

MacOS

  • 7.7 and above (Big Sur/Monterey/Ventura)
  • Apple M1/M2/M3 series processors
  • 16GB RAM or higher

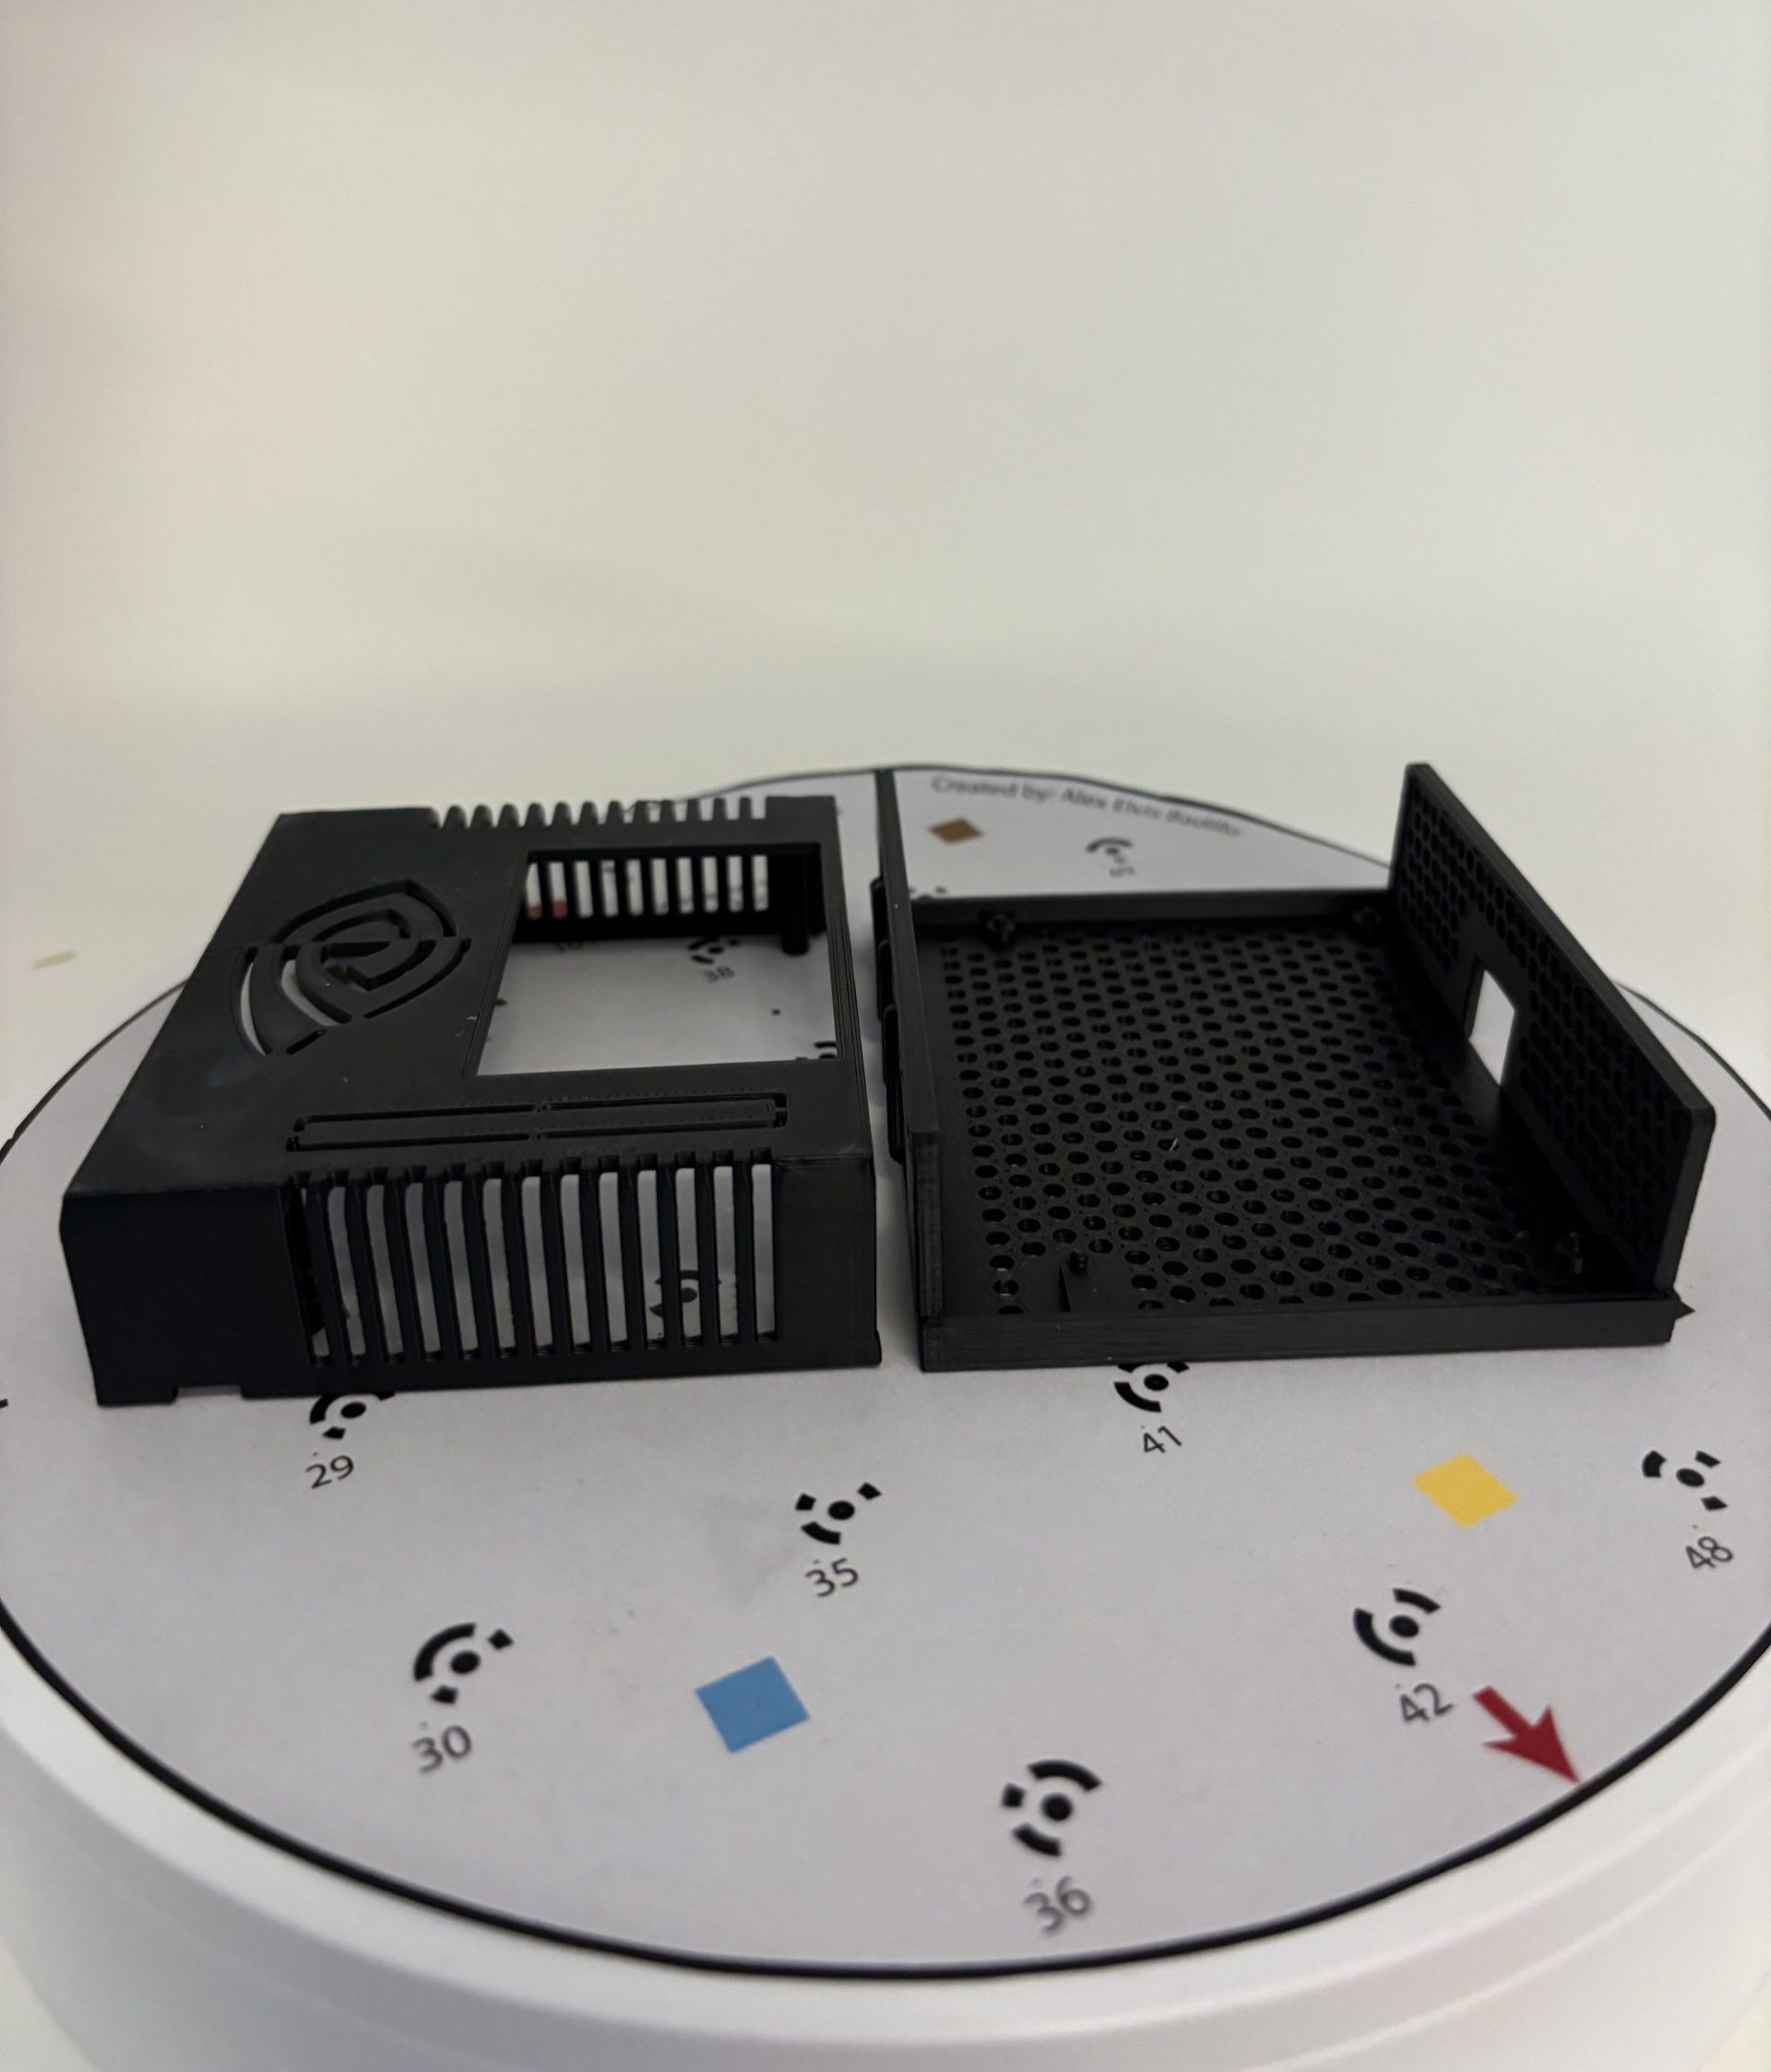
Tibetan printing block preparing to be 3D scanned.

Step 1: Set-up the Printing Block to be Scanned

The printing block was placed on top of a scanning pad. I then arbitrarily surrounded with Creality’s reflective circular markers. These marker points were crucial in assisting the scanning process. The more markers, the better.


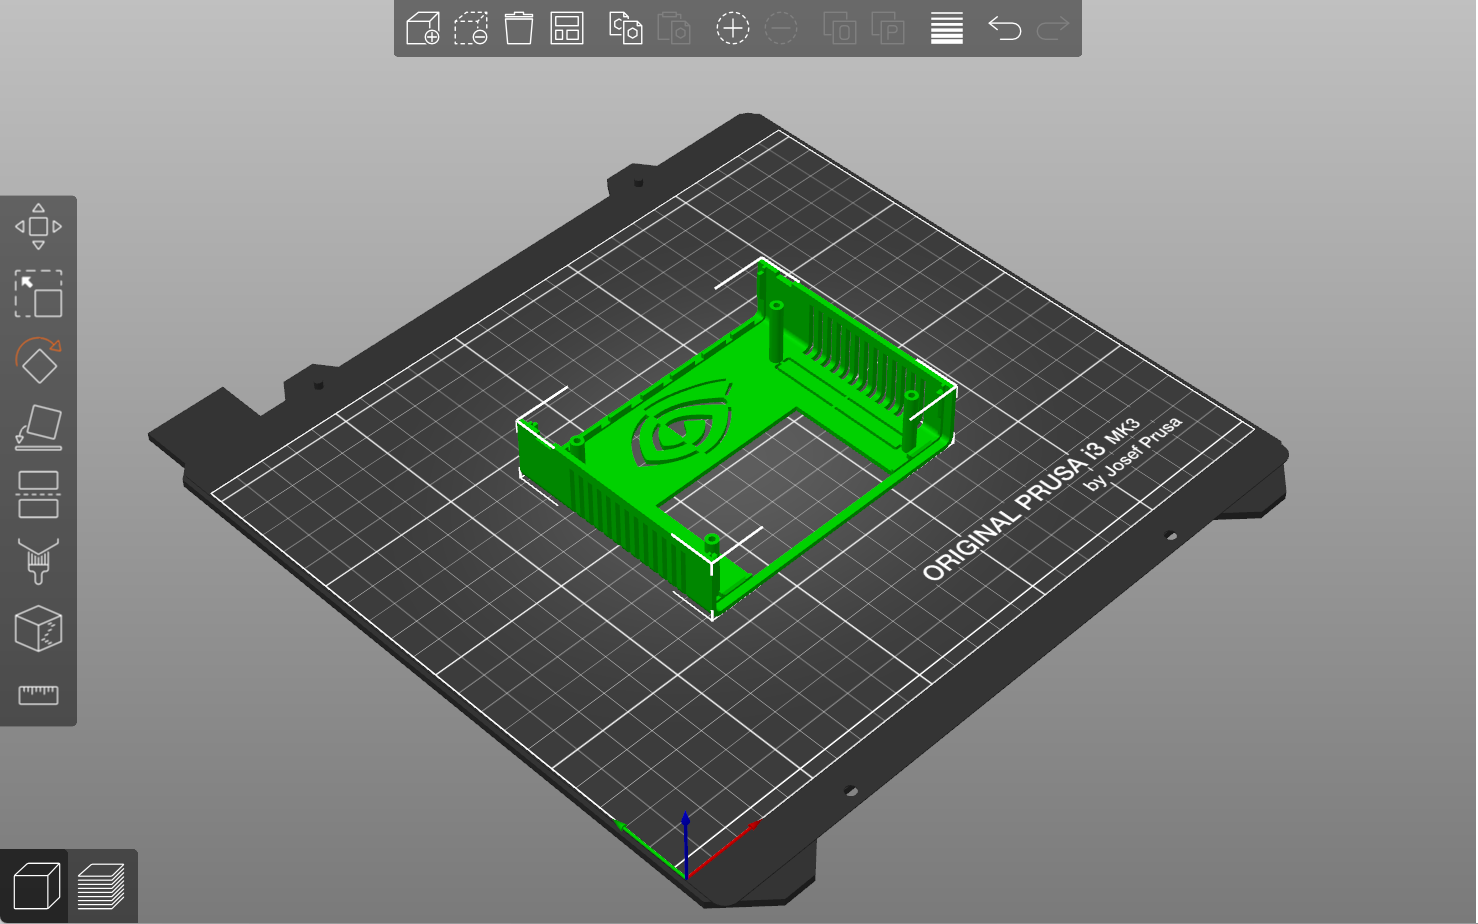
3D scan of the printing block in creality.

Step 2: Scan the Printing Block

I connected the CR-Scan Raptor USB cable to our relatively powerful desktop computer. Then, I started slowly scanning the printing block. During the scanning process, Creality Scan provides a colormap that indicates its confidence in the point clouds it is creating for the whether the current scan quality: red indicates a relatively poor quality of scanning, while an object that appears uniformly green, indicates a relatively good quality scan.


Optimized 3D scan of printing block.

Step 3: Optimize the 3D Scanned Model  

After scanning the object, I initiated an optimization of the pointcloud. The smaller the point distance, the better the detail, but it requires more processing time and RAM.


Printing with Resin

3D printed Tibetan printing block using resin.

The dimensions of the actual Tibetan printing block are as follows:

  • Length: 134.66mm
  • Width: 153.48mm
  • Height: 4.24mm

We coordinated with the Science Center to print the 3D scanned block with resin. Resin 3D printing has the advantage of producing higher resolution and finer details compared to 3D printing with the use of filaments. The printing process was handled by Jason Mativi, Senior Science Center Shop Engineer. Resin is expensive, and to reduce material costs we intentionally printed a very thin object — essentially just the raised print characters with maybe ⅛” backing — and then glued two pieces of custom cut ¼” acrylic plastic to create a rigid backing and protect the resin print.

Why It Matters: Preserving the Past for the Future

In today’s world, ancient artifacts face constant risks of damage or loss. Projects like this show how technology can help preserve cultural treasures while keeping them accessible. By using 3D scanning and resin printing, we can create accurate replicas that protect the original artifact while allowing people to engage with its history.

Replicating this Tibetan printing block doesn’t just save its physical form—it keeps its story alive, inspiring and educating future generations about the rich culture and artistry it represents.

Community

Exquisite ancient artistic artifacts like this Tibetan printing block are continuously depleting in terms of numbers. It is hard to maintain these numbers in place because it can only go down and never go up. This is something inevitable as we proceed in time.

“We anticipate using this block to demonstrate woodblock printing processes with ARTH 325: The Arts of the Book in Asia, and also to use it in co-curricular programming, since it is durable and easy to transport. Hands-on printing is a fantastic way of teaching book history to all kinds of learners,” said Professor Peale.

Why It Matters: Balancing Preservation and Accessibility

The replication of this block is more than a technical achievement—it’s a cultural imperative. In an era when ancient artifacts are steadily depleting, projects like this ensure their stories endure. By blending tradition with technology, we not only preserve history but also make it accessible to new generations.

Local ChatGPT: A Board Enclosure for Williams’ Micro AI

Imagine tinkering with a Generative AI. The orthodoxical scenario with Generative AI is that you ask it a question and it gives you an answer. But this time, rather than asking a question, you dictate how it answers the question. Instead of being a mere user, you are the brain behind the AI.

What is generative AI?

Printed case (using high-temperature ASA filament)

3D printed case (using high-temperature ASA filament)

A type of AI that quickly generates answers, information, and contents based on the user’s variety of input (Nvidia, 2024). It typically has an interface where users can type their inputs. Generally, these models can have text, images, sounds, animation, 3D models, or other types of data as inputs and outputs. 

At Williams, there exists a local generative AI called EphBot. Unlike the mainstream generative AI (e.g. ChatGPT, Gemini) which connect you to a huge database stored in powerful servers, EphBot is a tiny device that can be held in a real person’s hand. The EphBot offers AI for experimentation and exploration while ensuring complete data privacy because it is local and does not interact with the Internet or other databases.

Now what?

The Office for Information Technology (OIT) at Williams College is developing another micro AI just like EphBot. Mr. Gerol Petruzella is an Academic Technology Consultant in OIT and the project developer of the upcoming micro AI called NanoBot. I asked him about the purpose and significance of the project and he responded with, 

“For students and faculty at Williams to explore and experiment critically with generative AI. I believe passionately that all Williams students should have the opportunity to be more than merely users of generative AI applications.”

The NanoBot project is the 2nd anticipated microAI of Williams College. It is a generative AI like ChatGPT and Gemini. However, instead of being just a user, NanoBot gives you the opportunity to experiment on the AI itself.  

Why is it necessary to create a casing for the microAI?

Before I go deeper into that question, let us scrutinize the story from the start. Gerol is+ using the NVIDIA Jetson Nano Developer Kit to create the NanoBot. It is a small AI computer that allows a user to build practical AI applications, cool AI robots, and more. 

“I reached out to the Makerspace because the Jetson Nano Developer Kit provides a bare board, but no case or enclosure,” said Mr. Petruzella.

He noted that the Jetson Nano Developer Kit, which is the NanoBot itself, lacks a protective enclosure to its main body. This would be bad especially for hardware like this that is intended to be presented and used by a variety of people on loan through the Williams Library.

“Since my goal is to develop units which students and others in the Williams community can check out and use, the device needed a case, to make it sturdy and usable (avoiding both damage to the device and harm to the user!)”

Indeed, a protective cover would make the device itself sturdy and also avoid the risk of harming the people that are going to use it. But from what types of harm would the enclosure offer protection specifically?

Physical Protection

If the NanoBot will be used by the public, we cannot deny the fact that accidental bumps, drops, and other physical impacts that could lead to damage are likely to happen. Not to mention dust, dirt, and other particles that can accumulate on internal components and cause malfunctions.

Thermal Management

The enclosure is designed to have ventilation in order to help dissipate heat generated by the hardware, preventing overheating and ensuring optimal performance. By controlling the internal environment, it can help maintain a stable operating temperature for sensitive components.

Electrical Safety

It may be a small device, but it is still powered by electricity. The enclosure can provide electrical insulation, protecting users from accidental contact with live components and reducing the risk of electric shock. The enclosure would serve as the countermeasure and we know that it is better to have a countermeasure than to have a cure for electric related damages. 

You can read more here about enclosures.

Why not just order one online?

“I couldn’t find any commercially-available case for this model, but I did discover a recipe on Thingiverse, so using the resources of the Williams Makerspace seemed like a great solution,” said Mr. Petruzella.

The main objective of this project was to fabricate a cost-effective enclosure for the Jetson Nano Board. Specifically, this project aimed to create an enclosure that can:

  1. Protect the device from physical impacts
  2. Withstand high thermal activities without melting
  3. Serve as an outer insulation for the device 

Printing with ASA Filament

Filament Type: PolyLite ASA

Specification:

  • Print Temperature: 240 – 260 °C
  • Print Speed: 30 – 50 mm/s
  • Bed Temperature: 75 – 95 °C
  • Fan: OFF

Caution
The fumes emitted by the ASA filament can be potentially dangerous when inhaled. It emits a smelly & intense smoke that comes from Styrene present in this plastic compound (MakeShaper, 2020). This fume can cause health issues such as headaches, irritation, and so much more. It is recommended to use a fume extraction system while printing. We used BOFA fume extractors.

Blueprint of the top enclosure in Prusa Slicer Software.

Blueprint of the top enclosure in Prusa Slicer Software.

Step 1: Acquire the 3D Model of the Enclosure
The 3D model was pre-modeled by Ecoiras in thingiverse. I downloaded and converted it into a file that the Prusa i3 (3D Printer) can read using Prusa Slicer software. You are always welcome to customize your own design.

The Prusa i3 (3D Printer) printing the enclosure.

The Prusa i3 (3D Printer) printing the enclosure.


Step 2: Configure the 3D Printer and Load the Assigned Filament
Then, wait for it to print. It may fail to print sometimes, but it is totally normal for it to fail. Print and print until it succeeds. After it successfully prints the product, slowly scrape it off from the plate from which it was printed.

The NanoBot with its new enclosure.

The NanoBot with its new enclosure.


Step 3: Fit the Finished Product.
This is the finished product. Feel free to change the color if you want. We chose to print this case in ASA filament, instead of the more common PLA filament, because ASA offers a melting temperature that is higher by about 50 degrees Celsius. That means that the heat generated by generative AI computing is less likely to melt the case. 

Community

In this technology-driven time, the generative AI’s performance and popularity continuously rise. It is inevitable as we proceed in times where advancing technology is prominent. NanoBot will empower students and faculty to become active participants rather than passive consumers of generative AI technology.

The NanoBot gives users the ability to transcend the state of being mere users—how do you want to configure AI?

Resources

Nvidia. “What Is Generative AI?” NVIDIA, 2024, https://www.nvidia.com/en-us/glossary/generative-ai/  

MakeShaper (2020). 3D Printing: Understanding more about ASA filament applications. Makeshaper. https://www.makeshaper.com/post/3d-printing-understanding-more-about-asa-filament-applications