
The Quandary:
Have you ever broken or lost a small part of an important object you value? Perhaps the strap of that beautiful watch you got from your grandma or the battery cover for the back of your remote control? You looked for it everywhere, but the part was too “insignificant” to be sold on its own. Or it just wasn’t the sort of thing that anyone would expect to need a replacement.
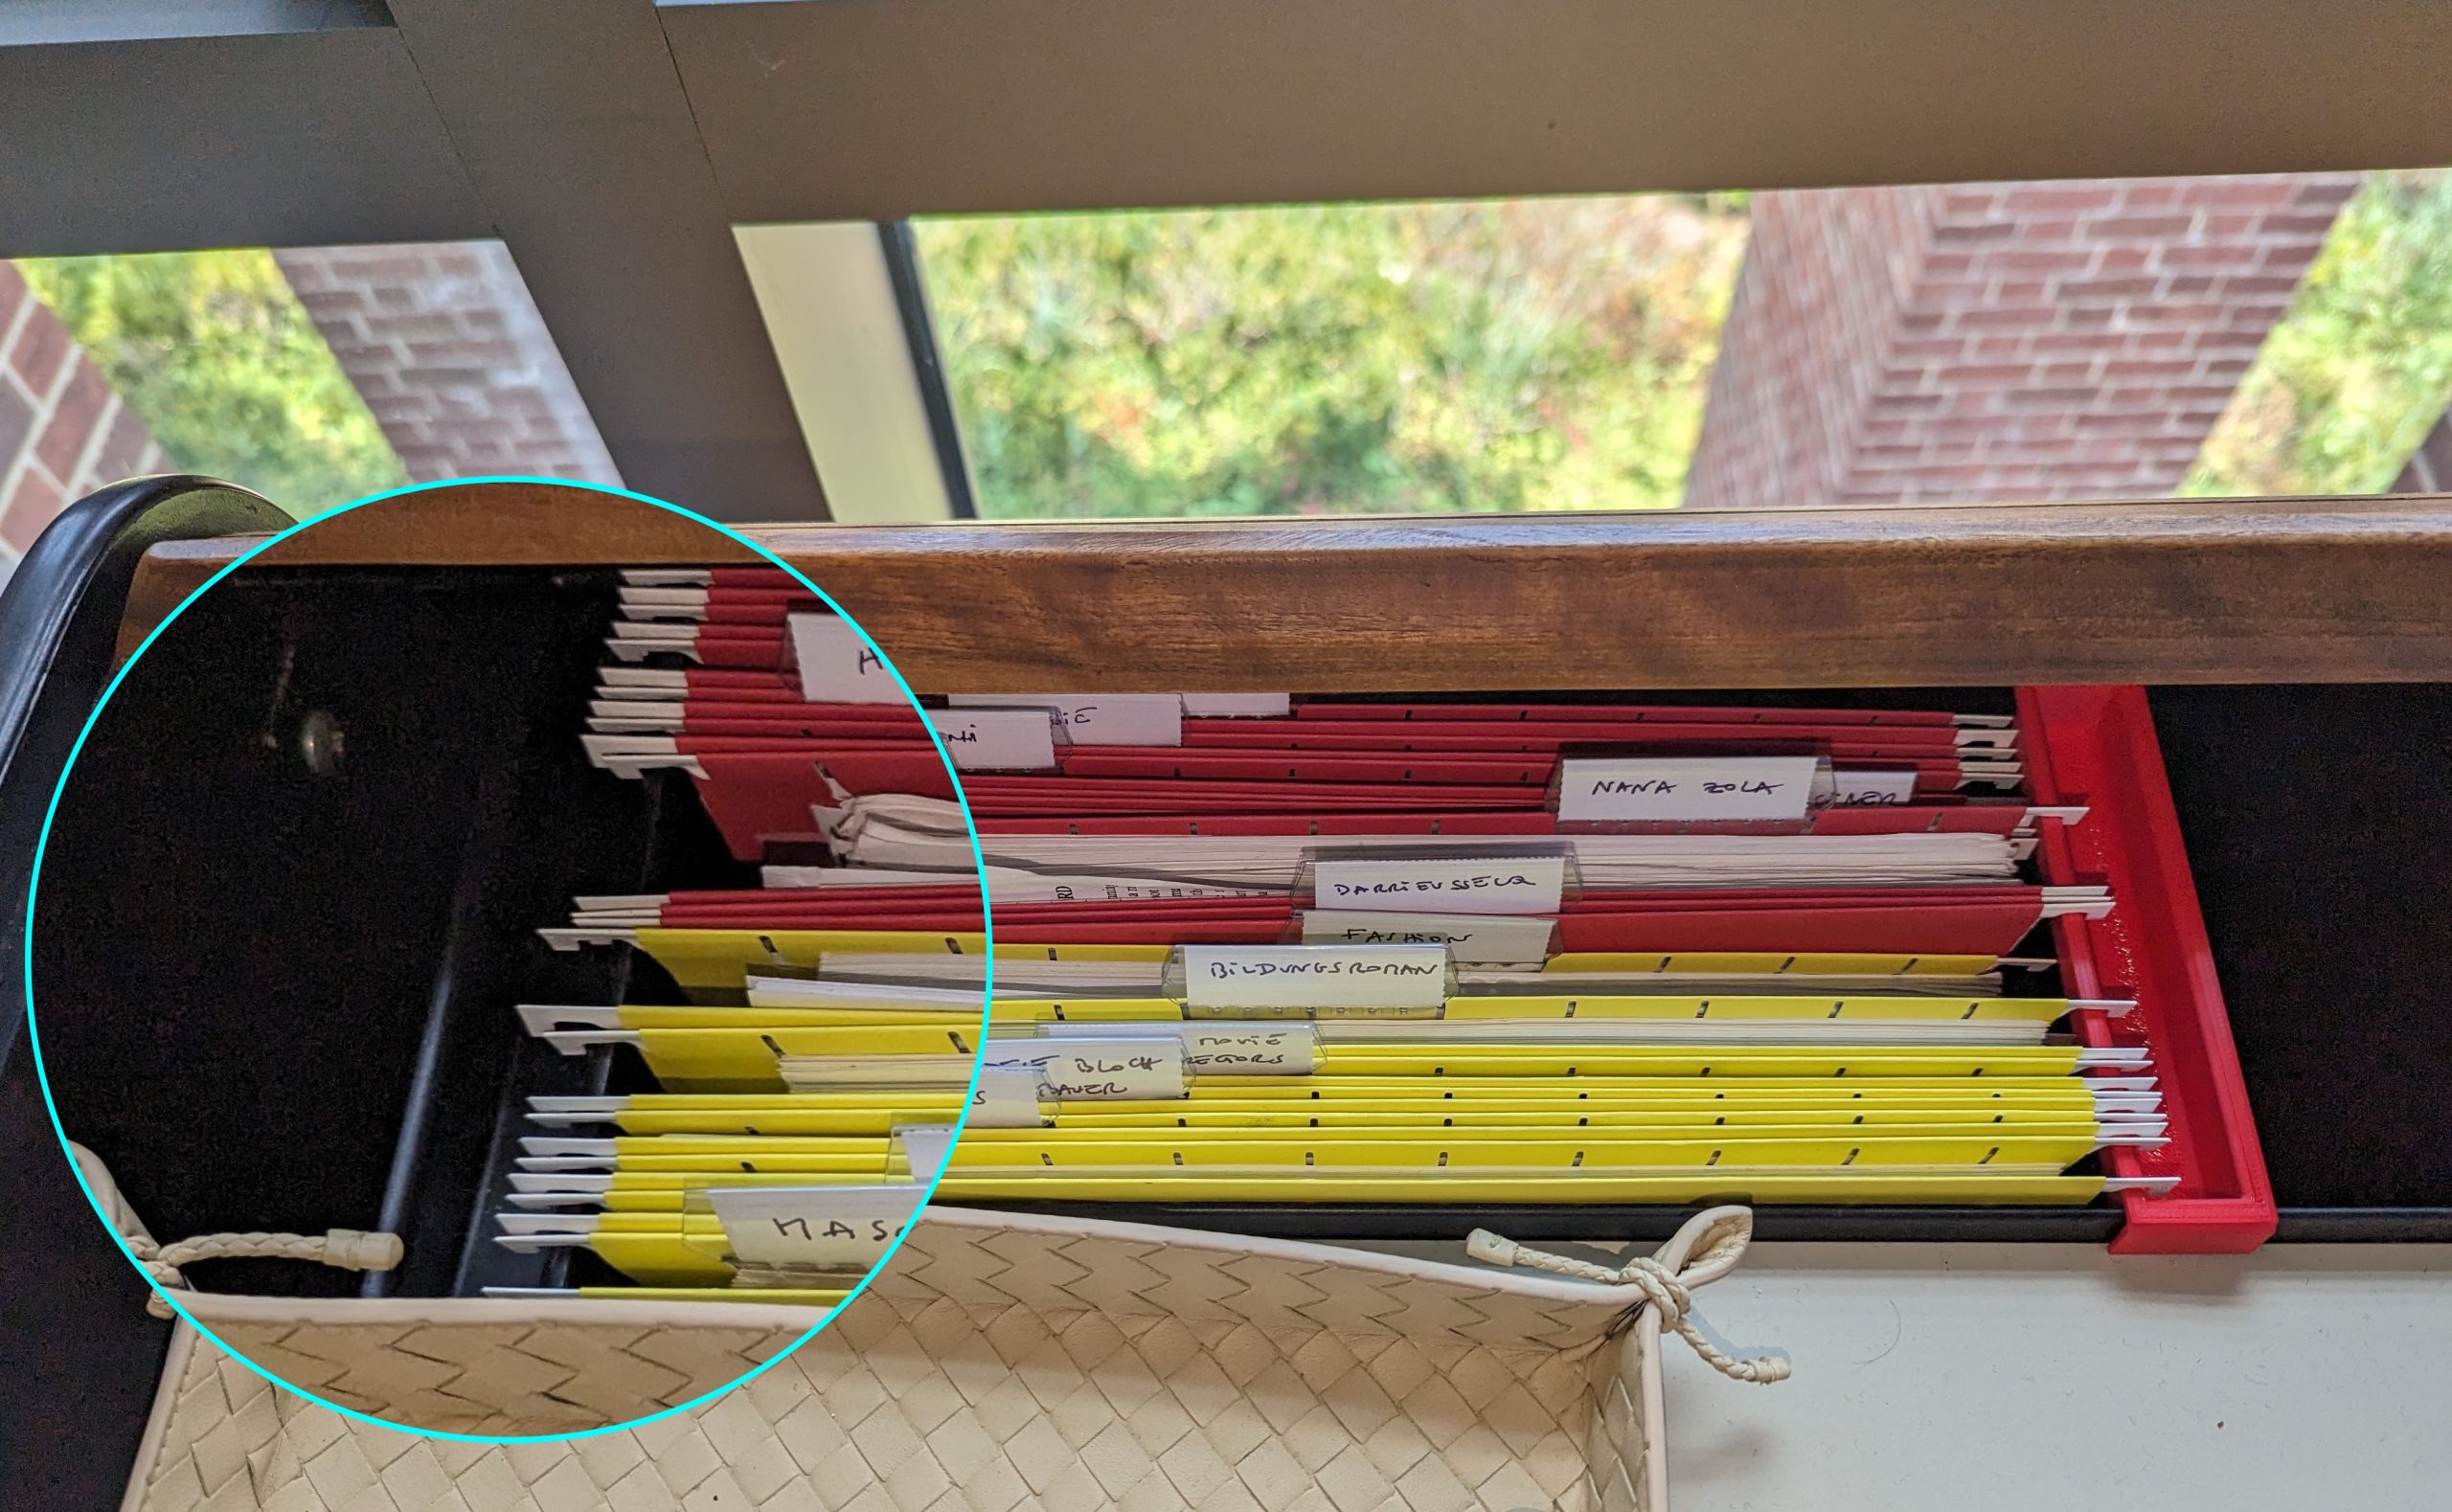
The original black “obsolete plastic object” (on left) keeping files safely stored, alongside the newly cloned red part (on (right)
Last semester at Williams College, Chris Koné, Associate Professor of German and Director of Oakley Center for Humanities & Social Sciences, had a similar experience. He lost an integral part of his desk that allows him to keep his files neatly stored and organized (shown on picture). Desperate to have a place for the files and papers scattered miserably on the floor, Prof. Koné looked in a brick and mortar NYC office parts store, as well as on Amazon, eBay, and other e-commerce websites, but alas, the object was nowhere to be found. It had become obsolete!
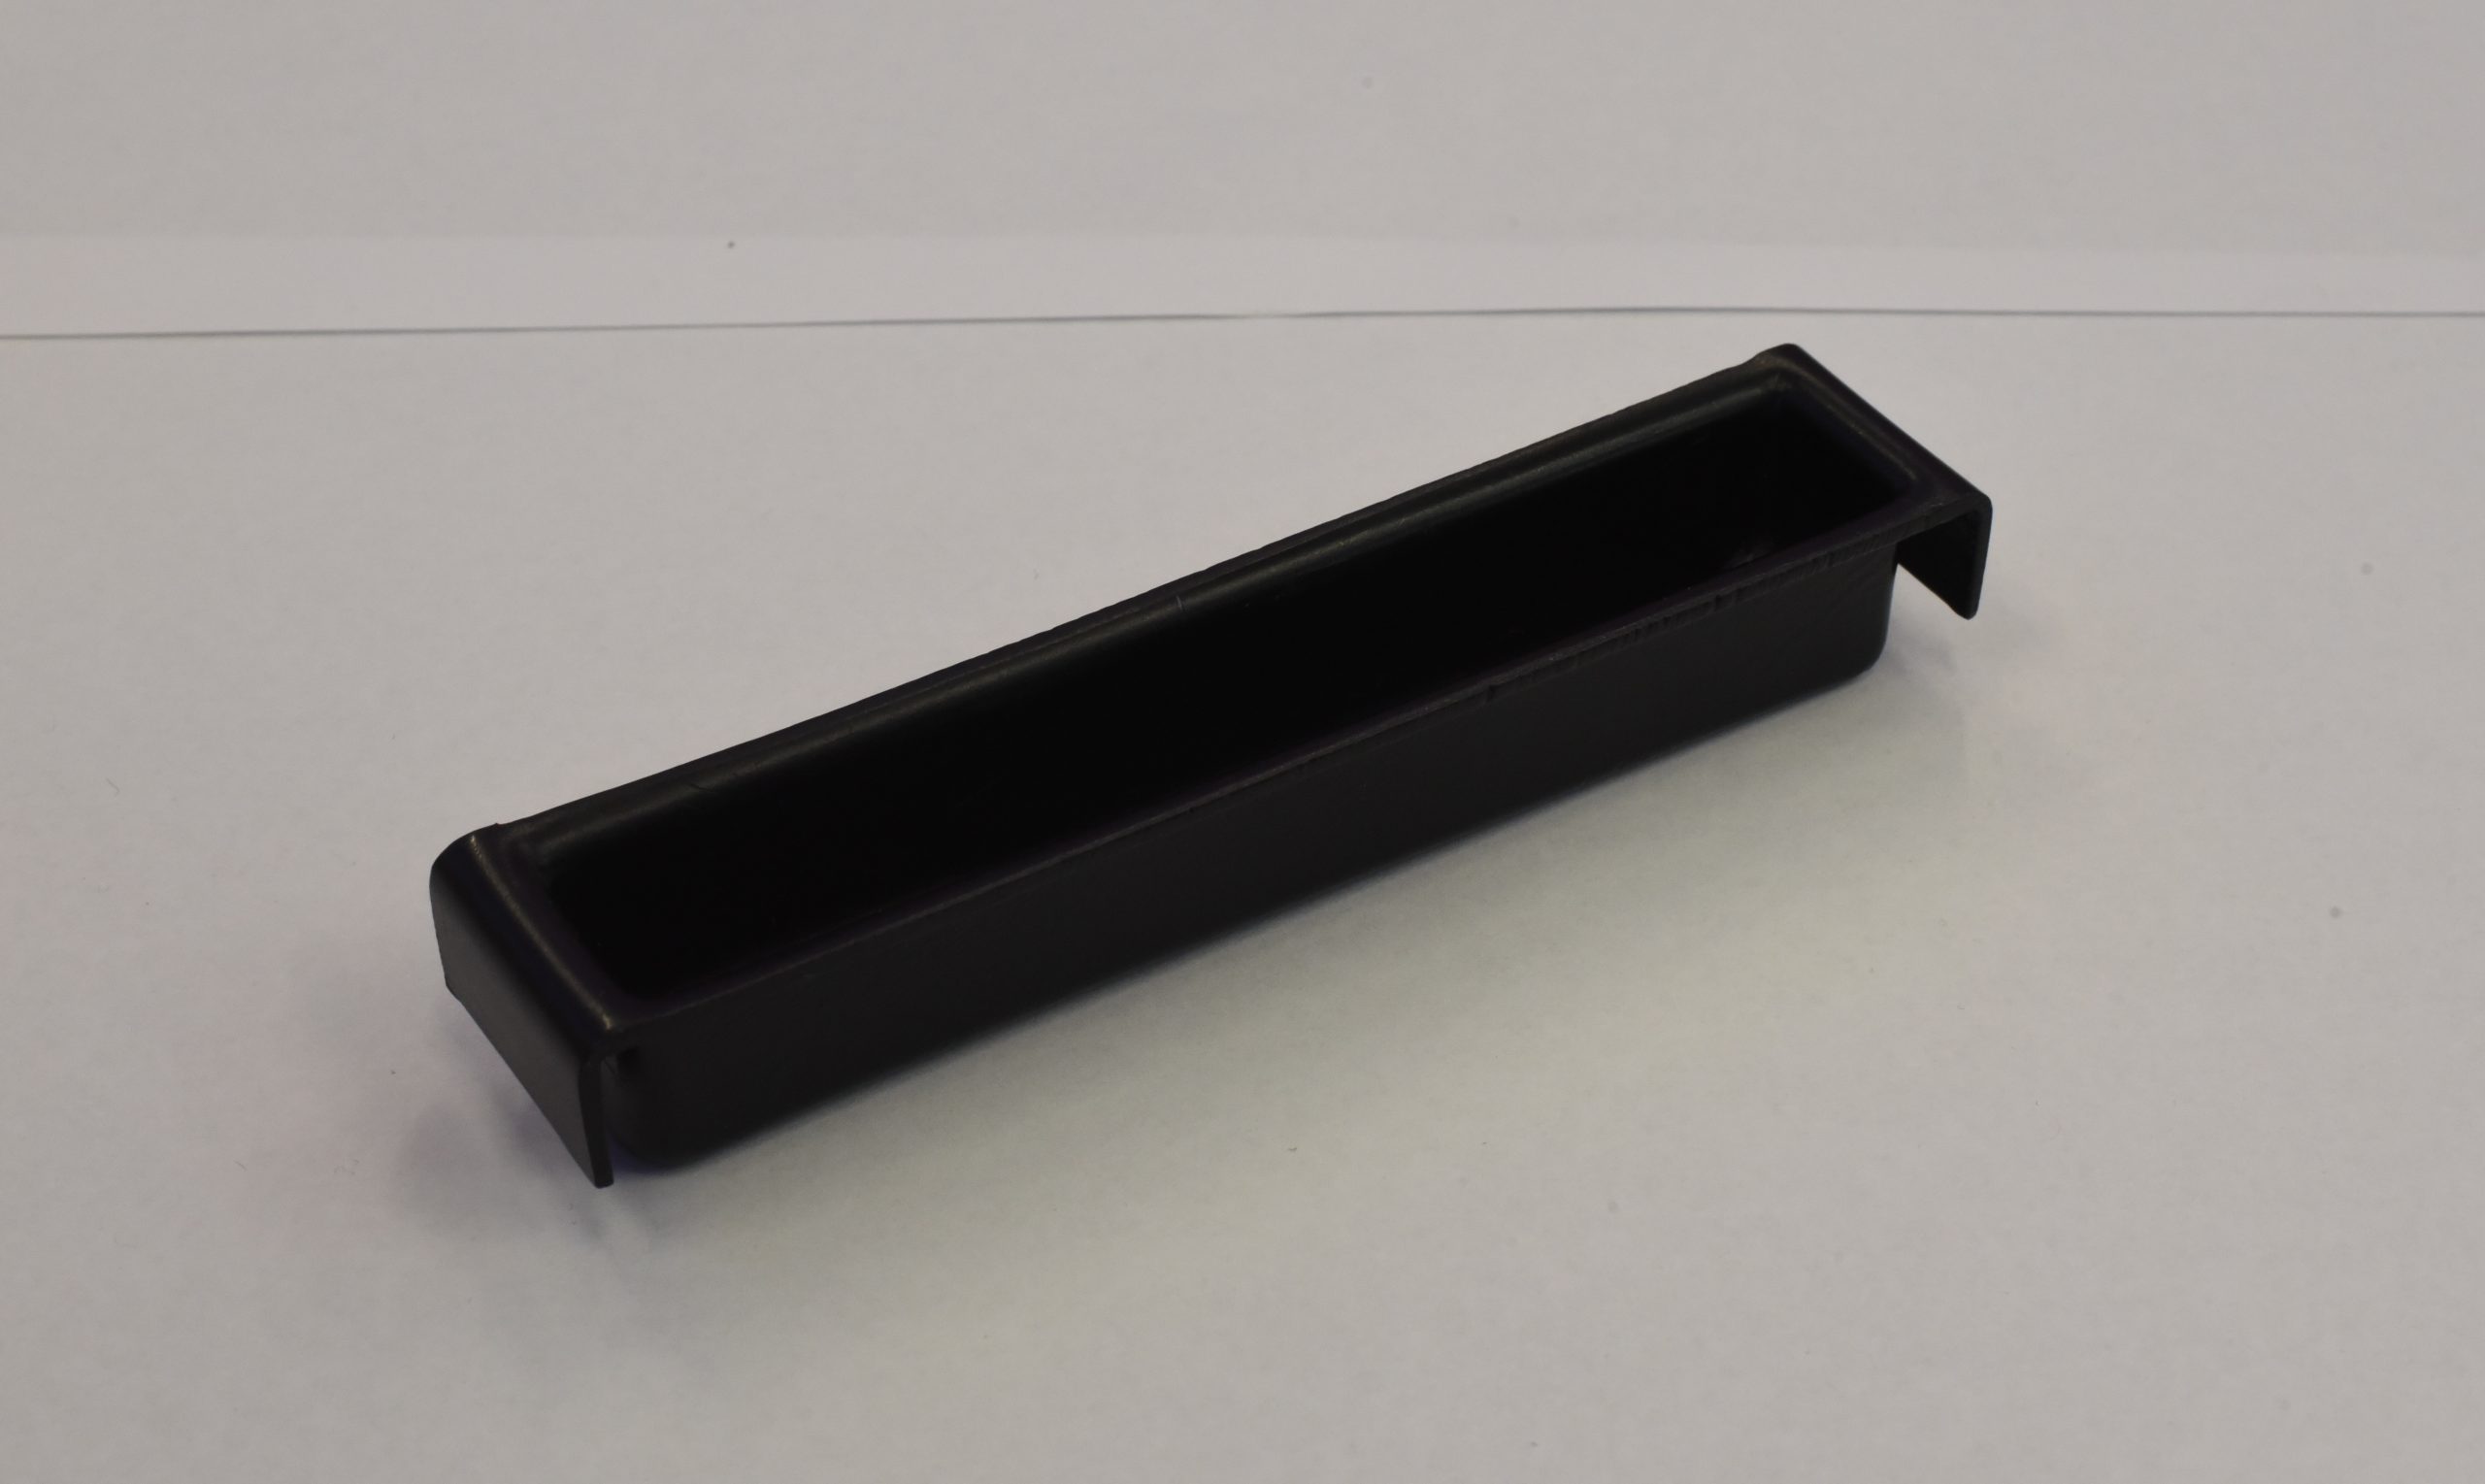
The “obsolete plastic object”
Determined to leave no stone unturned in finding a replacement for the obsolete plastic object, Prof. Koné did what any sensible person with access to the Makerspace would do – he asked for a 3D-printed model of the object! And it is here that he met me, an intern working at the Makerspace over the summer. In the process of helping him, I learned about multiple methods of photogrammetry and created a significantly more efficient and streamlined workflow for the Makerspace.
Some Background
As a new student worker with zero knowledge about photogrammetry and 3D printing, David Keiser-Clark, the Makerspace Program Manager, thought this project would be just the right amount of challenge for me. Photogrammetry is the process of creating a 3-dimensional digital model of an object by taking dozens or hundreds of photos of the object from different angles and processing them with software to create a digital spatial representation of the object. Doing this project would be a good introduction to the 3D digital world while allowing me to get acquainted with the Makerspace.
If you have tried photogrammetry, you know that some of the most difficult objects to work with are those that are dark or shiny. This object was dark and shiny! When an object is dark, it becomes difficult for the software to distinguish one feature on the object from another, resulting in an inaccurate digital representation. Likewise, light is reflected when an object is shiny, resulting in images that lack details in the shiny areas. Thus, you can imagine how challenging it is when your object is both shiny and dark!
Step 1
The first step was to figure out how to reduce the darkness and shininess of the object. To kill both birds with one stone, I covered the object with white baby powder, a cheaper alternative to expensive photogrammetry sprays used in industry. The powder’s white color would help eliminate the object’s darkness and offer it some helpful texture, while its anti-reflective nature would reduce shininess. After several attempts to completely cover the object, this method proved ineffective as the powder would not stick to the object’s smooth surface. A little out-of-the-box thinking led me to cover the object with matte blue paper tape, which proved very effective as the tape’s rough texture allowed minimum light reflection.
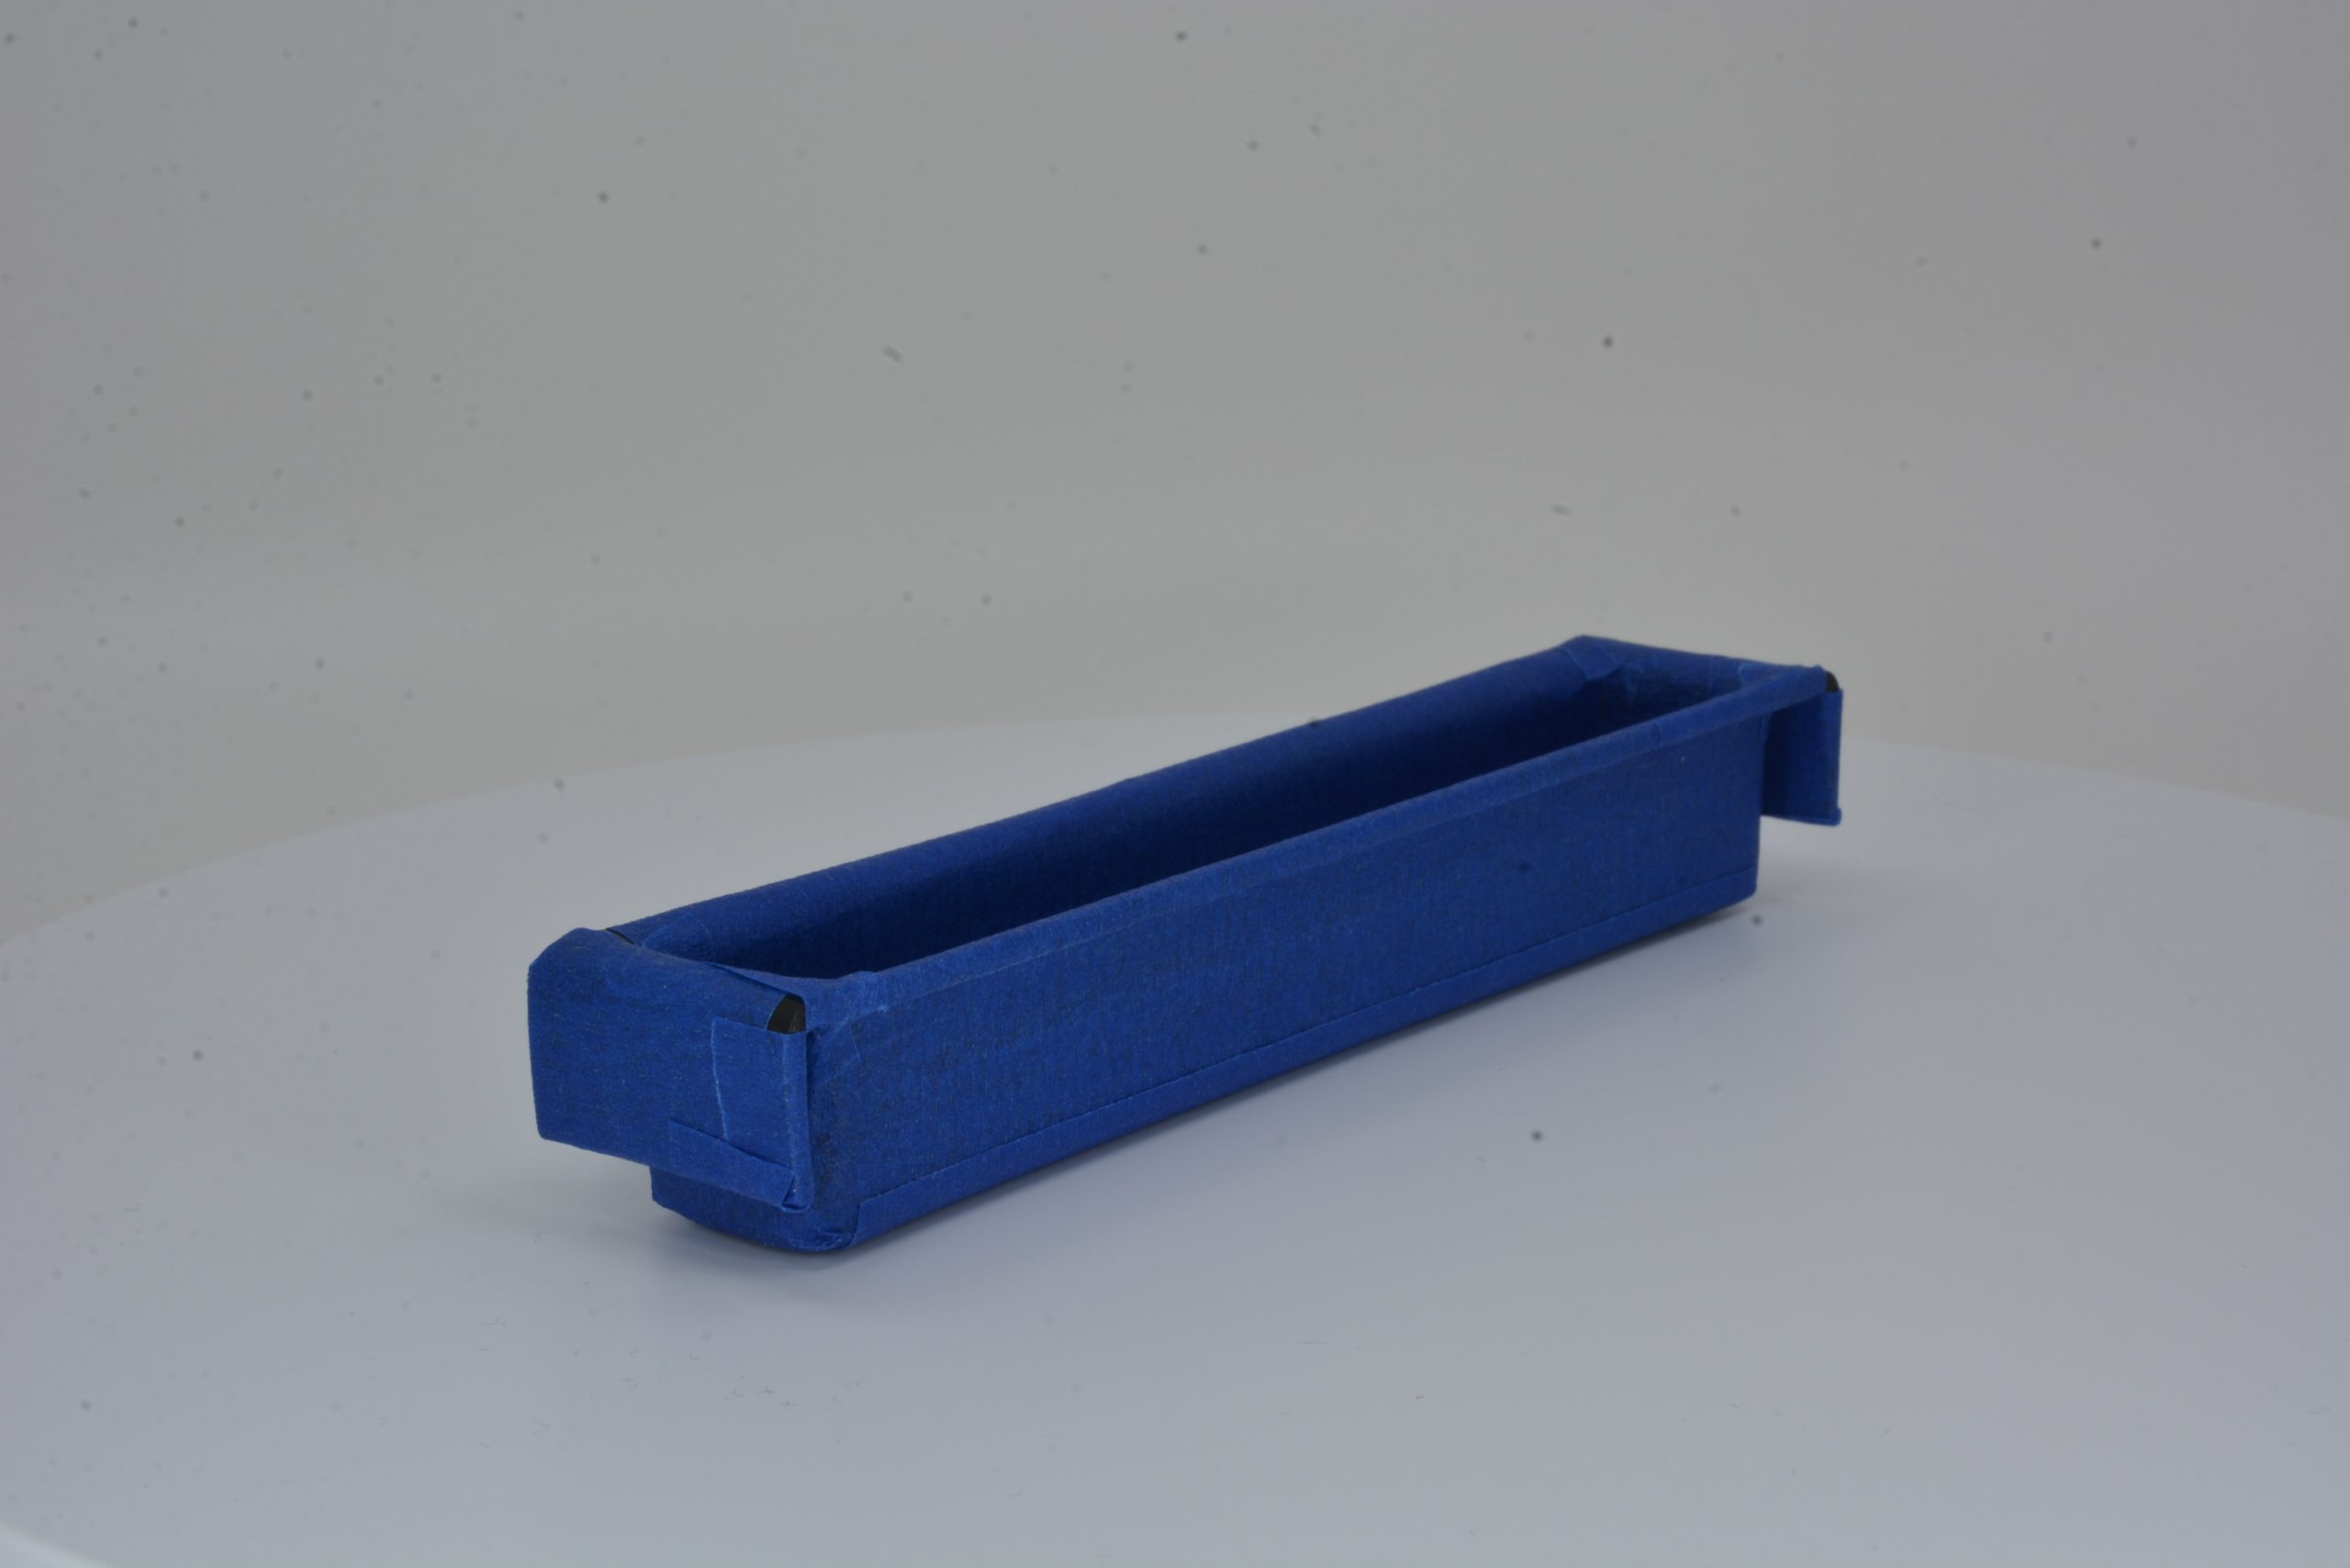
obsolete plastic object coated with blue tape
A Bit of Photography
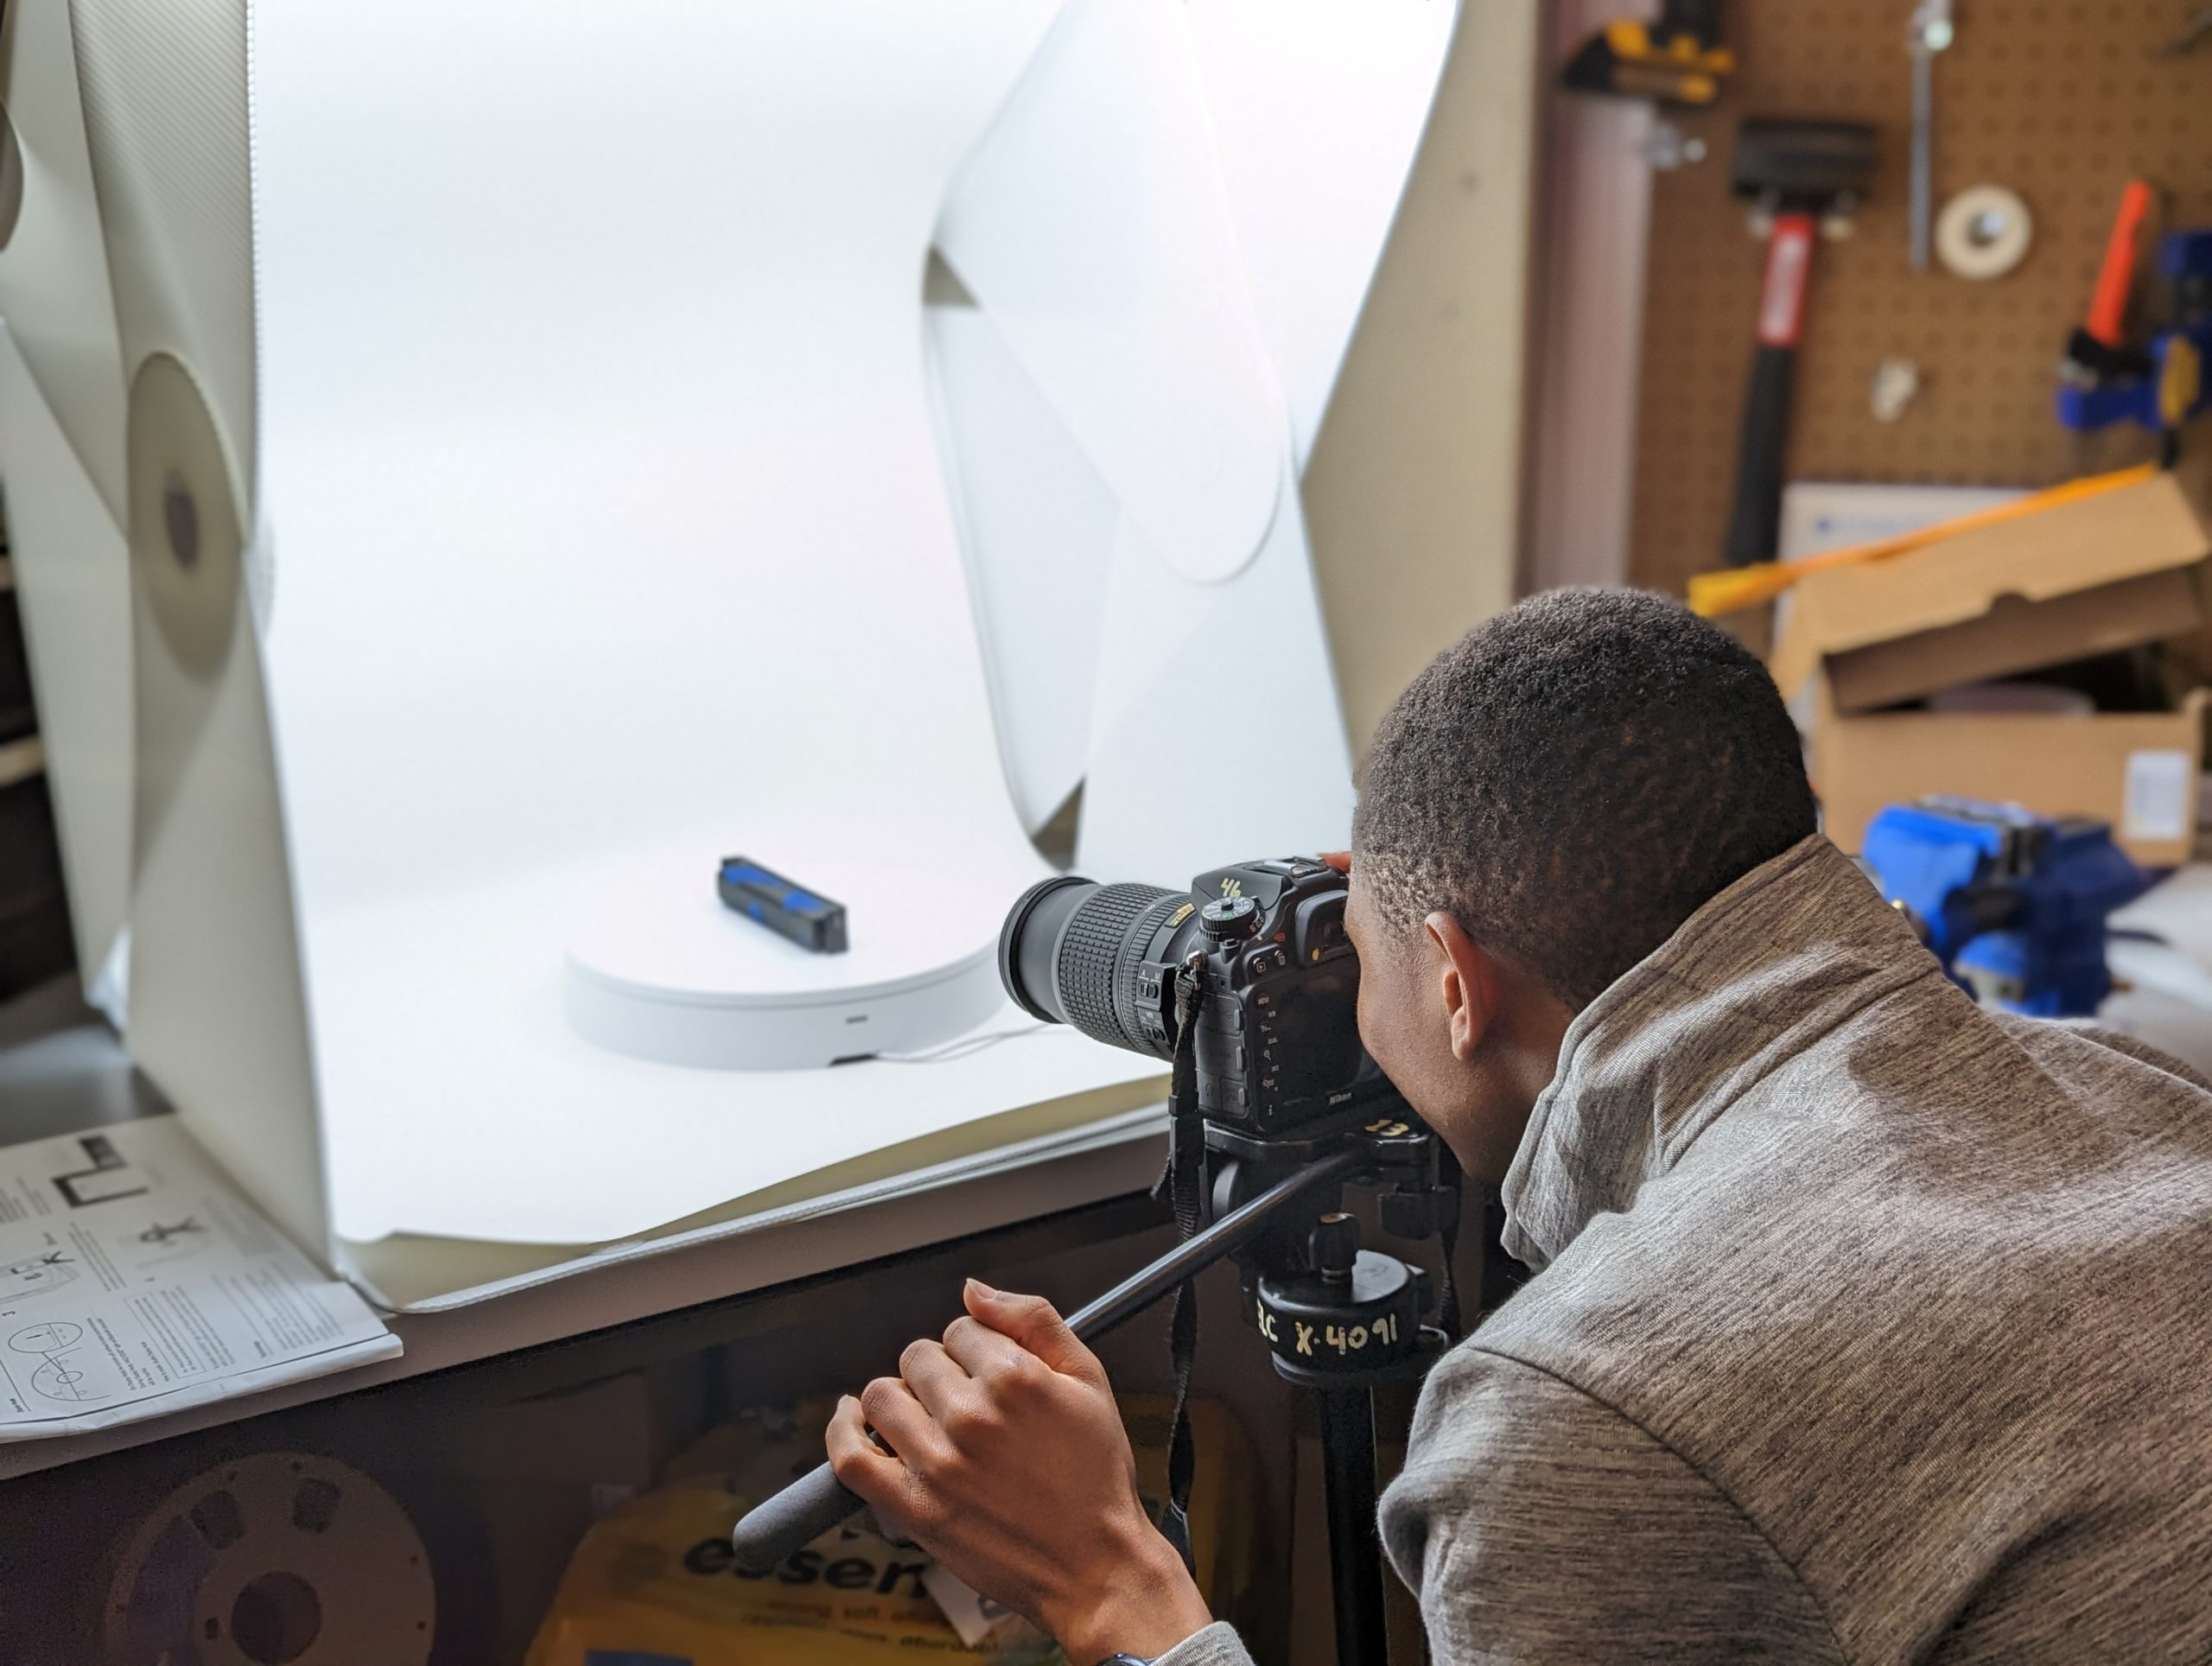
Milton taking pictures for photogrammetry
Now that the two biggest giants had been slayed, it was time to move on to the next step: taking pictures of the object. Taking shots for photogrammetry is very similar to doing stop-motion animation. You take a picture of the object, move it at a small angle (between 5-15 degrees) by hand or with a turntable (a rotating disc), and take another picture. Then you repeat this process until the object has rotated completely, change the camera angle (e.g., by taking shots from the top of the object), and redo the whole process again. This can be quite tedious, especially if you have to do it by hand, but luckily for me, the Makerspace had recently bought a new automated turntable, so I didn’t have to rotate the object manually. I also got to be the first to create a documentation guide for other Makerspace student workers to more easily be able to utilize the turntable in the future!
Alignment Process
Once the photos were ready, the next step was to analyze them using photogrammetry software. I turned to Agisoft Metashape, a powerful program that receives pictures of an object from different angles and analyzes them to create a 3D depiction of the object. The software first finds common points between the various images, called anchor points, and calculates their relative distances, allowing the software to place them in a 3D place. This process is called alignment.
Unfortunately, despite my efforts to aid the software by covering the object with matte blue tape to reduce its shininess and darkness, the obsolete plastic object did not align properly in Metashape. While I could not pinpoint the exact reason, I suspect it was due to its hollow shape, which made it challenging for the software to capture points on the inner surfaces, especially the corners. It was quite disappointing to get these results, especially after having had to wade through Metashape’s jungle of commands, but that was certainly not the end of it all. I decided to try a different approach – raise an older desktop 3D scanner from the grave!
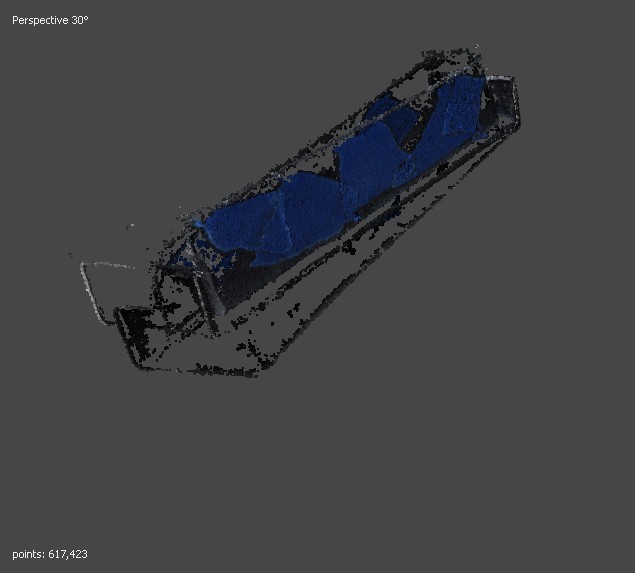
Misalignment in Metashape
The Hewlett Packard (HP) 3D Structured Light Scanner
The 3D David Scanner (now called the HP 3D Structured Light Scanner) works by projecting light onto a subject and capturing the reflection. It measures the time taken for the light to return, determining the distance of each point. These points, represented as XYZ coordinates, are collectively used to digitally reconstruct the object in a 3D space. I intended to use the structured light scanner as an alternative to Metashape software because it allows more control over the alignment process. For example, you can select two specific images you want to align and tell the software how you want them to get aligned. In addition, the scanner features a projector that sheds light on the project you’re scanning, as well as a calibrated background panel, allowing for greater detail to be picked up.

HP 3D Structured Light Scanner
A Bit of Scanner Surgery

Using the HP 3D Structured Light Scanner
The Makerspace’s HP scanner unfortunately hadn’t been functional in over three years. The camera was not working, and the scanner’s software could not make exports due to licensing issues. I updated the device’s software and installed new camera drivers, and in no time, the scanner was fully functional again. I then scanned the obsolete plastic object with the structured scanner. Unfortunately, the results were unsatisfactory. It resolved the prior alignment issue with Metashape, but the digital model had thin walls and holes on some of its surfaces, making it impossible to print.
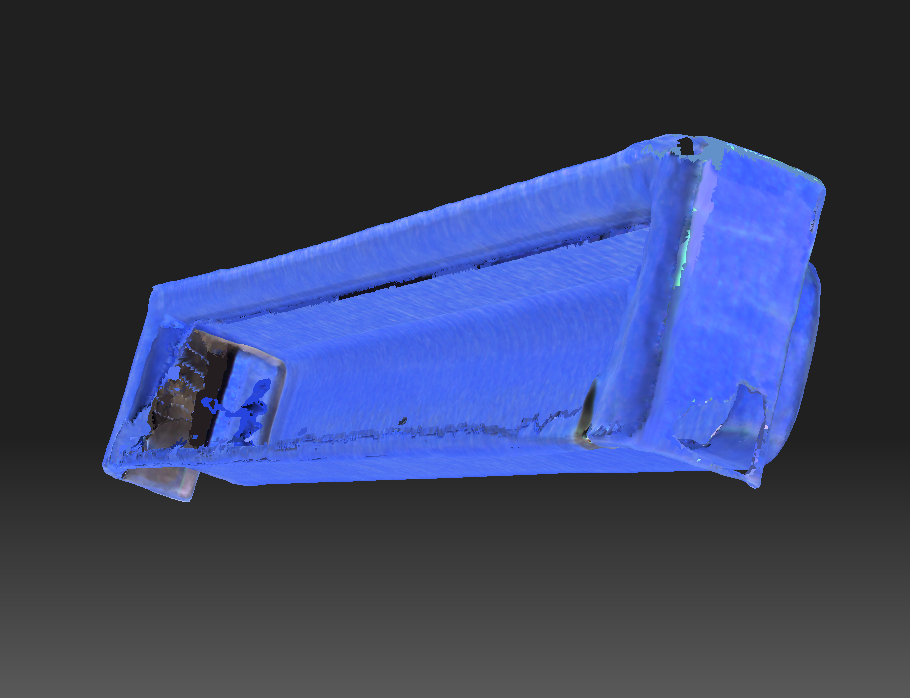
Thin walls and holes in the structured light scanner model
Building from the Ground Up with Fusion 360
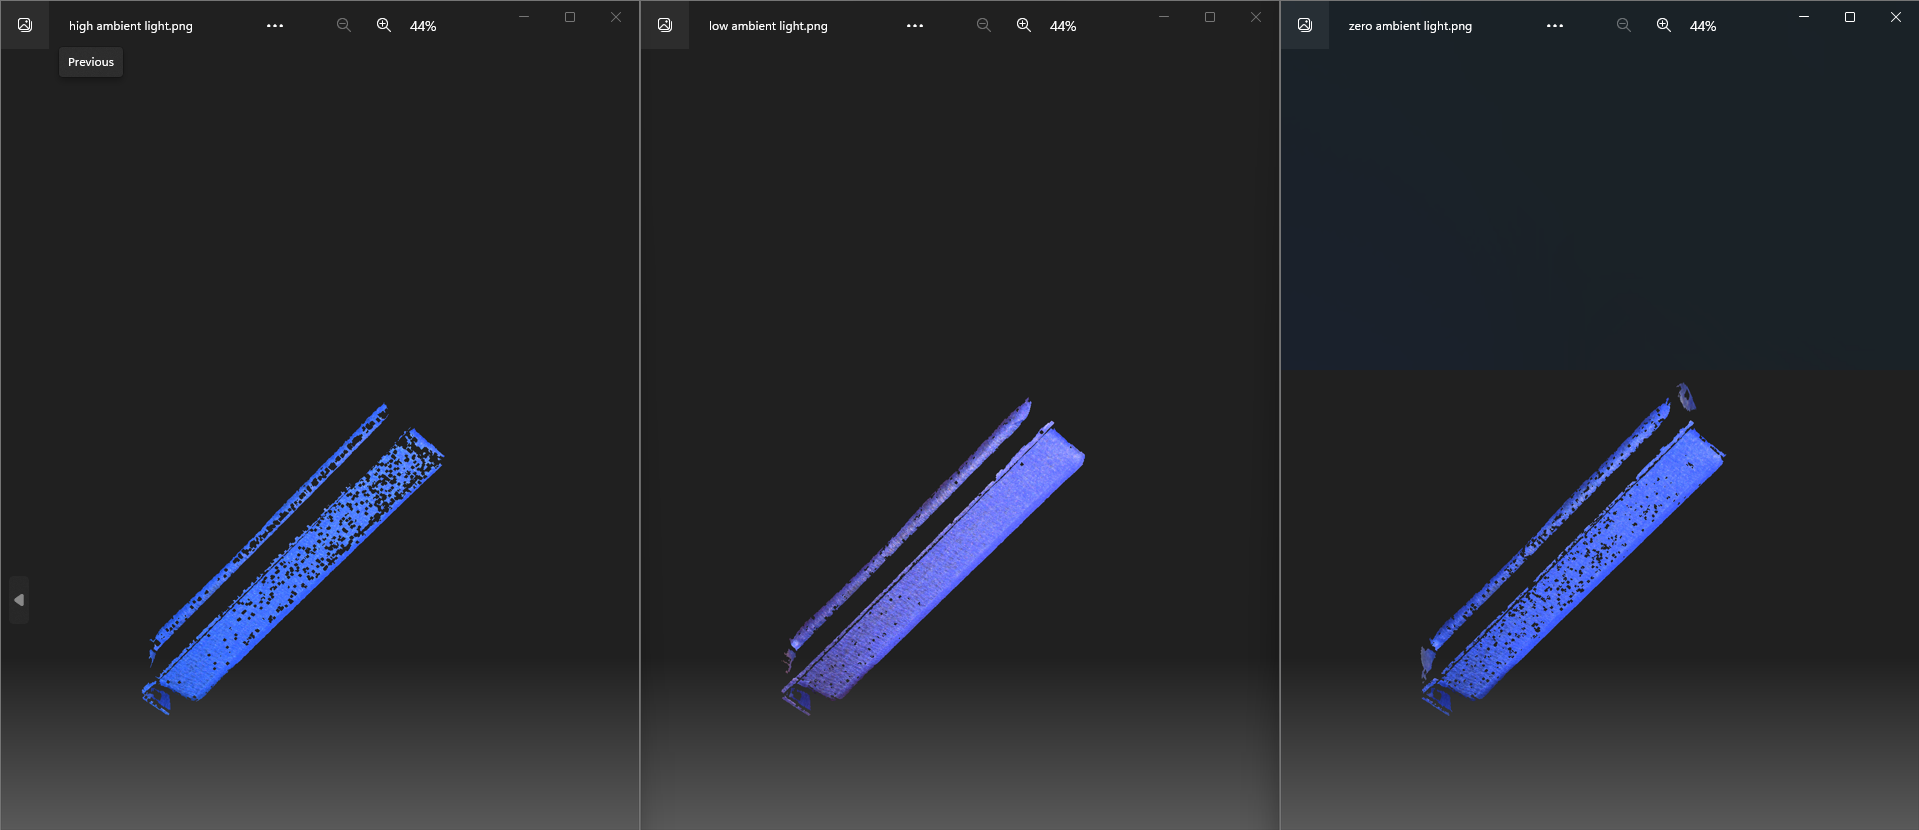
Results of different lighting setting in HP 3D Structured Light Scanner
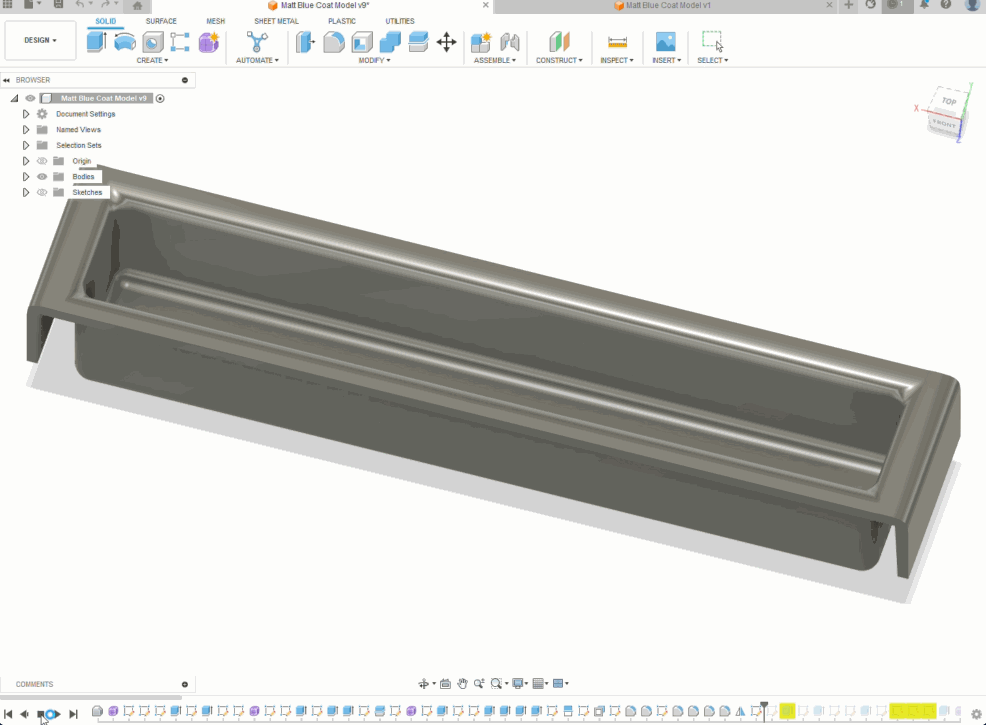
After trying out different strategies with the HP 3D Structured Light Scanner, such as different light settings, but still not getting good results, David suggested a different method – building the model from scratch! Excited to try out new software (and get a break from the structured scanner!), I began exploring Fusion 360 tutorials and documentation. Autodesk Fusion 360 is a Computer-Aided Design (CAD) software with applications across various sectors, including manufacturing, engineering, and electronics. It allows one to create a simple sketch of a model and build it into a solid model with precise dimensions. You can even add simulations of real-world features such as material sources and lighting.
Of course, this new, complicated, piece of software came with its challenges. For example, I had to know the dimensions of the fillets (the arcs) inside and outside my object. A little creativity combined with a pair of vernier calipers and a piece of paper did the job. Another challenge was understanding the timeline feature of Fusion 360, one of the most important features of the program, which allows you to record your progress and go back to a certain point. Researching online and getting help from a friend (shoutout to Oscar!) with more experience in Fusion 360 proved helpful in better understanding the software.
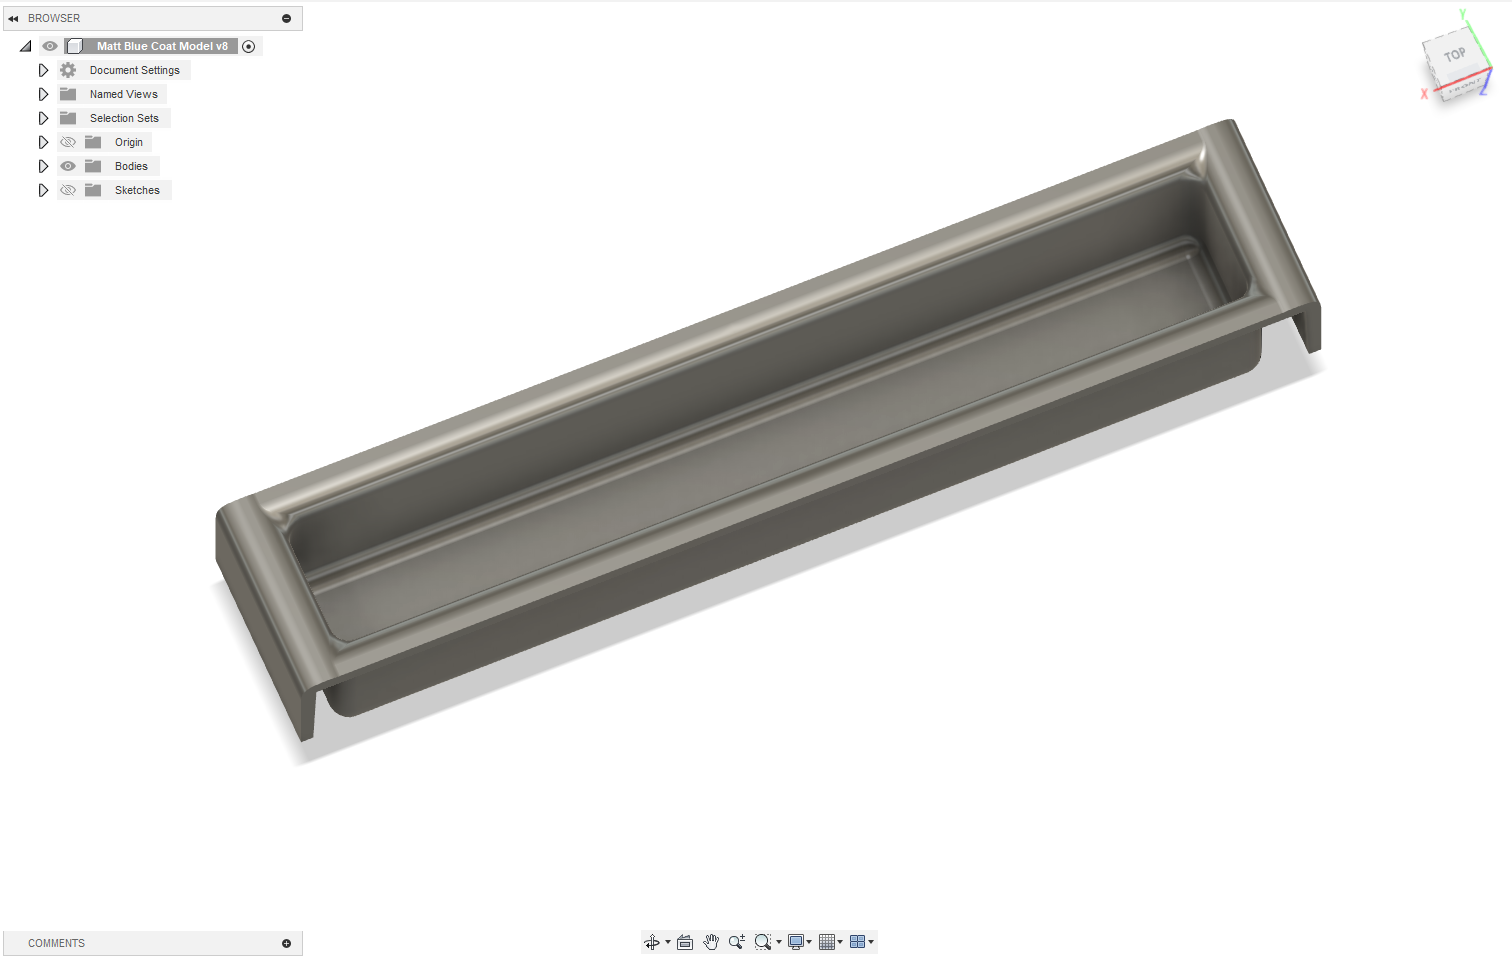
Successful Fusion 360 model of the obsolete plastic object
Fusion 360 timeline for modeling the obsolete plastic object
The Obsolete Plastic Object Was No Longer Obsolete
Finally, after several days of learning Fusion 360 and incrementally building a model, the obsolete plastic object was no longer obsolete. I produced an accurate model of the object and printed several copies, which Professor Koné was more than happy to receive. His files had regained their home, and time spent scouring eBay and Amazon for a nameless object had come to an end!
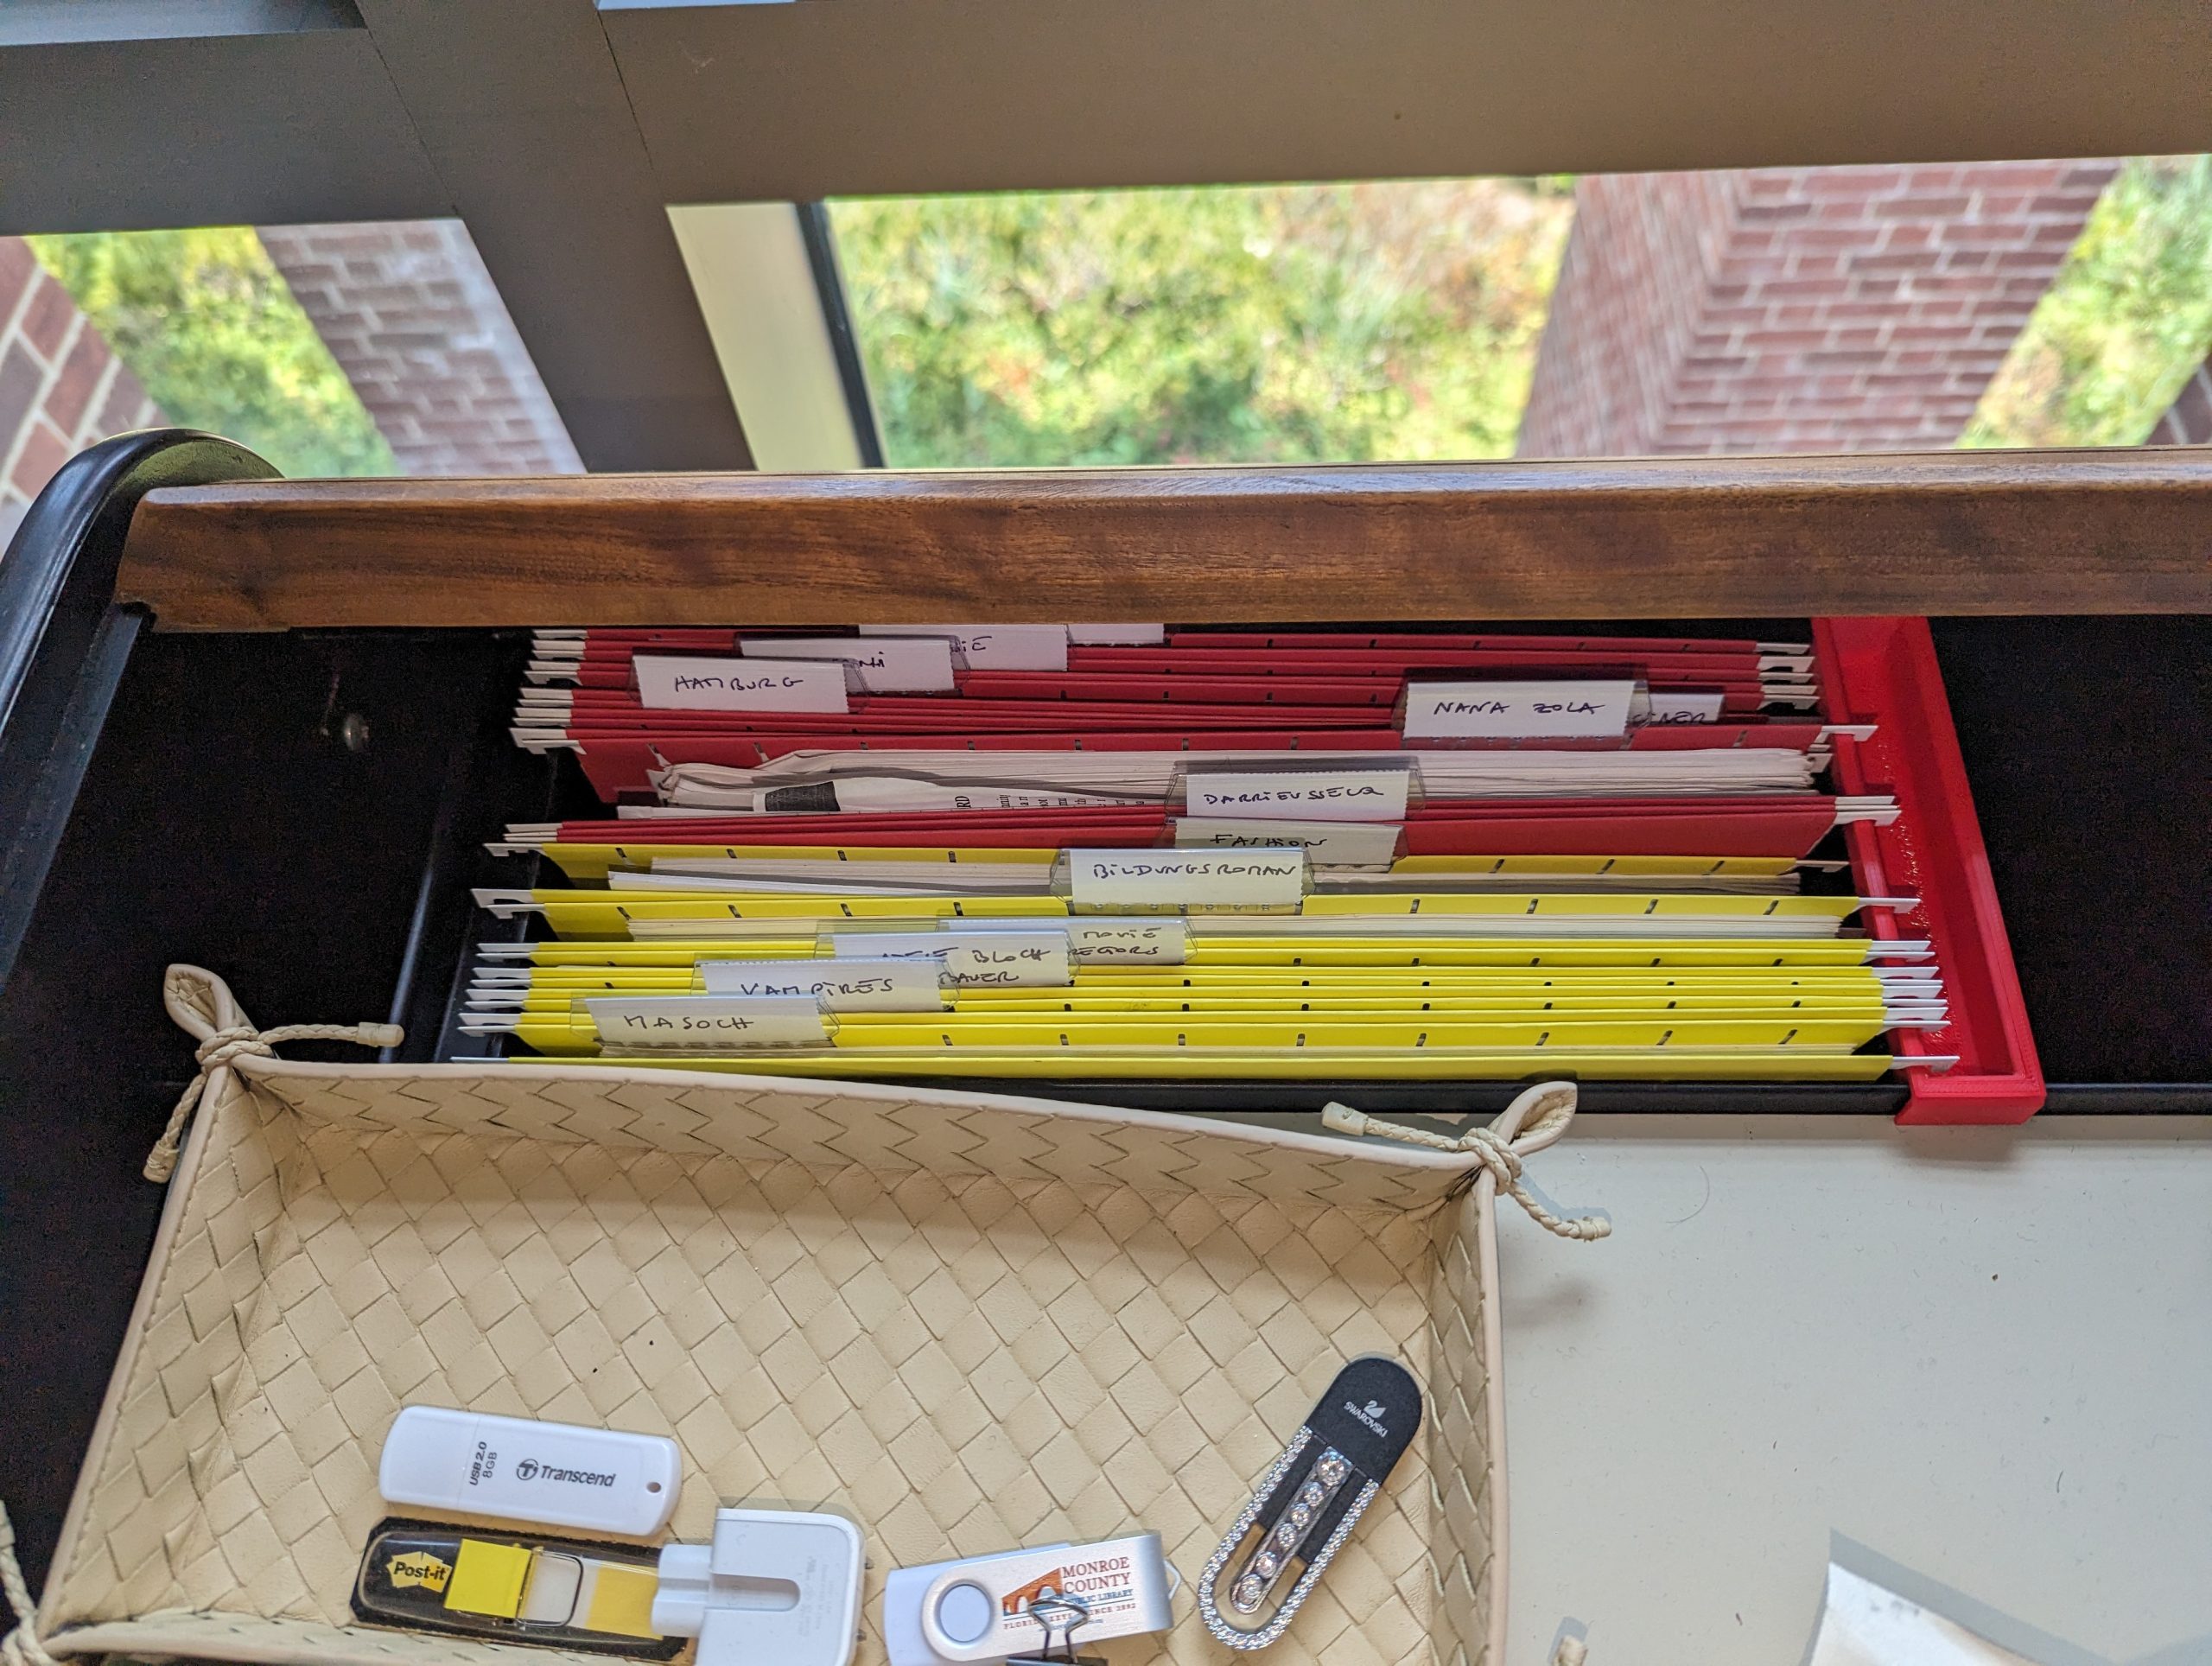
The red part (right), is the new clone of the original black “obsolete plastic object” (on left). Files are once again safely organized.
Conclusion
My experience working on photogrammetry and 3D modeling at the Makerspace was certainly full of twists and turns but definitely worth it. I learned how to use more than three very complicated software applications, significantly improved the Makerspace photogrammetry procedure (reduced a 3-month process to 1-2 days), and approached new challenges with an open mind.
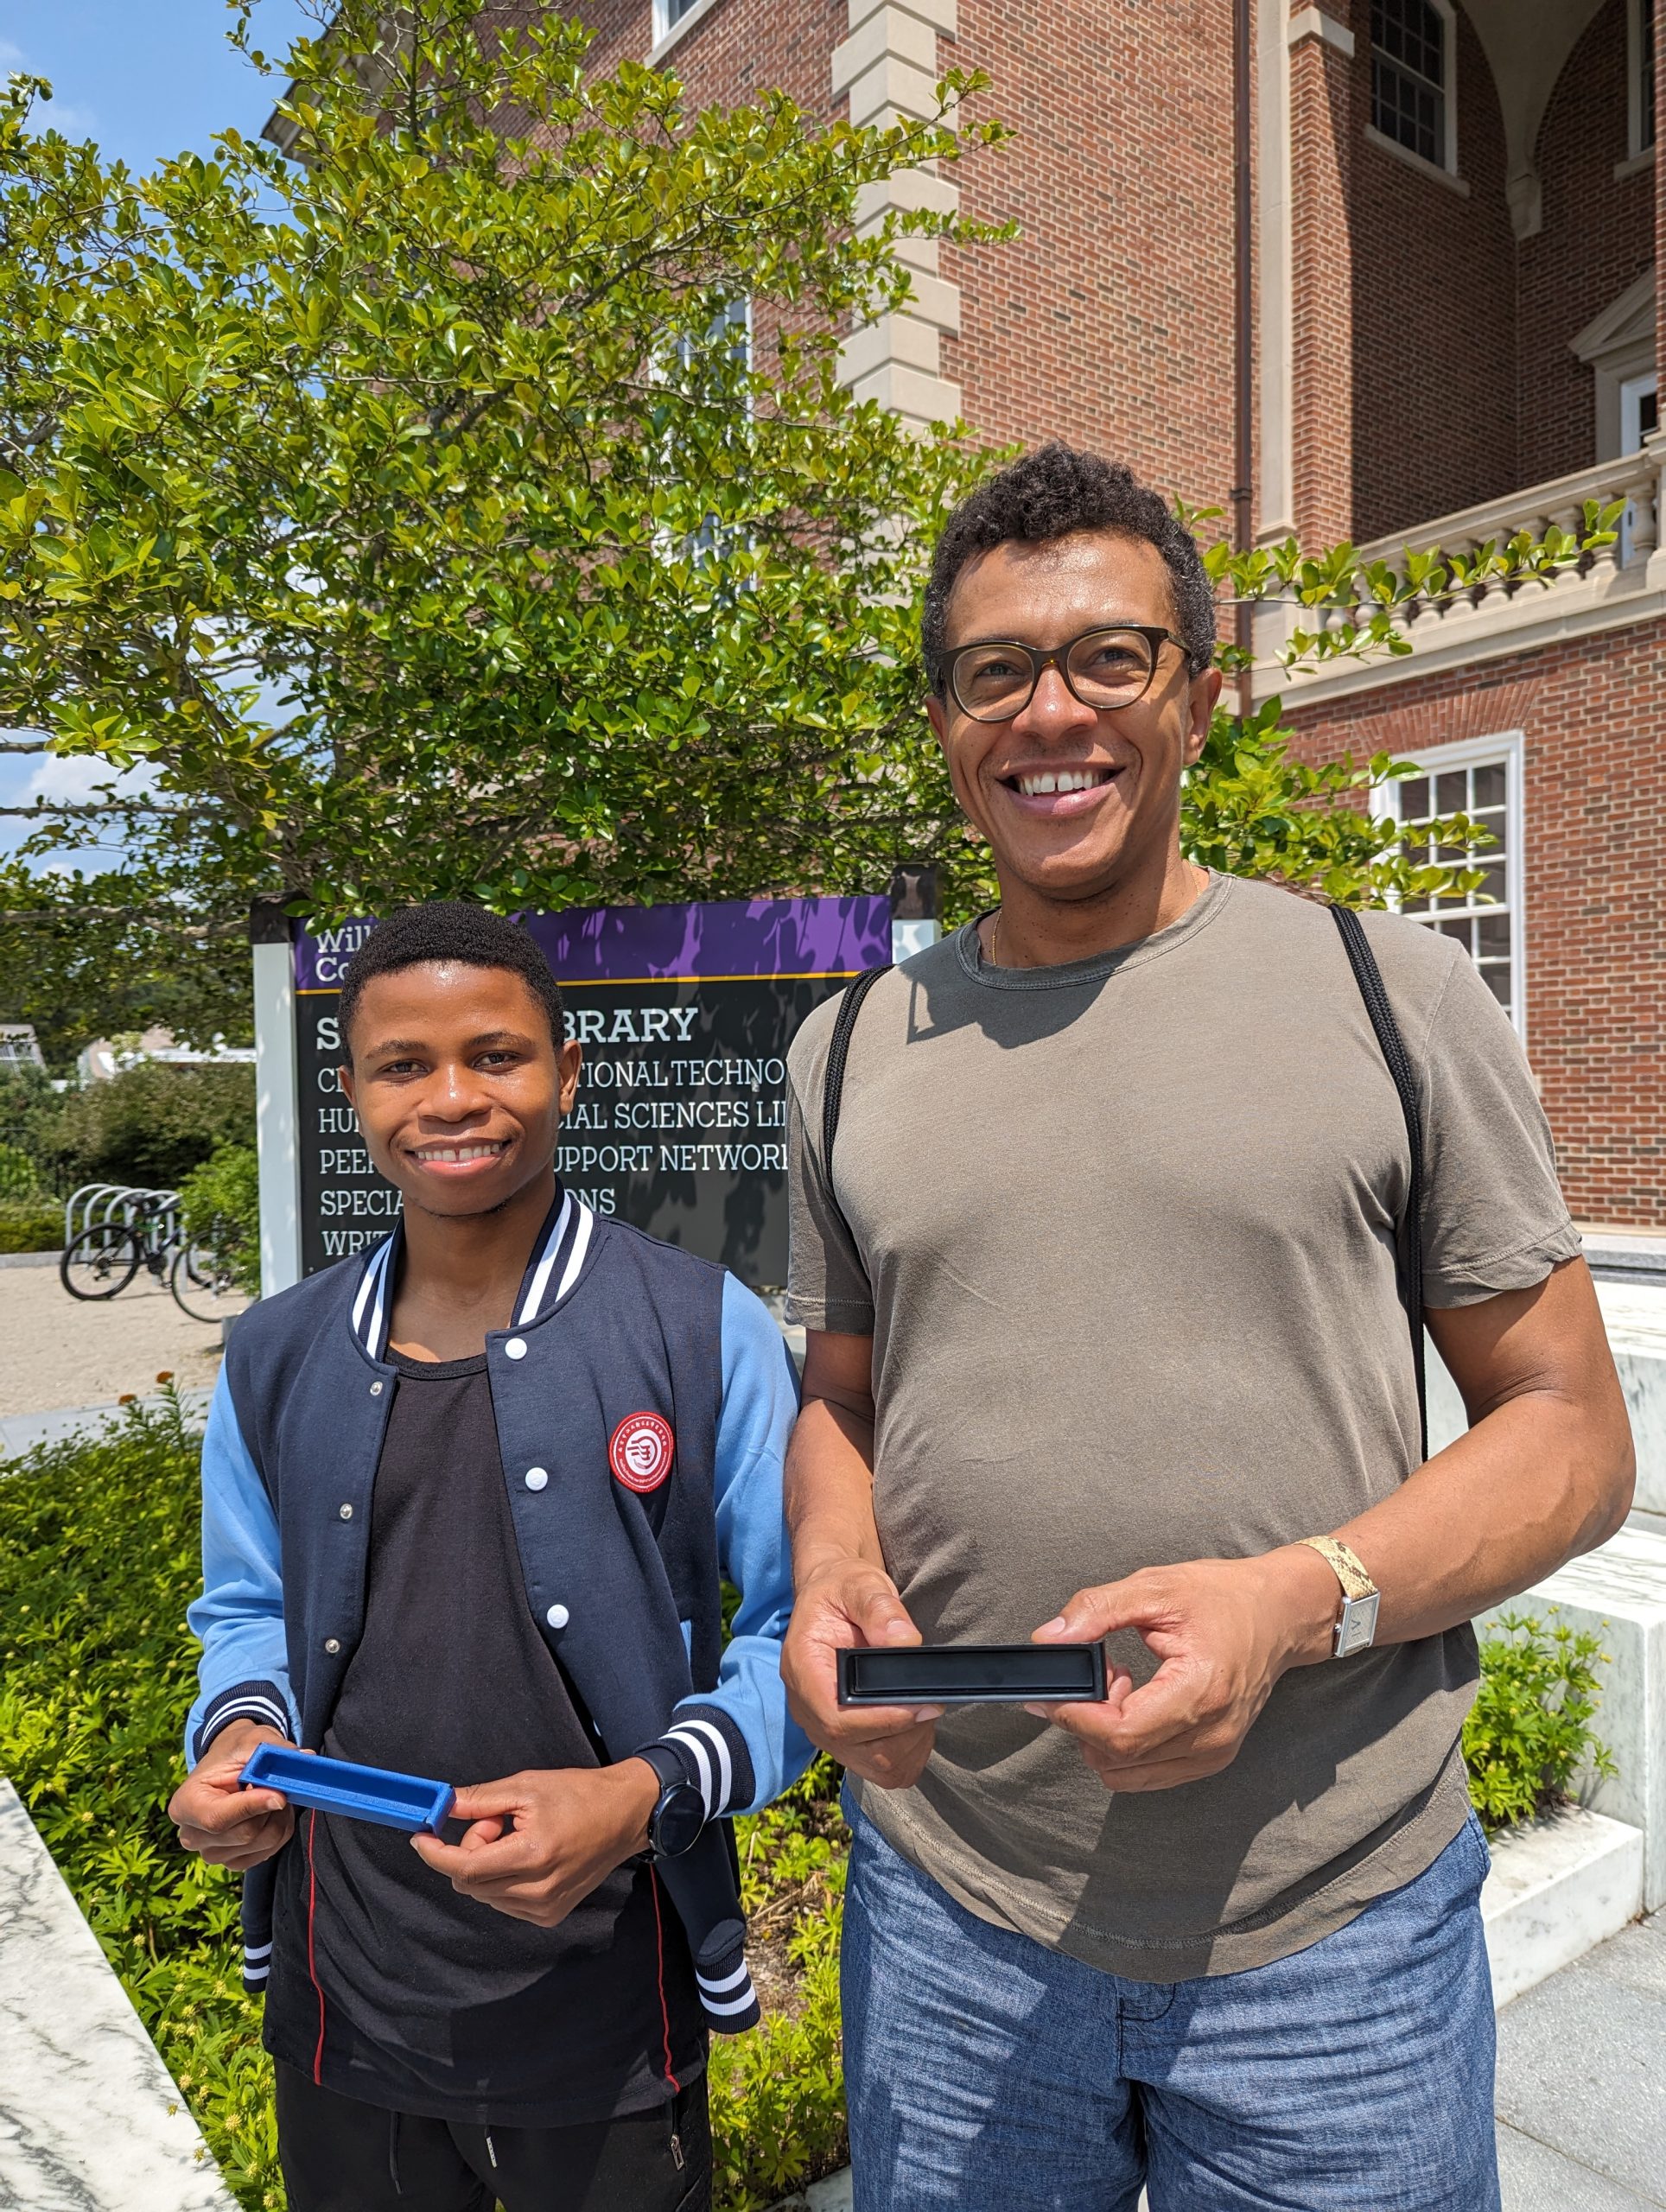
Prof. Koné and myself holding the original (covered in blue tape) and a newly printed black 3D “obsolete” plastic object
Next Steps
I look forward to exploring other methods of photogrammetry, particularly ones that require less equipment, such as those that use only a smartphone. Reality scan is one promising alternative that can create lower-resolution scans and models in less than 15 minutes. With new technologies coming out every day, there are many avenues to explore, and I’m excited to discover better methods.

Screenshot: Experimenting with the Reality Scan smartphone app