
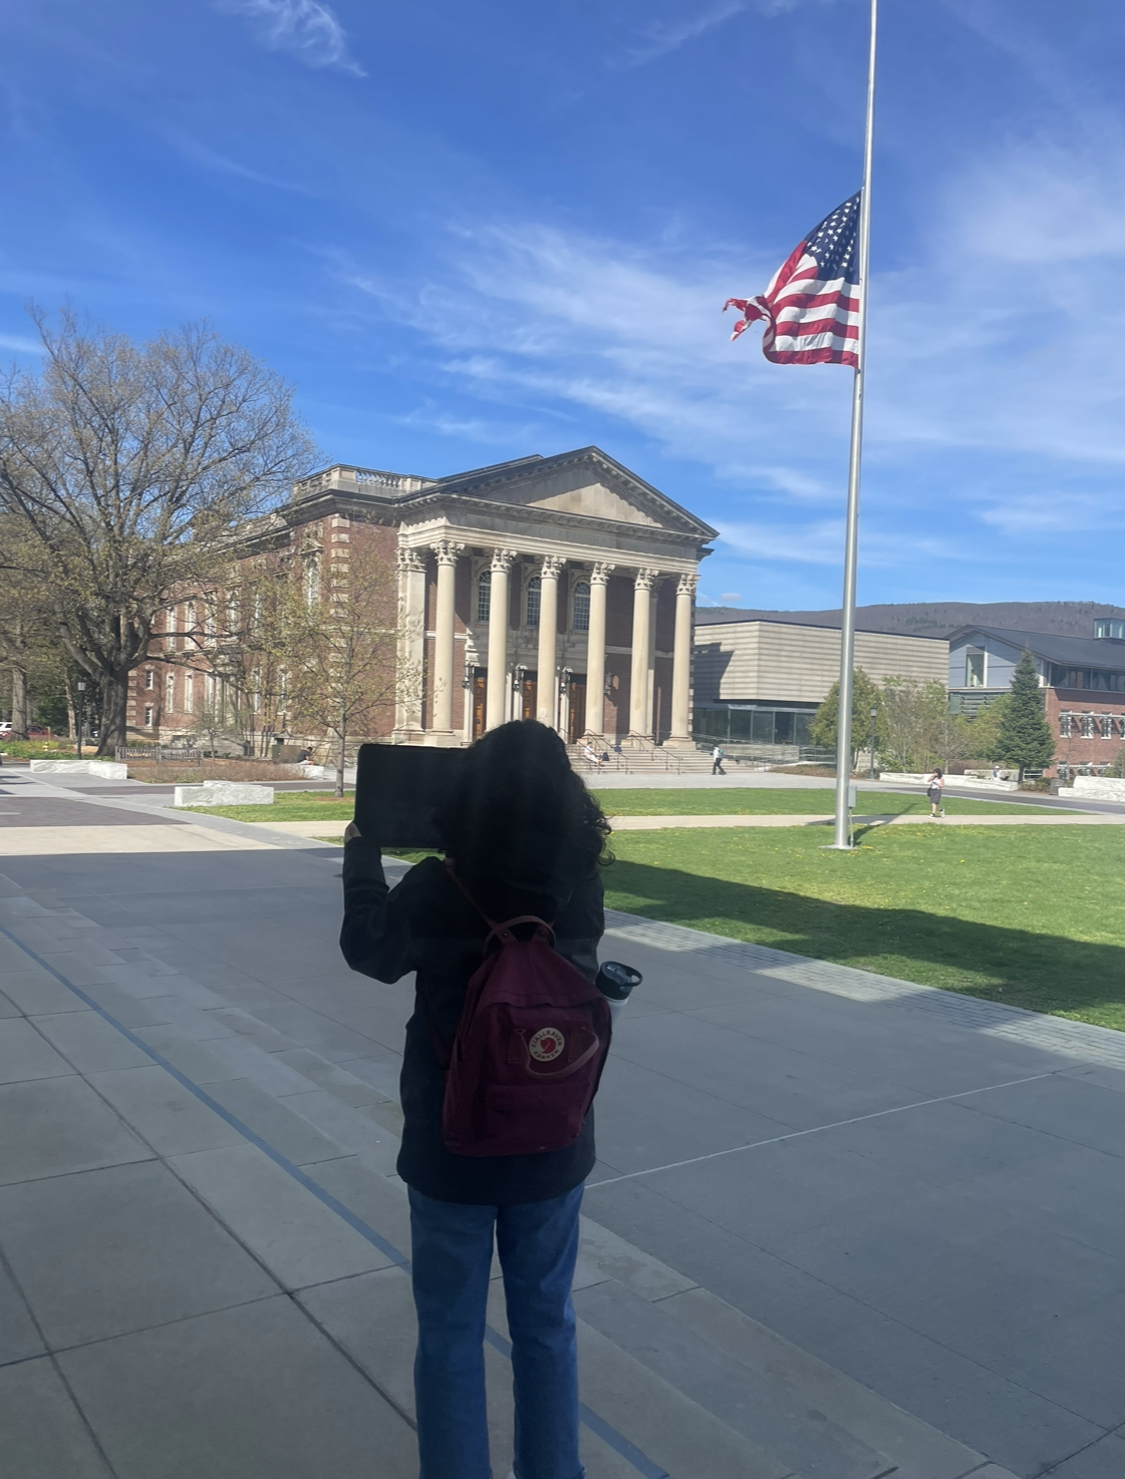
Fig.1 This is me standing in front of Chapin Hall, using my tablet to view my AR model (see below) superimposed as a “permanent object” onto the Williams campus.
At age nine, I had a bicycle accident (and yes, for those who know me, I can’t swim, but I can pretty much ride a bike, thank you!). It was not that unusual compared to how you usually fall from a bike: I was going up perhaps faster than what my mom allowed me at the time, and I bumped into a really, really, BIG rock. In great pain, someone nearby picked me up and, crying very much, I said: “I want to go home, give me my tablet.” A very Gen-Z answer from me, and I don’t recommend that readers have such an attachment to their devices. But let’s be honest—would I have been in such a situation at the time if I was peacefully playing the Sims instead of performing dangerous activities (such as bike riding) in real life? Is there a fine line between real and virtual? Can I immerse myself in a virtual environment where I *feel* like I drive without actually driving *insert cool vehicle*?

Fig. 2: I created this sketch of “maker space” in Procreate on my tablet.
Augmented Reality (AR) is something I have been interested in learning more about as an internet geek. Although I count stars for a living now (I am an astrophysics major), I am still very much intrigued by the world of AR. Whenever there is a cool apparatus in front of me, I take full advantage of it and try to learn as much as I can about it. That’s why one of my favorite on-campus jobs is at the Williams College Makerspace! It is the place where I get to be a part of a plethora of cool projects, teach myself some stuff, and go and share it with the world (i.e., as of now, the College campus and grand Williamstown community!). Fast forward to my sophomore year of college, Professor Giuseppina Forte, Assistant Professor of Architecture and Environmental Studies, reached out to the Makerspace to create a virtual world using students’ creativity in her class “ENVI 316: Governing Cities by Design: the Built Environment as a Technology of Space”. The course uses multimedia place-based projects to explore and construct equitable built environments. Therefore, tools like Augmented Reality can enhance the students’ perspectives on the spaces they imagine by making them a reality.
This project could not have been possible without the help of the Makerspace Program Manager, David Keiser-Clark. He made sure that there was enough communication between me and Professor Forte so that deadlines for the in-class project completion were met, as well as the Williams College “Big Art Show”. In short, my role was to help students enhance their architectural designs with augmented reality simulations. This process involved quite a few technical and creative challenges, leading to a lot of growth as a Makerspacian, especially having no background in AR before taking part in this project!
Choosing Tools and Techniques
My role in this project was to research current augmented reality softwares, select one, and then teach students in the course how to utilize it. In consultation with Giuseppina and David, we chose Adobe Aero because it’s free, easy to use, and has lots of cool features for augmented reality. Adobe Aero helps us put digital stuff into the real world, which is perfect for our architectural designs in the “ENVI 316: Governing Cities by Design” course. I then set up a project file repository and inserted guides that I created, such as “Interactive Objects and Triggers in Adobe Aero” and “How to Use Adobe Aero”. This documentation is intended to help students and teaching assistants make their own AR simulations during this — and future — semesters. This way, everyone can try out AR tools and learn how to apply them in their projects, making learning both fun and interactive.
AR Simulations: My process

Fig. 3: I have successfully augmented reality so that, viewed through a tablet, my “maker space” 3D model now appears to be positioned in front of Chapin Hall at Williams College.
Once we had all the tools set up with Adobe Aero, it was time to actually start creating the AR simulations. I learned a lot by watching YouTube tutorials and reading online blogs. These resources showed me how to add different elements to our projects, like trees in front of buildings or people walking down the street.
Here’s a breakdown of how the process looked for me:
- Starting the Project: I would open Adobe Aero and begin a new project by selecting the environment where the AR will be deployed. This could be an image of a street or a model of a building façade.
- Adding 3D Elements: Using the tools within Aero, I dragged and dropped 3D models that I previously created in Procreate into the scene. I adjusted their positions to fit naturally in front of the buildings.
- Animating the Scene: To bring the scene to life, I added simple animations, like people walking or leaves rustling in the wind—there was also the option to add animals like birds or cats which was lovely. Aero’s user-friendly interface made these tasks intuitive, and videos online like this one were extremely helpful along the way!
- Viewing in Real-Time: One of the coolest parts was viewing the augmented reality live through my tablet. I could walk around and see how the digital additions interacted with the physical world in real-time.
- Refining the Details: Often, I’d notice things that needed adjustment—maybe a tree was too large, or the animations were not smooth. Going back and tweaking these details was crucial to ensure everything looked just right. Fig. 1, 2 & 3 show an example of a small project I did when I just started.
Final Presentation: The Big Art Show
Figures 4 and 5 show side-by-side comparisons of real-life vs AR spaces as presented in the Williams College “Big Art Show” in the fall semester 2024. The student who used the AR techniques decided to place plants, trees, people and animals around the main road to make the scene look more lively and realistic.
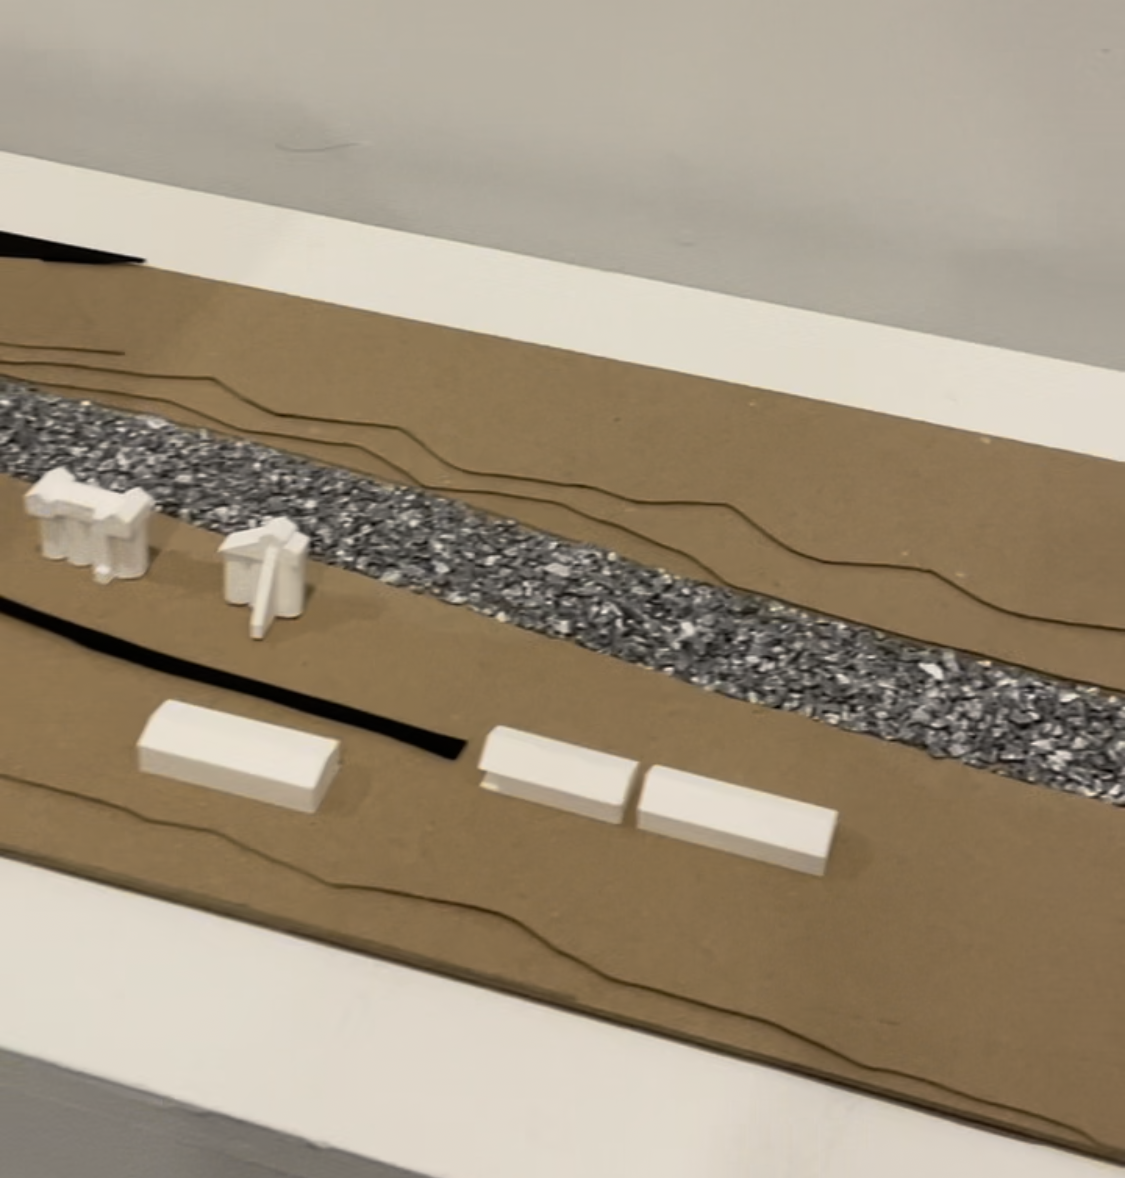
Fig. 4: Exhibition at the “Williams College Big Art Show” featuring 3D printed houses and buildings alongside a main road.

Fig. 5: Live recording of an AR space in Adobe Aero, enhanced with added people, trees, and birds to create a more memorable scene.
Lessons Learned
Reflecting on this project, I’ve picked up a few key lessons. First, jumping into something new like augmented reality showed me that with a bit of curiosity, even concepts that seem hard at first become fun. It also taught me the importance of just trying things out and learning as I go. This project really opened my eyes to how technology can bring classroom concepts to life—in this case, the makerspace!—making learning more engaging. Going forward, I’m taking these lessons with me.