In this article:
- Display Logic
- Skip Logic
- Blocks
- Survey Flow
- Adding Elements to Survey Flow
- Block
- Branch
- Embedded Data
- Randomizer and Random Assignment
- End of Survey
Display Logic
With display logic, you can display a survey question to a subset of respondents based on prior information collected in the survey.
In the below example, we will use display logic to make sure that a question about senior thesis projects only appears to respondents who have participated in a thesis.
To apply display logic to a particular question, click on it, then scroll down to Display logic in the editing menu on the left.
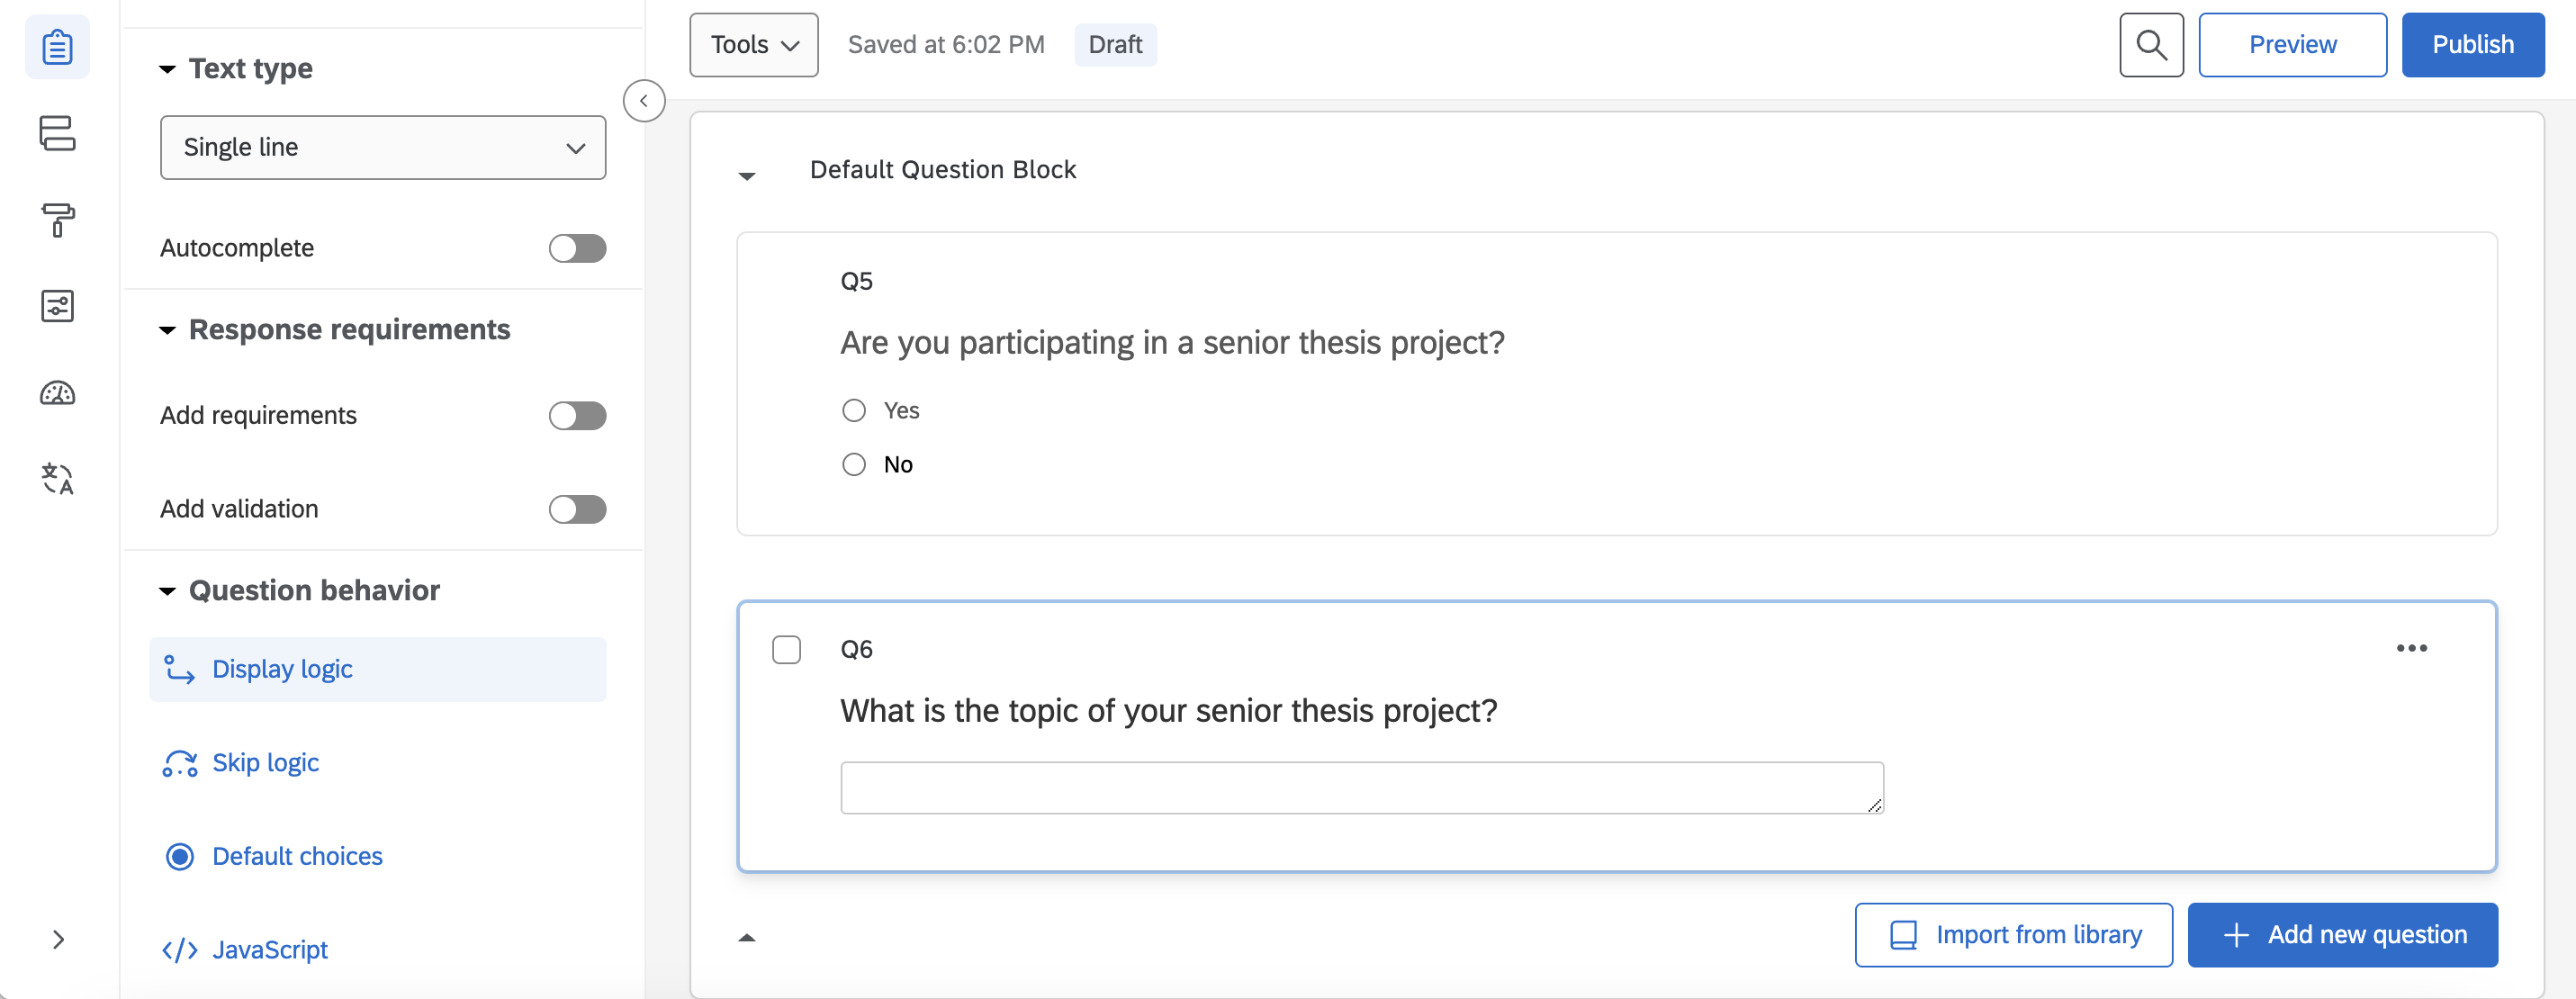
You will be prompted to use a series of dropdown menus to set the criteria in order for the question to be displayed.

Criteria can be added or taken away using the plus and minus signs on the right, respectively.
When applying multiple criteria at once, be careful with the words “and” and “or”. If you were to display a question to psychology majors OR biology majors, then either psychology majors or neuroscience majors would see the question. If you were to display a question to psychology majors AND biology majors, then the question would only be visible to students who double-majored in psychology and biology.
Page breaks are automatically added after questions that have display logic applied. At the bottom of the display logic screen, there is an option to set the display logic to be “in-page”. This means that if criteria is met, display logic question will appear on the same survey page.
For more on Display Logic in Qualtrics, check out this resource page.
Skip Logic
With Skip Logic, you can move respondents to a future point in your survey based on information gathered in the survey. Respondents may be skipped to the end of the survey, or to the end of a survey block.
Skip logic can applied to a question in the same way as display logic.
For more on Skip Logic in Qualtrics, check out this resource page.
Blocks
Survey blocks are groups which contain one or more questions. You may have noticed them in the survey builder tab- they are the white boxes around the questions. By default, a survey block corresponds to a page of a survey. Blocks can help organize your questions, as well as apply display features to entire sets of questions at once.
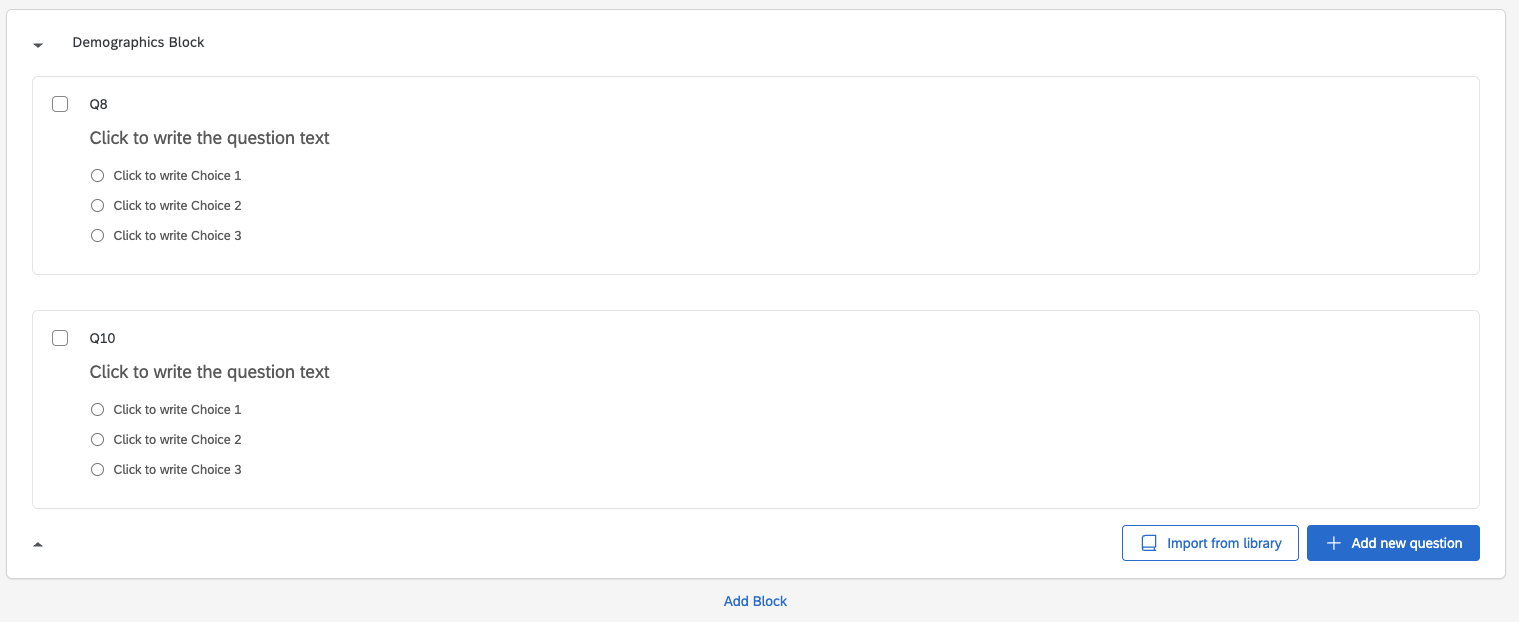
To title a block, click on the text at the top of the block and edit. To add a block, click Add Block underneath a block.
To move the position of a block, click on the white space at the top of a block and drag the block to the desired position. (You can also use Survey Flow, discussed below.)
Survey Flow
The Survey Flow is a block-level view of your survey. In Survey Flow, you can customize the pathways your participants will take in your survey and what exactly they will see.
To access the Survey Flow, navigate to the diagram icon to the left of the survey builder.
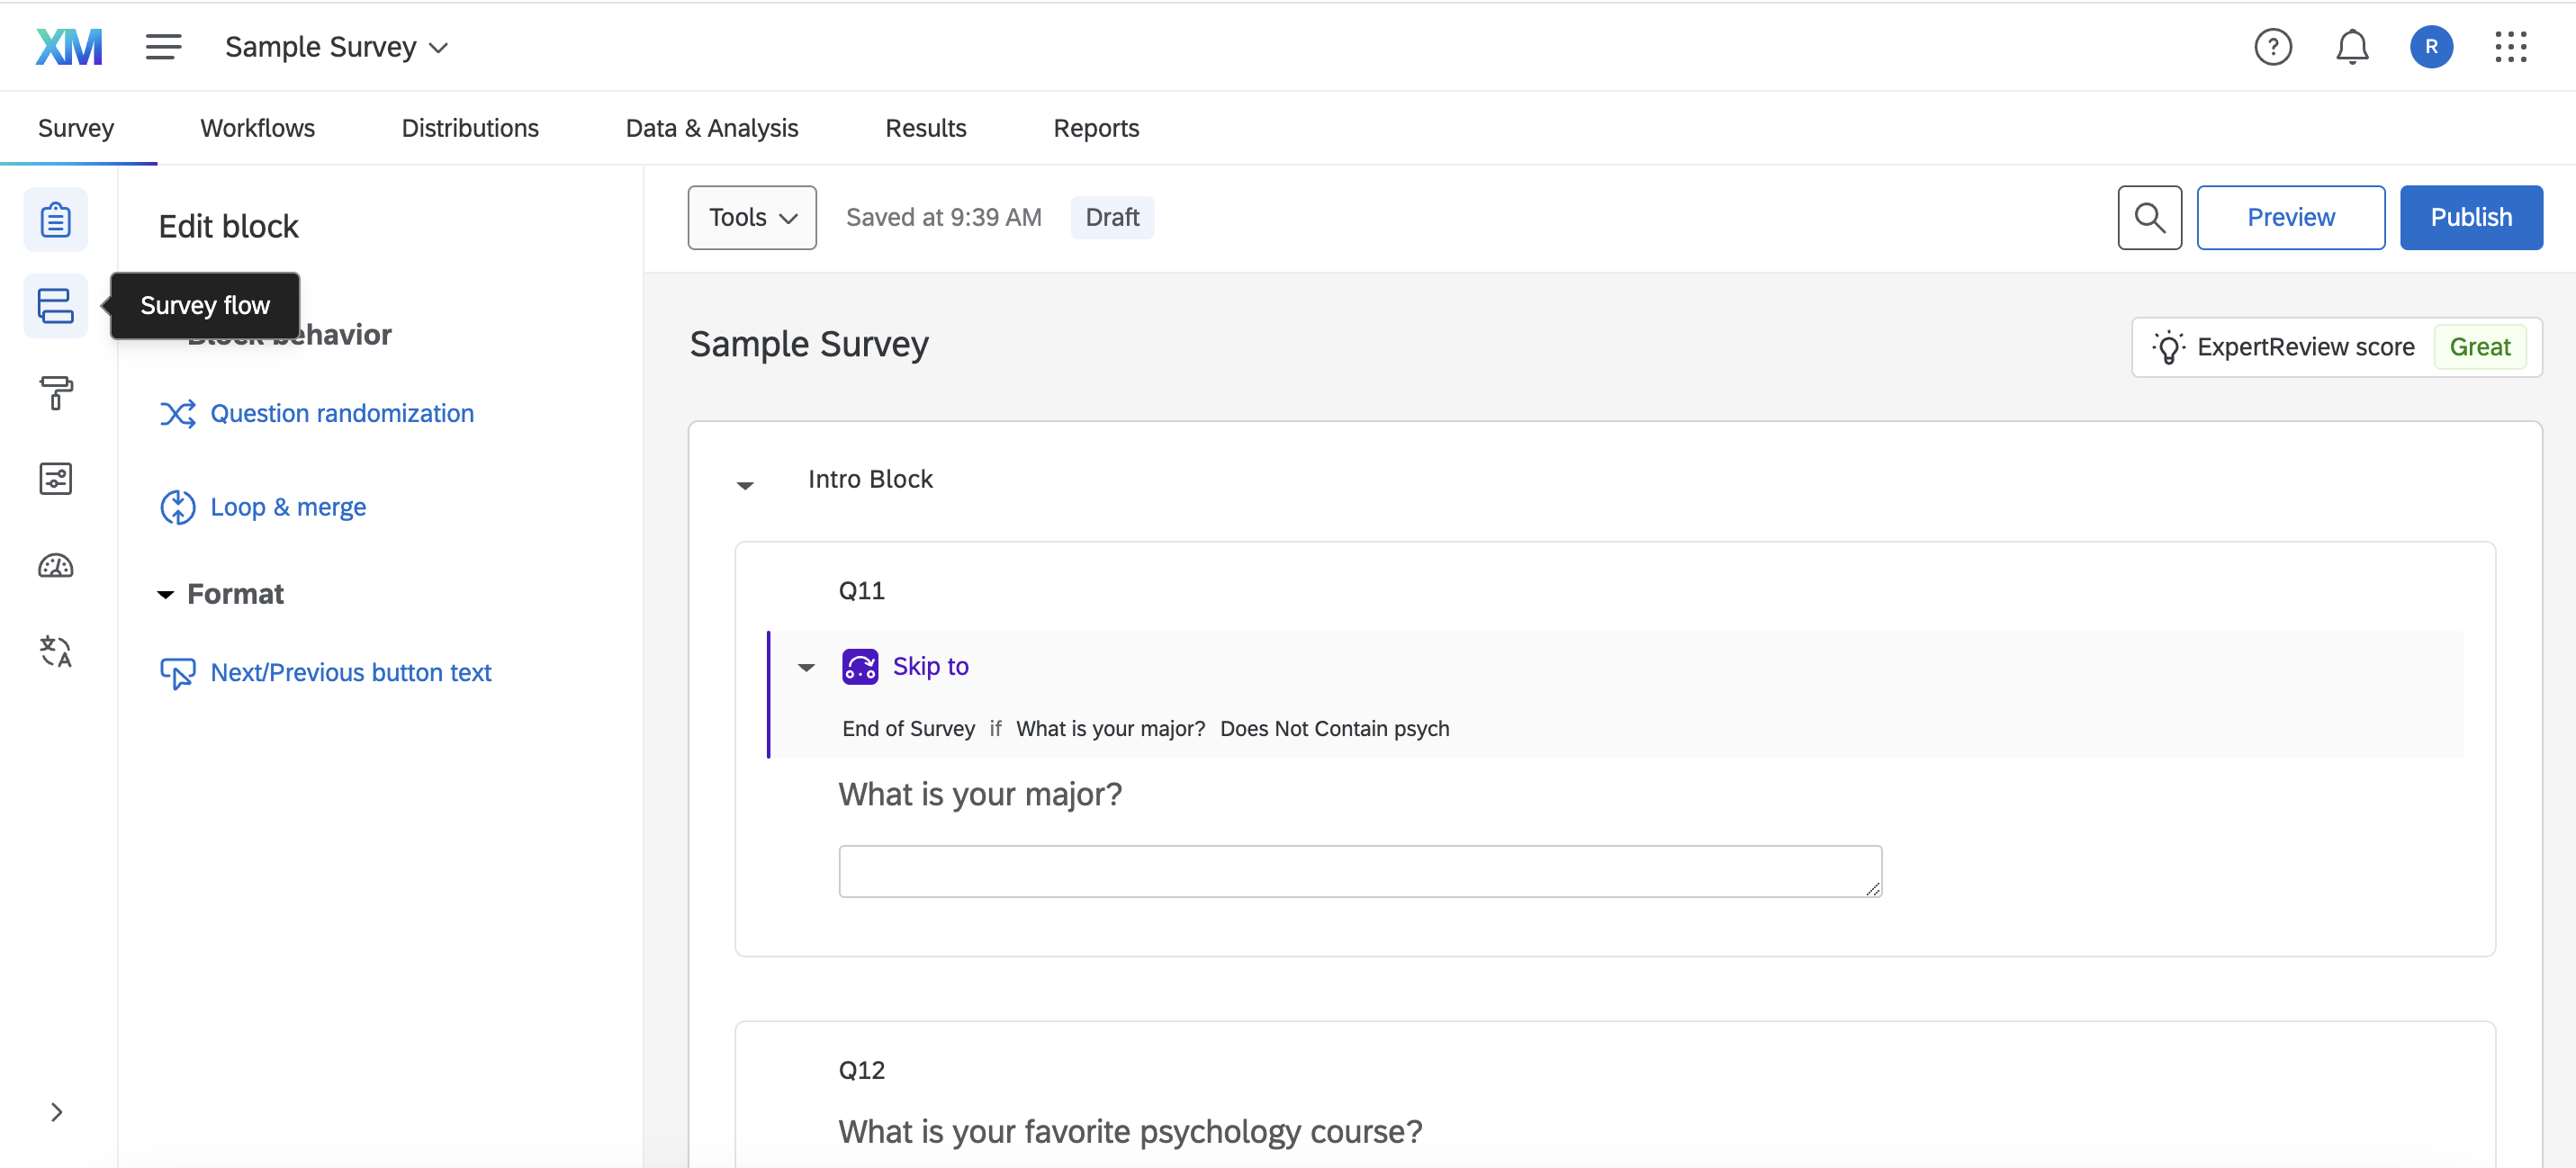
You will then see a screen that looks like the following. On the right of each survey block, you will see a few options.
To change the position of a survey block, click on Move and drag the survey block to the desired location.

Adding Elements to Survey Flow
To add a new element to your survey flow, click on the green Add Below on a survey block, or Add a New Element Here at the bottom of the survey flow. A yellow block like the one below will appear.
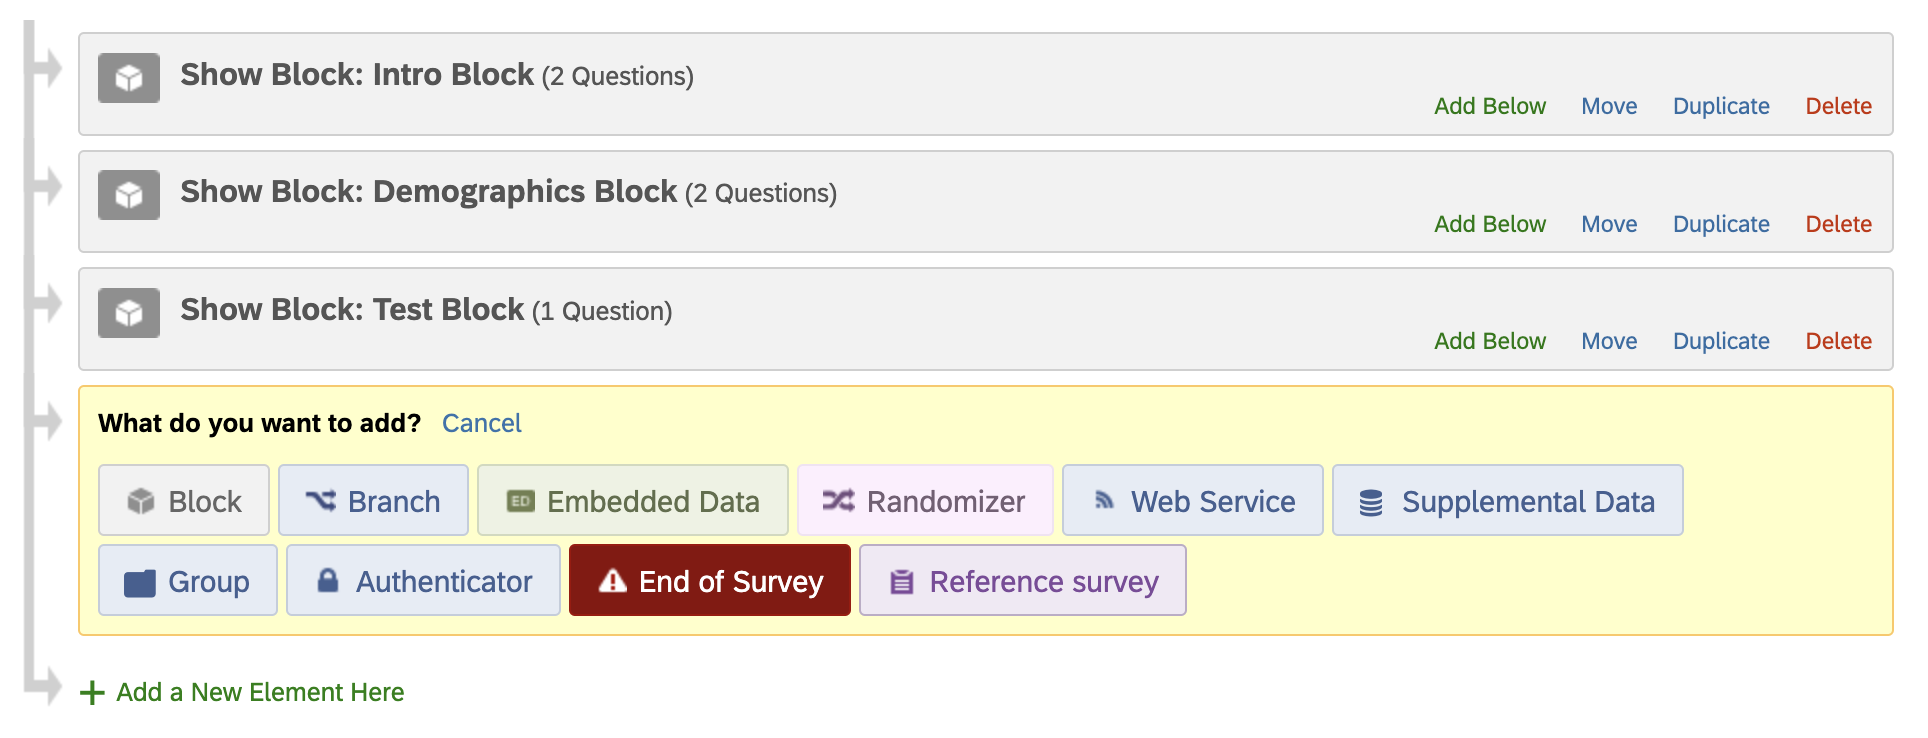
Here is an overview of a few of the survey elements you are most likely to use.
Block
You can add a block from the survey flow, but only if it is a block that is already in the survey. Otherwise, create a block in the survey builder, then go to the survey flow to move the block to the desired position.
Branch
With a branch, you can display blocks or other elements conditionally.
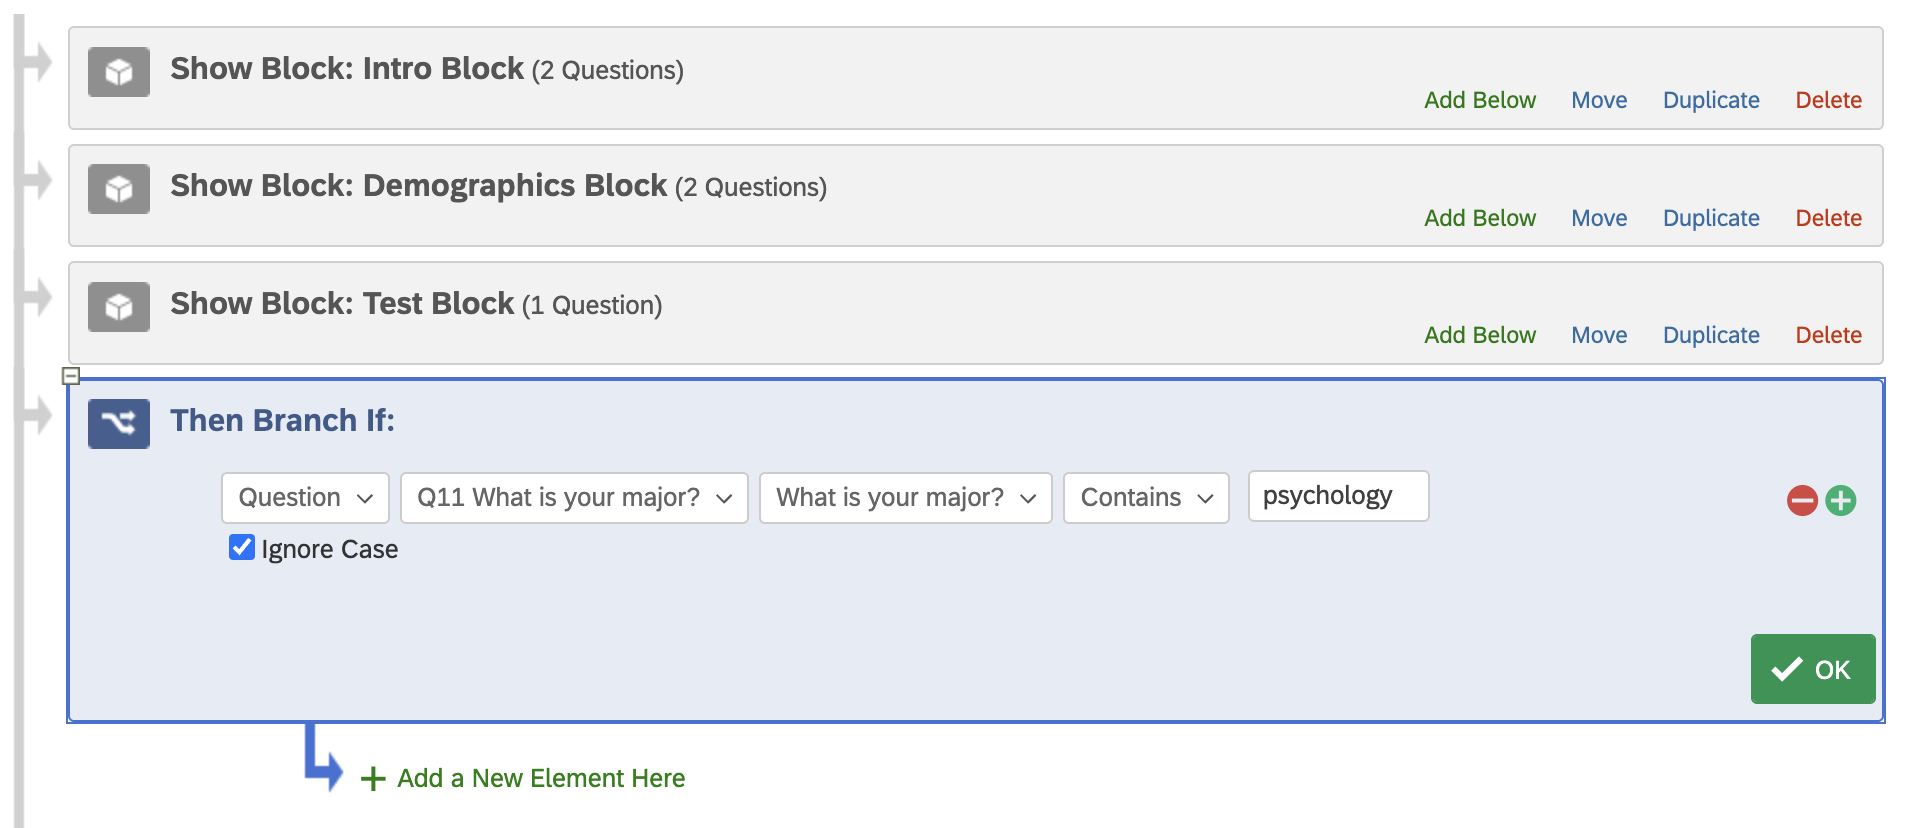
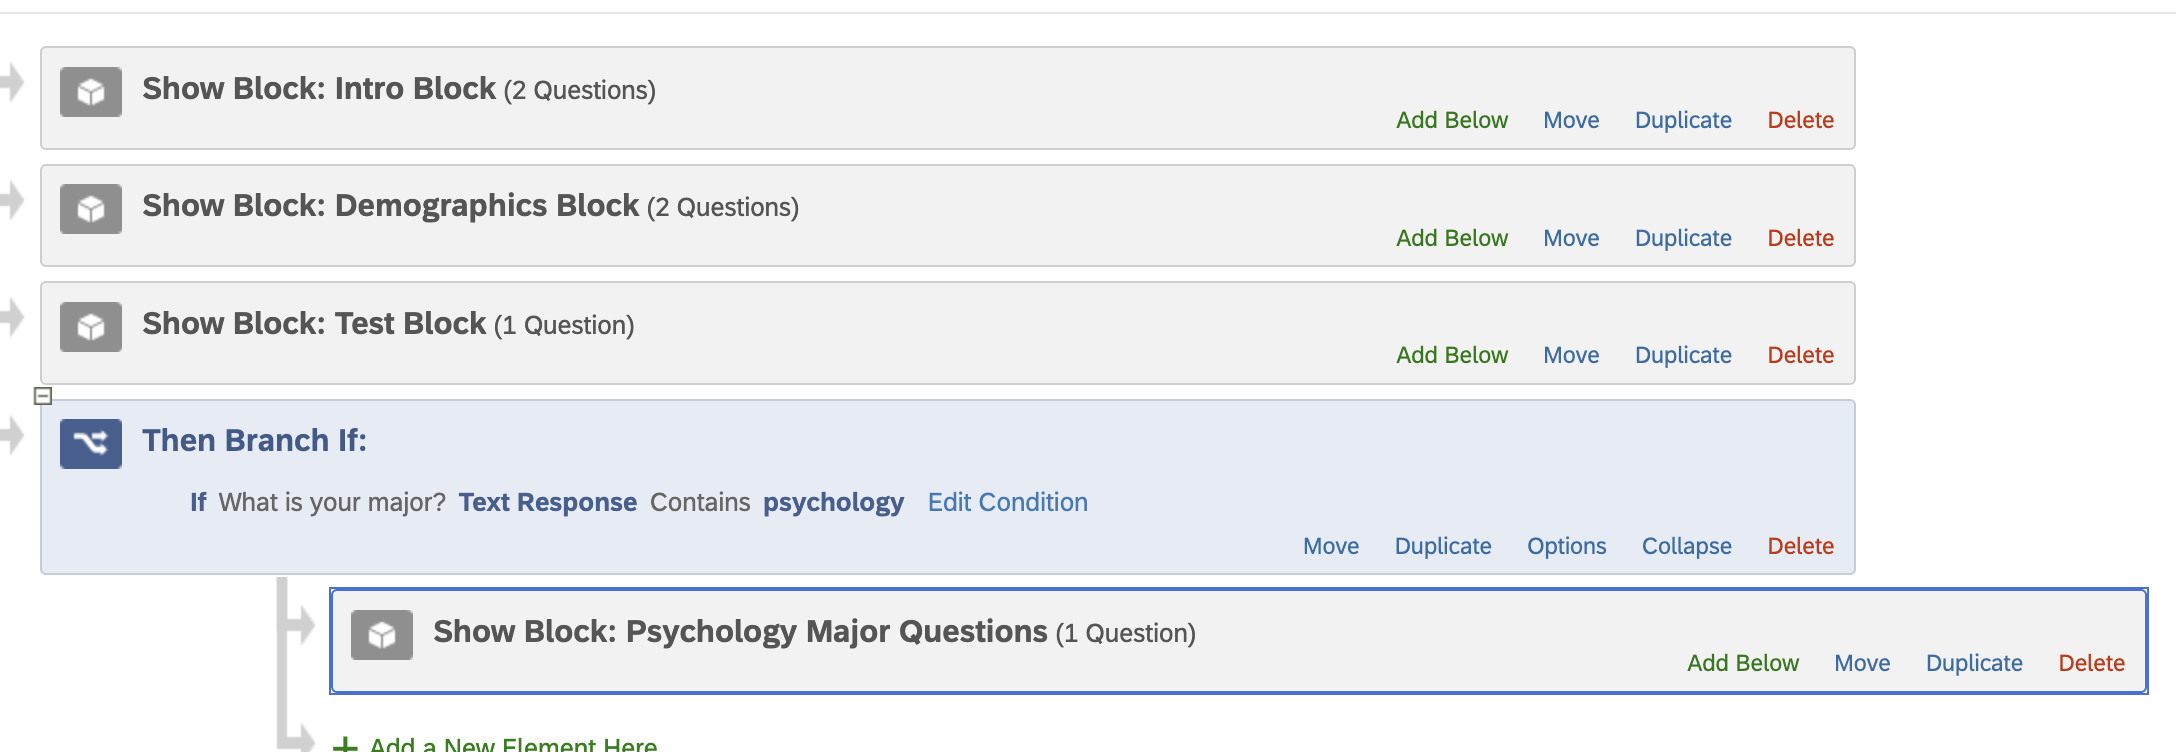
Once you add a branch, click Add a Condition and use a series of dropdown menus to set the conditions. In the below example, I have set a branch for respondents whose answer to the question “What is your major?” contains “psychology” (independent of case).
Add blocks to the indented arrow below the Branch element. Respondents will be directed there if they satisfy the condition set in the Branch element.
For more on branch logic in Qualtrics, check out this resource page.
Embedded Data
The embedded data element stores data that is not collected from survey questions. This element might be used to embed information from a contact list within Qualtrics, for example. You will probably use embedded data more often to create labels for different conditions.
The embedded data element requires either to specify a preexisting data field or create a new one. To create a condition label, click on the menu and simply write “condition”.

Click Set a Value Now to create a value for your data field. In the case of this example, you would click here to create names for each condition. Make a separate embedded data block for each condition- it is easier to randomly assign respondents to condition in this way.
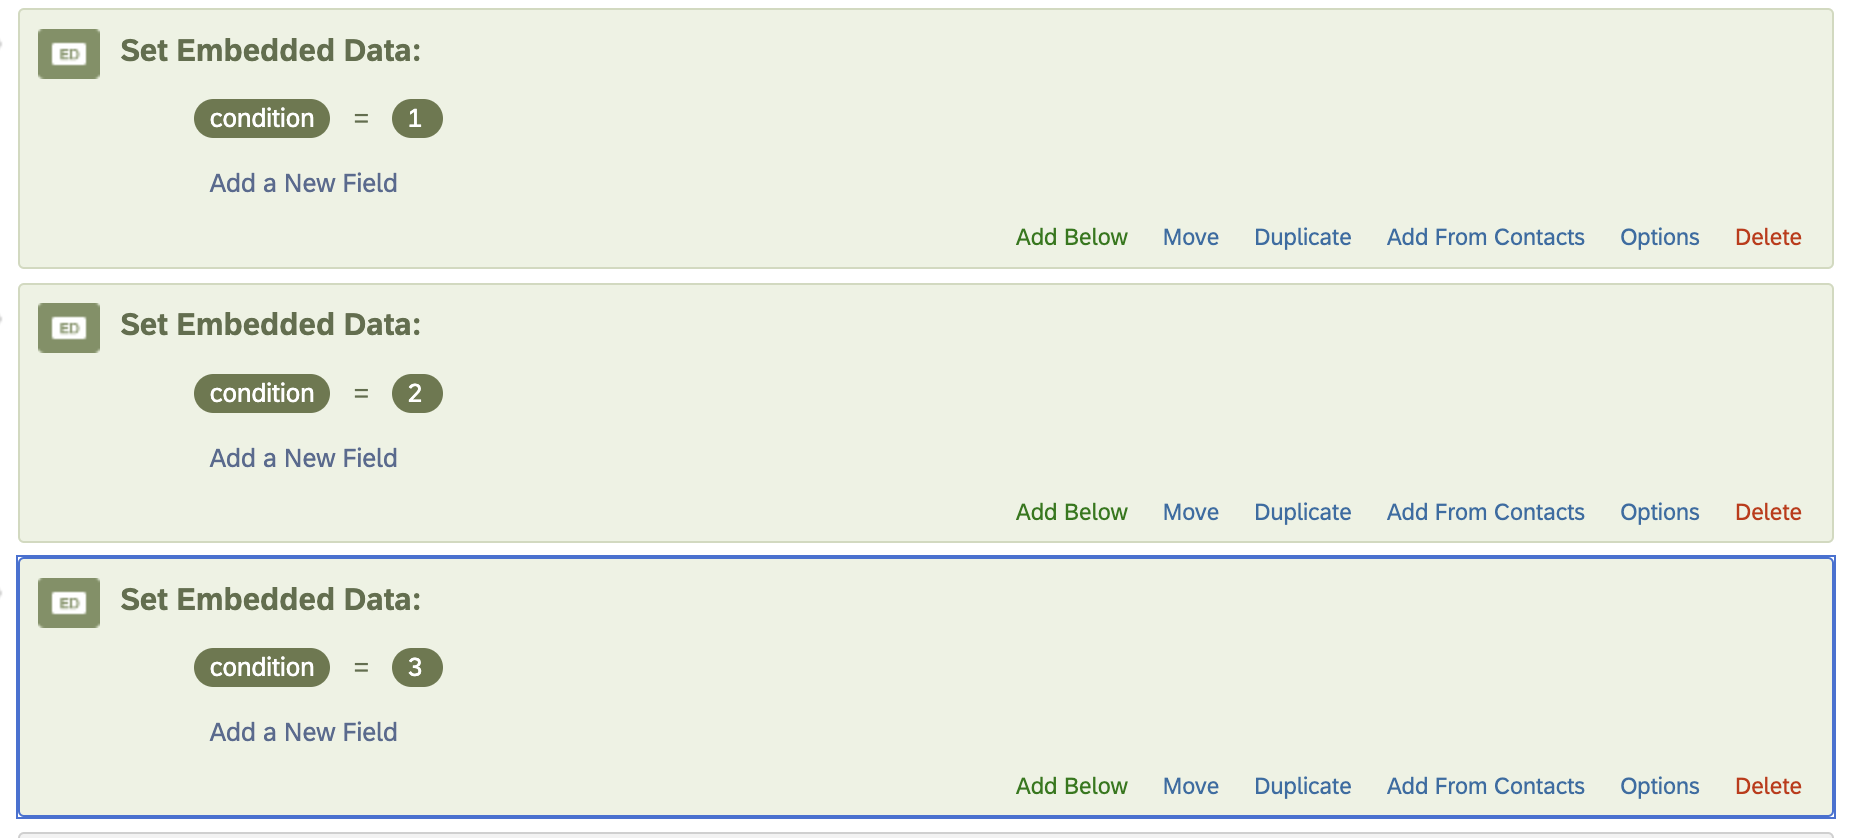
For more on embedded data in Qualtrics, check out this resource page.
Randomizer and Random Assignment
The Randomizer will allow you to randomly assign respondents to view different survey elements. Simply place each element in the indented area below the Randomizer box.
In the below image, respondents are randomly assigned to conditions. Note that the randomizer box asks you to specify how many elements you would like to present. (In this case, each respondent will only receive one condition label.) Also in the randomizer box, there is an option to evenly present elements. Checking this box prevents the number of respondents in each condition from being wildly different (as may be case if assignment is completely random).

Once condition labels are assigned, you can use Branch Logic to direct each respondent to their condition. In a Branch block, use the Embedded Data option.
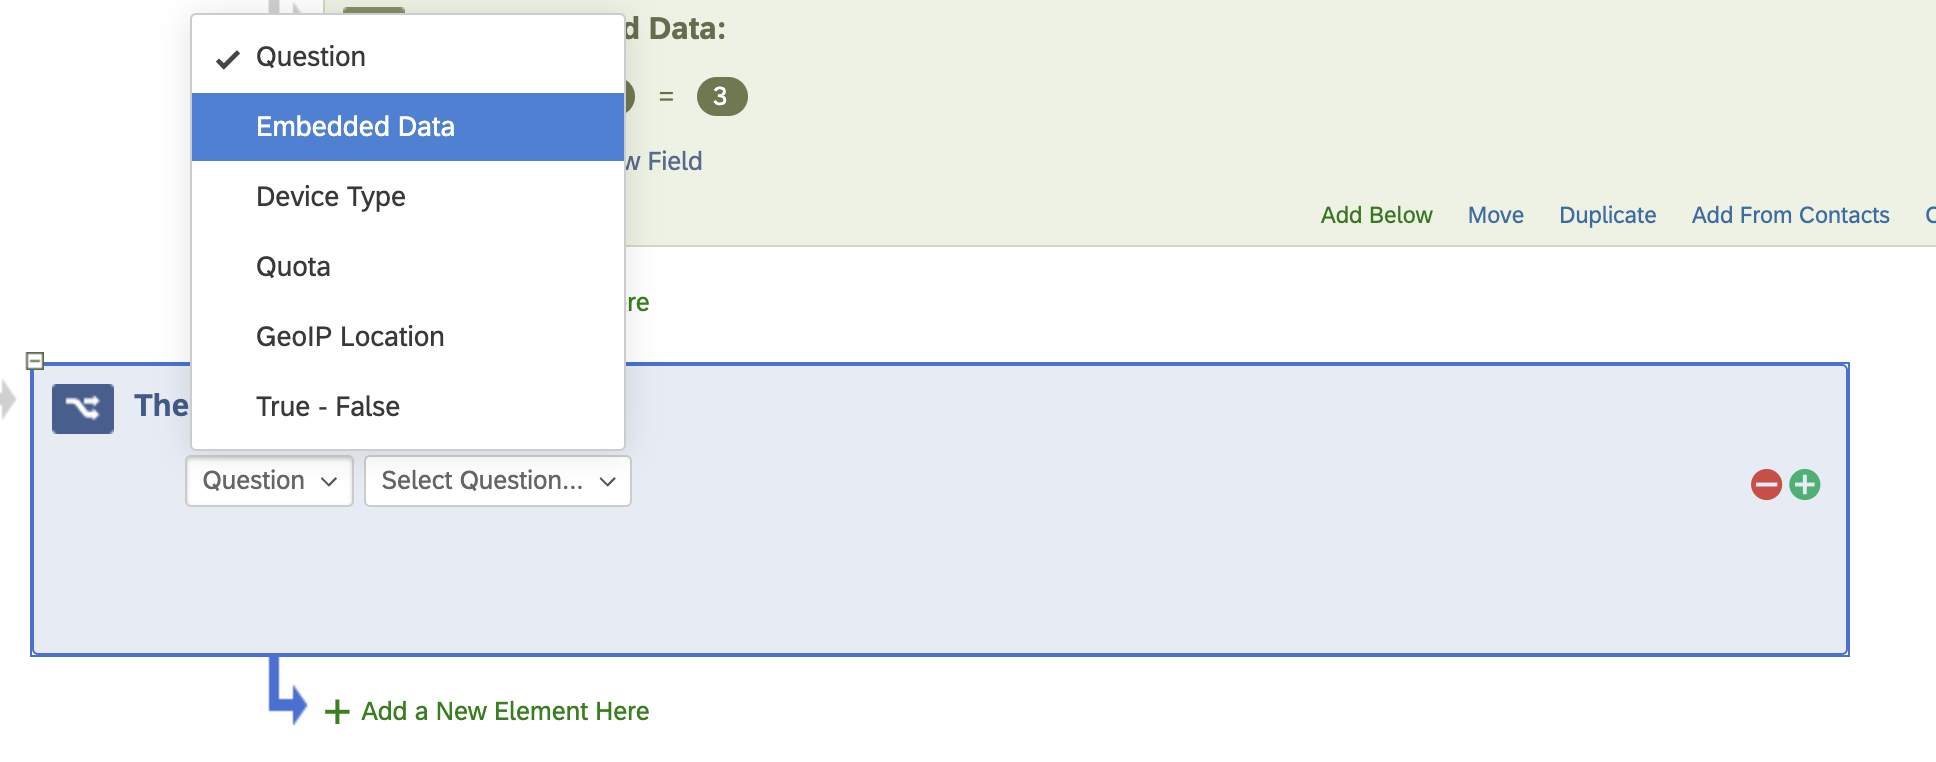
Below is an example of what random assignment to condition in Qualtrics would look like.
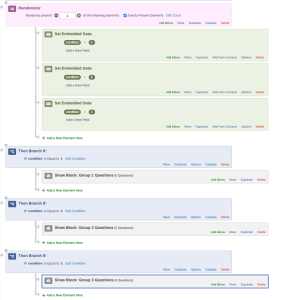
For more on the randomizer element in Qualtrics, check out this resource page.
End of Survey
The End of Survey element will terminate the survey for a respondent. If you would like to kick a respondent out of your survey for failing to meet certain conditions, you would use this element.

You’ll see on the end of survey block there is an option to customize. This option allows you to write a custom end-of-survey message, or direct respondents to another URL.
For more on the End of Survey element, check out this resource page.
